background image

15

TREADMILL OPERATION

This section explains how to use your treadmill’s console and programming. The BASIC OPERATION section in the 

TREADMILL gUIDE has instructions for the following:

• 

LoCATIoN of THE TREADMILL

• 

USING THE SAfETY KEY

• 

foLDING THE TREADMILL

• 

MoVING THE TREADMILL

• 

LEVELING THE TREADMILL

• 

 TENSIoNING THE RUNNING BELT

• 

CENTERING THE RUNNING BELT

• 

USING THE HEART RATE fUNCTIoN

Содержание PARAGON 4

Страница 1: ...TREADMILL OWNER S MANUAL Read the treadmill guide before using this owner s manual PARAGON 4 PARAGON 5 PARAGON 6 ...

Страница 2: ...e parts that are not tightened and will seem loose and may cause irritating noises To prevent damage to the treadmill the assembly instructions must be reviewed and corrective actions should be taken Before proceeding find your treadmill s serial number located on the front stabilizer tube and enter it in the space provided below Also locate the model name which is next to the serial number ENTER ...

Страница 3: ... the banding straps have been removed do not lift or transport this unit unless it is fully assembled Unpack and assemble the unit where it will be used Never grab hold of any portion of the incline frame and attempt to lift or move the treadmill FAILURE TO FOLLOW THESE INSTRUCTIONS COULD RESULT IN INJURY WARNING NOTE During each assembly step ensure that ALL nuts and bolts are in place and partia...

Страница 4: ... ASSEMBLY STEP 2 BOLT A M8 x 10 Qty 2 BOLT B M8 x 70 mm Qty 8 SPRING WASHER C Φ 8 2 mm Qty 8 FLAT WASHER D Φ 8 2 mm Qty 8 HARDWARE for step 2 A Open HARDWARE BAG 2 B Attach console mast to main frame bracket using 4 bolts B 4 spring washers C and 4 FLAT washers D C Repeat step B on other side NOTE Do not tighten bolts until step 4 is complete NOTE Do not pinch console cable when placing the mast o...

Страница 5: ...onnect the CONSOLE CABLES carefully tucking wires in masts to avoid damage D Attach the CONSOLE to the console mast using 4 BOLTS I 4 SPRING WASHERS C and 4 Flat WASHERS D E Fold the deck into the upright position until the foot latch engages Make sure the spacing between the handlebars and the deck are the same then tighten BOLTS from step 2 to step 4 BOLT I M8 x 15 mm Qty 4 FLAT WASHER D Φ 8 2 m...

Страница 6: ...WARE for step 5 LEFT WATER BOTTLE HOLDER SCREW K RIGHT WATER BOTTLE HOLDER SCREW K Φ 4 x 10 Qty 2 PARAGON 6 PARAGON 6 ASSEMBLY STEP 5 HARDWARE BAG 5 A Open HARDWARE BAG 5 B Carefully attach RIGHT CONSOLE MAST OUTER INNER COVER together using 4 SCREWS J C Repeat the step B on the opposite side RIGHT HANDLEBAR RIGHT COVER LEFT COVER SCREW J SCREW J Φ 4 x 12 Qty 8 Note Connect and screw in the outer ...

Страница 7: ...aragon 5 Max User Weight 159 kg 350 lbs Product Weight 103 kg 227 lbs Overall Dimension 182 x 91 x 149 cm 72 x 36 x 59 Folding Dimension 99 x 91 x 168 cm 39 x 36 x 66 Complies with EN957 1 EN957 6 HB Paragon 6 Max User Weight 159 kg 350 lbs Product Weight 110 kg 243 lbs 127 kg 280 lbs Overall Dimension 194 x 91 x 149 cm 76 x 36 x 59 Folding Dimension 105 x 91 x 178 cm 41 x 36 x 70 Complies with EN...

Страница 8: ...ramming The BASIC OPERATION section in the treadmill guide has instructions for the following LOCATION OF THE TREADMILL Using the SAFETY KEY FOLDING the treadmill MOVING the treadmill LEVELING the treadmill TENSIONING THE RUNNING BELT CENTERING THE RUNNING BELT Using the HEART RATE function ...

Страница 9: ...LTEN ENTER EINGABE START QUICK START SCHNELLSTA RT CHANGE DISPLAY ANZEIGENWEC HSEL TARGET HEART RATE ZONE ZIELHERZFREQUENZZONEN PARAGON 4 J I CALORIES KALORIEN HEART RATE HERZFREQUENZ Paragon 4 Shown PARAGON 4 CONSOLE OPERATION Note There is a thin protective sheet of clear plastic on the overlay of the console that should be removed before use A LED display windows Time Distance Speed Incline Cal...

Страница 10: ... use A LCD display windows Time Distance Speed Incline Calories Heart Rate B Dot matrix display window displays workout level progress and workout profiles C Communication Window Passport synchronisation proFILE display information and other communication texts D Energy saver To minimize energy consumption your machine will enter energy saver mode automatically after entering stand by mode for 15 ...

Страница 11: ... use A LED display windows Time Distance Calories Speed Incline Heart Rate B Dot matrix display window displays workout level progress and workout profiles C Communication Window Passport synchronisation proFILE display information and other communication texts D Energy saver To minimize energy consumption your machine will enter energy saver mode automatically after entering stand by mode for 15 ...

Страница 12: ... Indicates distance traveled or distance remaining during your workout SPEED Shown as MPH or KMPH Indicates how fast your walking or running surface is moving INCLINE Shown as percent Indicates the incline of your walking or running surface CALORIES Total calories burned or calories remaining left to burn during your workout TIME Shown as minutes seconds View the time remaining or the time elapsed...

Страница 13: ...oll through settings 5 Exit setup mode To confirm the date and time press and hold enter for 3 seconds To CLEAR SELECTION reset the console Hold stop key for 3 seconds Finishing your workout When your workout is complete the display will flash WORKOUT COMPLETE and beep Your workout information will stay displayed on the console for 30 seconds and then reset dot matrix LED window 10 12 To display P...

Страница 14: ... Speed British 1 3 1 9 2 5 5 1 9 1 3 Speed Metric 2 3 4 8 3 2 Level 4 Speed British 1 3 1 9 2 5 5 5 1 9 1 3 Speed Metric 2 3 4 8 8 3 2 Level 5 Speed British 1 5 2 3 3 6 2 3 1 5 Speed Metric 2 4 3 6 4 8 9 6 3 6 2 4 Level 6 Speed British 1 5 2 3 3 6 5 2 3 1 5 Speed Metric 2 4 3 6 4 8 10 4 3 6 2 4 Level 7 Speed British 1 8 2 6 3 5 7 2 6 1 8 Speed Metric 2 8 4 1 5 6 11 2 4 1 2 8 Level 8 Speed British ...

Страница 15: ...d British 2 5 3 8 5 5 5 6 6 5 7 6 5 6 5 5 4 5 3 Speed Metric 4 6 8 8 8 9 6 10 4 11 2 10 4 9 6 8 8 7 2 4 8 Incline 1 5 2 3 3 2 5 2 2 2 2 5 3 2 1 5 Level 8 Speed British 2 8 4 1 5 5 6 6 5 7 7 5 7 6 5 6 4 9 3 3 Speed Metric 4 4 6 5 8 8 9 6 10 4 11 2 12 11 2 10 4 9 6 7 8 5 2 Incline 1 5 2 3 3 2 5 2 2 2 2 5 3 2 1 5 Level 9 Speed British 3 4 5 6 6 5 7 7 5 8 7 5 7 6 5 5 3 3 5 Speed Metric 4 8 7 2 9 6 10 ...

Страница 16: ... 9 10 Cool Down Time 4 00 min 30 sec 30 sec 30 sec 30 sec 30 sec 30 sec 30 sec 30 sec 30 sec 30 sec 4 00 min Level 1 0 0 1 1 5 2 2 5 3 3 2 5 2 1 5 1 0 0 Level 2 0 0 1 5 2 2 5 3 3 5 3 5 3 2 5 2 1 5 0 0 Level 3 0 1 2 2 5 3 3 5 4 4 3 5 3 2 5 2 1 0 Level 4 0 1 5 2 5 3 3 5 4 4 5 4 5 4 3 5 3 2 5 1 5 0 Level 5 0 1 5 3 3 5 4 4 5 5 5 4 5 4 3 5 3 1 5 0 Level 6 0 1 5 3 5 4 4 5 5 5 5 5 5 5 4 5 4 3 5 1 5 0 Lev...

Страница 17: ...e during exercise The middle row represents your target heart rate THR and the other rows equal 2 heart beats If you are working out beneath your THR the LEDs below the middle row will illuminate If you are over the display LCD LED above the middle row will illuminate Your current heart rate is represented by the flashing column and the window will refresh every 5 seconds 13 15 CUSTOM Programs Let...

Страница 18: ...mats by pressing the PROFILE button A workout is saved when the program ends the console is paused and not resumed within 5 minutes or the STOP button is held to reset the console 1 CURRENT WORKOUT The console automatically defaults to current workout displaying your progress in real time 2 AVERAGE WORKOUT This option allows you to see your average accumulated data for the last 30 workouts The fol...

Страница 19: ...will automatically enter standby mode energy saver mode after 15 minutes of inactivity after paused Almost all power for the machine will be off except for some circuits that are needed to detect a key press indicating the console should wake up This feature can be turned off by entering the engineering menu To enter the engineering menu press and hold the incline and speed buttons for 3 5 seconds...

Страница 20: ...ler Set Front Pattern TM616 AR2 Roller Set Rear TM116 B15 FIXING PLATE ROLLER R PAINTING AZ40 1C B16 FIXING PLATE ROLLER L PAINTING AZ40 1C B17 WASHER SPL Φ8 2xΦ15 4x2 0T B20 WASHER FLT Φ8 2xΦ19 0x2 0T B21 NUT NLK M8x1 25P BZN B25 Wheel nylon TM196 TM196 K13E B27 TM DECK 670x1220x20T SILICON B28 SCREW FH M8x1 25Px28L HS BP B39 RVN HX NHS 610 3 0 M6X1 0P YZN B40 NUT NLK M10x1 5P BAN B41 AIR STICK D...

Страница 21: ...al NZL 1 5mm Long2M P26 PWR Cord External 1 5mm Long2M P26 PWR Cord China 1 5mm Long2M P26 PWR Cord External HK 1 5mm Long2M P26 PWR Cord USA 16AWG Long2M P26 PWR Cord group Israel 1 5mm Long2M P26 External PWR Argentina 1 5mm 2M P26 External PWD Wire Africa 1 5mm 2M P26 External PWD Wire JPN 1 25mm 2M P26 External PWR Cord SWitzerland P26 External PWR Cord BRIZIL 1 5mm2 2M P26 WIRE EXTERNAL PWR S...

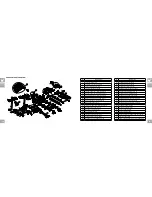
Страница 22: ...NG AZ40 1C AK1 BASE FRAME SET PAINTING AZ40 1C AM1 MOTOR FIXNG PLATE PAINTING AZ40 1C AR1 Roller Set Front Texture TM115 AR2 Roller Set Rear TM116 B15 FIXING PLATE ROLLER R PAINTING AZ40 1C B16 FIXING PLATE ROLLER L PAINTING AZ40 1C B17 WASHER SPL Φ8 2xΦ15 4x2 0T B20 WASHER FLT Φ8 2xΦ19 0x2 0T B21 NUT NLK M8x1 25P BZN B25 Wheel nylon TM196 TM196 K13E B27 TM DECK 670x1220x20T SILICON B28 SCREW FH M...

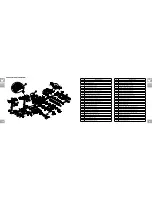
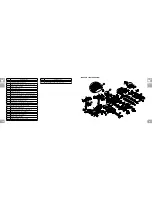
Страница 23: ...Φ19 0x2 0T M40 NUT NLK M8x1 25P BZN M41 SCREW BH M8X1 25PX15L HS BZN N03 COVER ARM REST L1 ABS 75140 TM447 NO DESCRIPTION N04 COVER ARM REST L2 ABS 75140 TM447 N05 COVER ARM REST R1 ABS 75140 TM447 PARAGON 6 EXPLODED VIEW B15 B16 B27 B25x2 B39x8 B41 K15x2 K50x4 K28x2 K29x2 K14x2 Q02 Q06 Q07 Q08 Q10 Q11 P10 P20 AM1 M19 M02 M03 R03 R02 AR1 AR2 AK1 AH1 AC1 AC2 K24x2 K26x2 K27x2 K25x4 K21x2 Q12x15 N03...

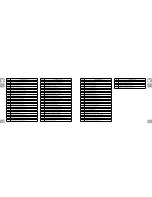
Страница 24: ... K18 Front Carriage Roller Nylon PA6 φ46xφ10 K21 SCREW BH Φ4X10L SM PH BZN POT NO DESCRIPTION K24 SCREW BH M10X1 5PX40L 15L MT HS G8 8 CHM K25 SCREW BH M4X0 7PX42L PH K26 SCREW BH M8X1 25PX50L 18L MT HS G8 8 CHM K27 NUT NLK M8X1 25P CHM K28 Pedal skid TM367 K29 Halt Plate Wheel TM367 K50 Front Leveler M02 Motor AC Elevation 220V 80mm 225 10pin J M03 Motor controller 2 2 75HP 220V 12V MLH09 M10 NUT...

Страница 25: ...SHER SPL Φ8 2xΦ15 4x2 0T Z07 WASHER FLT Φ8 2XΦ16 0X1 4T BZN Z08 Washer Arc φ8 2xφ16 0x1 0t 65Mn BZN Z09 SCREW BH M8X1 25PX15L HS CHM Z10 SCREW BH Φ4X12L TC PH BZN POT D Entsorgungshinweis Horizon Fitness Produkte sind recyclebar Führen Sie das Gerät am Ende der Nutzungsdauer einer sachgerechten Entsorgung zu örtliche Sammelstelle GB Waste Disposal Horizon Fitness products are recyclable At the end...

Страница 26: ...50 51 ...

Страница 27: ...TREADMILL OWNER S MANUAL Paragon 4 5 6 Owner s Manual 070212 Rev 1 2012 Horizon Fitness ...

Отзывы: