


17
4
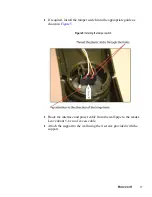
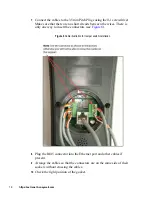
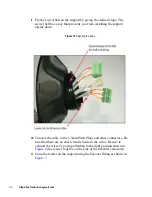
If required, install the tamper switch into the appropriate guide as
shown in
Figure 5
.
5
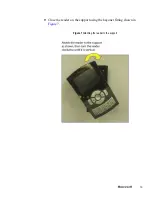
Route the interface and power cable from the wall/pipe to the reader.
Leave about 5-6 cm of excess cable.
6
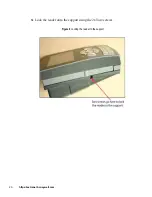
Attach the support to the wall using the 4 screws provided with the
support.
Figure 5
Installing the tamper switch