


4
LP916A-C PNEUMATIC REMOTE BULB THERMOSTATS
95-5559
E
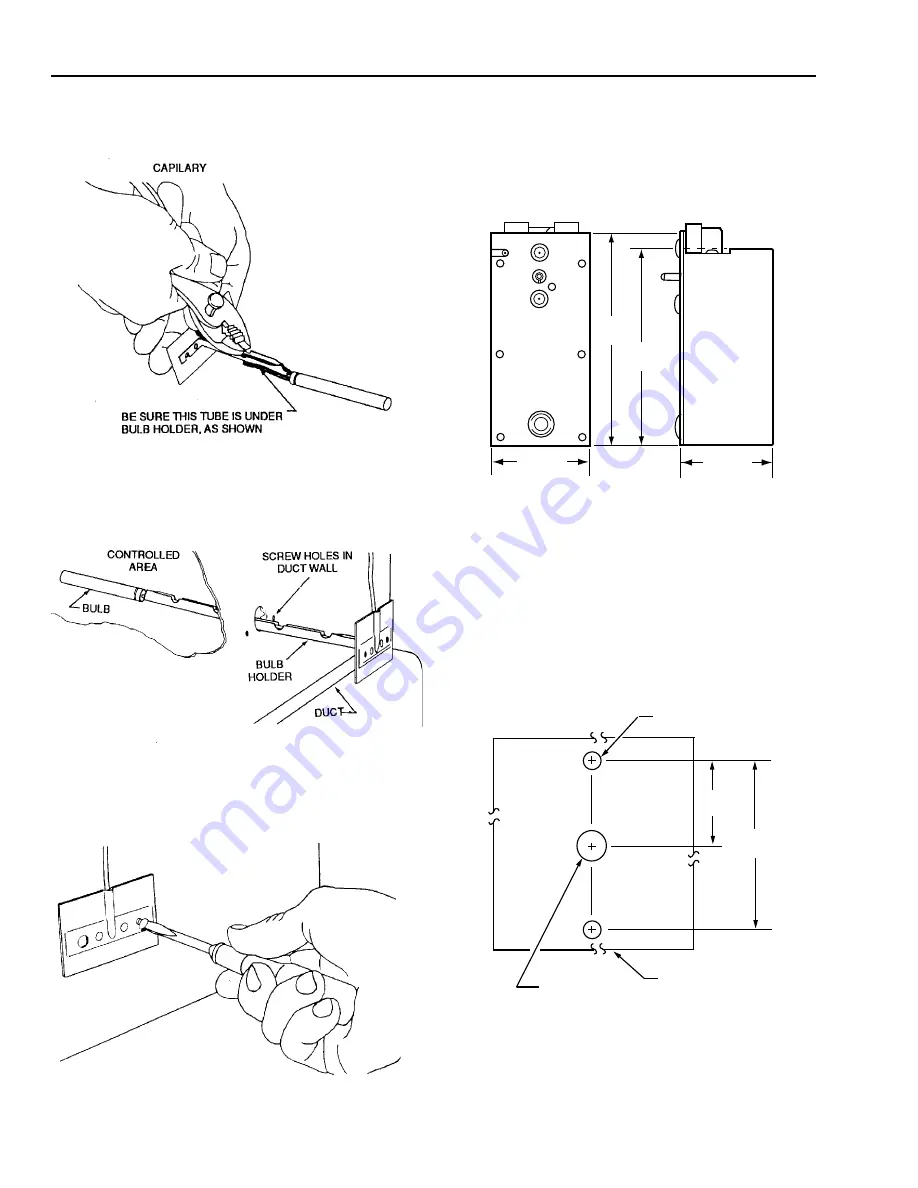
Place capillary tubing in bulb holder channel and pinch
top edges of holder together at each segment as shown
in Figure 9.
Fig. 9. Mounting capillary tubing in bulb holder.
F
Insert bulb and bulb holder (Fig. 10) into duct through
hole prepared in Step 1.
Fig. 10. Inserting bulb and bulb holder into duct.
G
Fasten bulb holder to duct wall with screws as shown in
Figure 11.
Fig. 11. Fastening bulb holder to duct wall.
Mounting Kit Model
The LP916 mounting kit model is shown in Figure 12. This
model can be either panel mounted or mounted in a terminal
unit using a bracket.
Fig. 12. LP916 mounting kit model
dimensions in inches (millimeters).
Panel Mounting
Mounting LP916 Mounting Kit Model directly on a panel
requires a 306016C Bag Assembly which includes a scale
plate, knob, and mounting screws.
A
Drill holes in panel on centers as shown in Figure 13.
Fig. 13. Hole dimensions in inches (millimeters) for panel
mounting LP916 mounting kit model.
C4650
3/8 (10) DIA
7/32 (6) DIA -2
PANEL
2-1/4
(57)
1-1/8
(29)
S24103
S24105
S24104
C4653
4-1/2
(115)
4-7/8
(124)
2-3/16 (56)
2-1/16 (53)
C4653
B
M
+
+
+
+
+
+
+