HW7000E/HW7000EL Portable Electrical Generator Owner’s Manual
www.honeywellgenerators.com
23
Engine Oil
Changing Engine Oil
1.
Place the generator on a flat, level surface.
2.
Start engine and run until warm.
3.
Stop engine.
4.
Place oil pan, or other container suitable for holding
engine oil, underneath generator.
5.
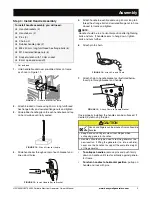
Using a socket wrench with 12 mm socket and exten-
sion, loosen oil drain screw partially to allow oil to flow
slowly.
6.
Using clean cloth, wipe around oil fill area and oil
drain screw to remove dirt and debris.
7.
Remove oil drain screw and sealing washer.
8.
Allow oil to drain into oil pan or container.
9.
Slowly unscrew and remove oil fill dipstick.
10.
Allow oil to completely drain into oil pan or container.
11.
Using clean cloth, wipe around oil fill and drain plug
areas to clean any dirt and debris.
12.
Reinstall sealing washer and oil drain screw.
13.
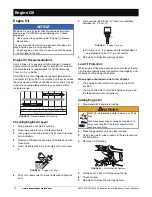
Pour new (unused) engine oil into oil fill hole using
funnel. (See Figure 29 for recommended oil type).
Do not overfill.
14.
Check oil level.
15.
Reinstall oil fill dipstick and fully tighten.
NOTE:
Dispose of used motor oil according to guidelines estab-
lished by your local or state government.
Frequent or prolonged contact with engine oil may cause skin
cancer.
• Immediately after handling engine oil, thoroughly wash
hands and any areas of skin exposed to engine oil, with
soap and water.
To change engine oil, you will need:
3/8” socket wrench with 12 mm 6 pt. socket and
3” extension
Oil drain pan or other container suitable for holding
engine oil
Funnel
Clean cloth
Unused engine oil (SAE type indicated in Fig-
ure 29)
ALWAYS stop engine before removing oil fill
dipstick.
Crankcase pressure can cause hot engine oil to
spray out of engine fill hole. Hot engine oil can
cause severe burns.
FIGURE 33:
Oil Drain Screw
FIGURE 34:
Loosen Oil Drain Screw
WARNING
WARNING
FIGURE 35:
Oil Fill Dipstick Removal
FIGURE 36:
Oil Draining from Generator
FIGURE 37:
Oil Fill Dipstick—Oil Level Indicator
H
L
Содержание HW7000E
Страница 99: ... ...

