Rev 3.01
17
Document 900.0399
08/08
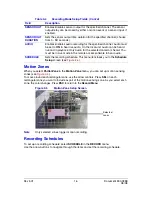
Figure 3-6
Recording Schedule Setup Screen
You can schedule recording in one hour increments from 0 to 24 (0:00 to 24:00). You can
select individual blocks of time, blocks of time for all channels, entire channels, or the entire
schedule. Motion recording, sensor recording, and continuous recording can be used
exclusively for the schedule, or mixed as needed. See
Table 3-5
for four ways to set the
schedule.
To set up a recording schedule, select SCHEDULE in the record menu. Use the arrow
buttons to select one of the items in
Table 3-5
. Then press SEL to toggle and select the
recording method required (
C
= Continuous,
M
= Motion,
S
= Sensor,
-
= No recording).
Setting System Parameters
Use the System Setup screen to input system parameters.
Use the UP and DOWN arrow controls to navigate through the menu items and use the
LEFT and RIGHT arrow controls to change the value of the menu items.
Table 3-5
Schedule Recording Setup Fields
Field
Description
ALL
Selected recording mode is applied to the entire time zone and
all channels (cameras 1 to 4).
CH1 to CH4
Selected recording mode is applied to the entire time zone for
the specified channel.
Vertical Bar
Selected recording mode is applied to the entire channel for the
selected time zone.
Each vertical bar corresponds to one hour.
- Individual Block of
Time
Selected recording mode is applied to the selected 1-hour
increment for the selected channel.
Содержание HRDE4X4
Страница 1: ...User Guide HRDE4X4 Document 900 0399 08 08 Rev 3 01 Digital Video Recorder ...
Страница 10: ...Rev 3 01 x Document 900 0399 08 08 ...
Страница 20: ...Rev 3 01 10 Document 900 0399 08 08 ...
Страница 46: ...Rev 3 01 36 Document 900 0399 08 08 ...
Страница 50: ...Rev 3 01 40 Document 900 0399 08 08 ...

