Servicing Your Honda
154
Air Cleaner
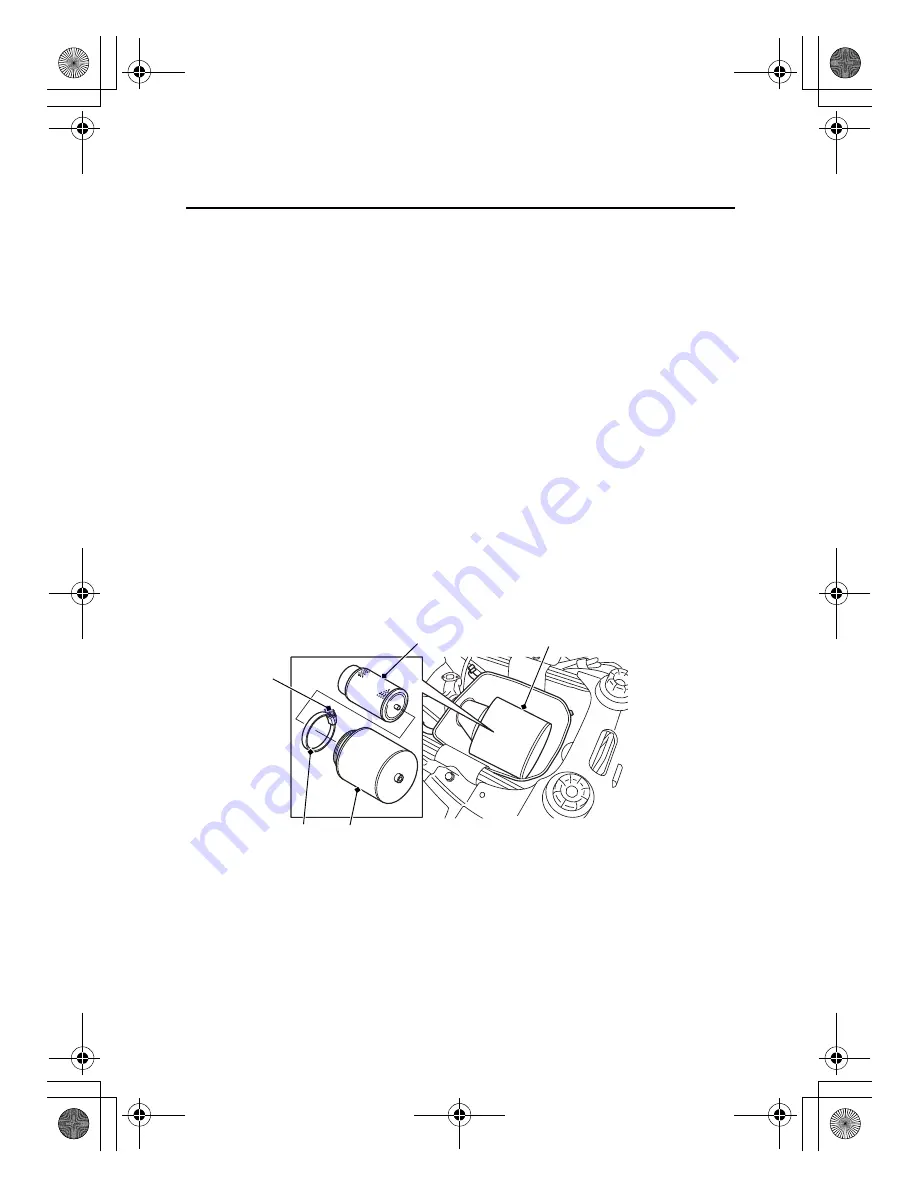
4. Loosen the screw (3) and remove the air cleaner assembly (4)
from the air cleaner housing.
5. Remove the clamp (5).
6. Remove the air cleaner (6) from the air cleaner body (7).
7. Gently wash the air cleaner in clean, non-flammable (high flash
point) solvent such as kerosene — not petrol. After cleaning,
gently squeeze out the remaining solvent. Avoid twisting or
wringing the air cleaner. This can tear the foam.
8. Inspect for tears or cracks in the foam or seams of the air cleaner.
Replace the air cleaner if it is damaged.
9. Allow the air cleaner to dry thoroughly before applying oil. A wet
air cleaner will not fully absorb the oil.
10. Pour clean air filter oil over the entire surface of the air cleaner.
Use both hands to evenly spread the oil into the air cleaner.
Gently squeeze out any excess oil. (To keep your hands dry, place
the air cleaner in a clean plastic bag before spreading the oil into
the air cleaner.)
(3)
(3) screw
UNDER SEAT
(5)
(7)
(6)
(4) air cleaner assembly
(5) clamp
(6) air cleaner
(7) air cleaner body
(4)
14 TRX420FA1 FA2-32HR3B000.book 154 ページ 2013年9月6日 金曜日 午後1時57分
Содержание TRX420FA1
Страница 21: ...ATV Safety 13 Labels U type 14 TRX420FA1 FA2 32HR3B000 book 13...
Страница 62: ...Instruments Controls 54 14 TRX420FA1 FA2 32HR3B000 book 54...
Страница 78: ...Before Riding 70 14 TRX420FA1 FA2 32HR3B000 book 70...
Страница 244: ...Taking Care of the Unexpected 236 14 TRX420FA1 FA2 32HR3B000 book 236...
Страница 267: ...14 TRX420FA1 FA2 32HR3B000 book 259...
Страница 268: ...14 TRX420FA1 FA2 32HR3B000 book 260...
Страница 269: ...14 TRX420FA1 FA2 32HR3B000 book 261...
Страница 270: ...14 TRX420FA1 FA2 32HR3B000 book 262...
Страница 271: ...14 TRX420FA1 FA2 32HR3B000 book 263...
Страница 272: ...14 TRX420FA1 FA2 32HR3B000 book 264...


