


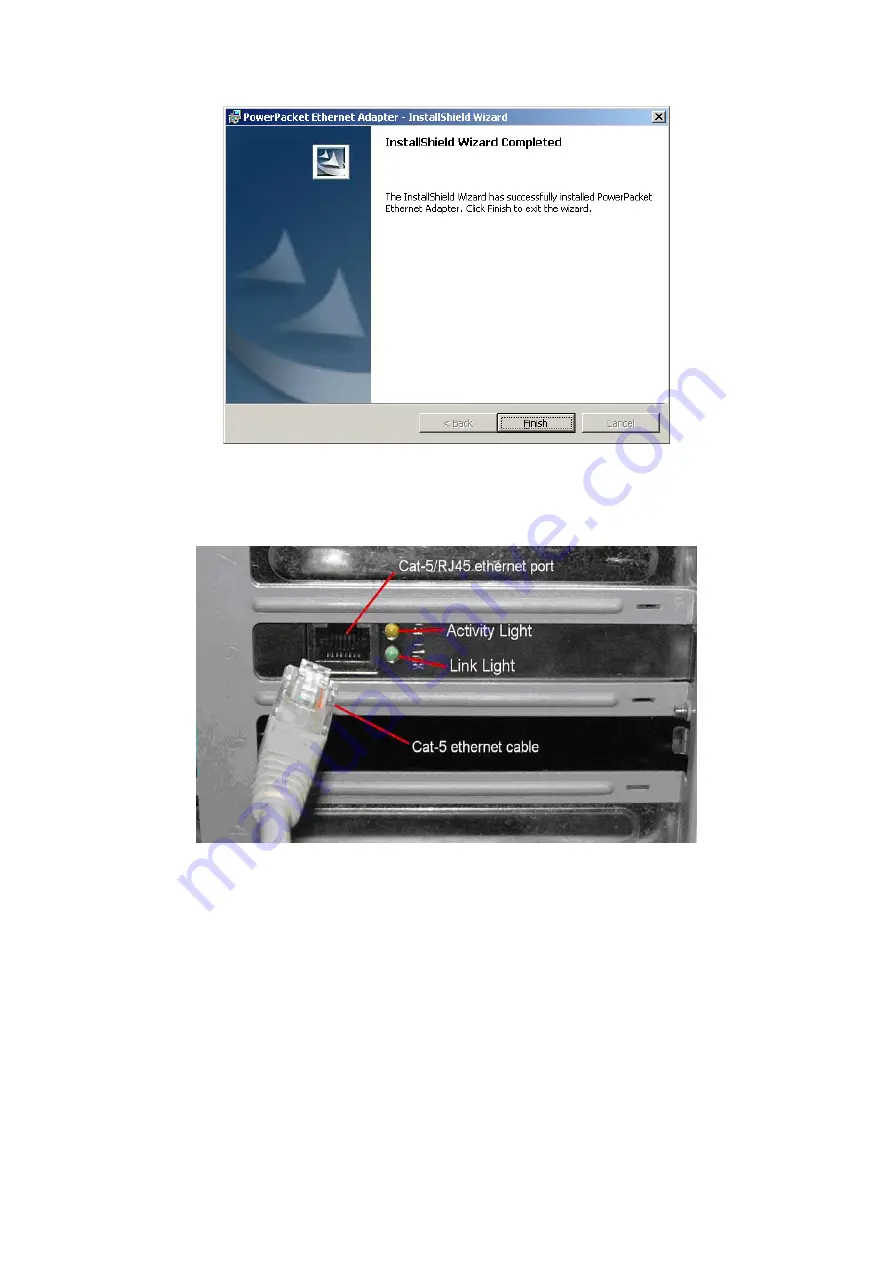
This screen shows that the installation was completed successfully. Click on
Finish
to exit the wizard.
Now its time to setup you hardware connections please refer to the
next diagrams.
Plug
your network cable into the computer’s RJ-45
network adapter port
Plug
the other end
of your network cable into the
RJ-45 port locate at the back
of
the HomePlug Ethernet Bridge. If you are using the 3 port desktop product then plug
your power connector into the
power connector at the back
of the HomePlug
Ethernet Bridge. Next plug your HomePlug Bridge into a convenient mains socket.
**Note: ** Do not plug the device into a UPS or power strip with surge
protection. The HomePlug Ethernet Bridge has its own power filter for
protection against surges.
9
Содержание VeseNET Powerline PLA-14-E
Страница 6: ...6 ...
Страница 18: ...1 Click Start and click Run 2 Type Command in the run prompt Click OK 18 ...
Страница 24: ...3 Click Properties 4 Click Highlight Internet Protocol TCP IP and click Properties 24 ...
Страница 27: ...2 Type winipcfg and click OK 3 Select the Network adapter you want to release IP s for 27 ...
Страница 28: ...4 Click Release 5 Your IP Address should turn to 0 0 0 0 28 ...
Страница 30: ...1 Click Start then click Run 2 Type Command and click OK 3 Type ipconfig release and press Enter 30 ...
Страница 32: ...32 ...
Страница 54: ...4 Click Set up my connection manually 5 Click Connect using a broadband connection that is always on 54 ...
Страница 56: ...56 ...