7
HOMEDEPOT.COM/HOMEDECORATORS
Please contact 1-800-986-3460 for further assistance.
Assembly - Standard Ceiling Mount
Routing the wires
Assembling the fan
Preparing for mounting
Remove the canopy ring (L) from the canopy (C) by turning
the ring to the right until it unlocks.
Remove the mounting bracket (A) from the canopy (C) by
loosening the two screws (HH) located in the “L shaped”
slots
Remove and save the two non-slotted screws (SS) in the
round holes. This will enable you to remove the mounting
bracket (A).
Route the wires exiting the top of the fan motor (D) into
the decorative motor collar cover (F) and through the
canopy ring (L).
Make sure the slot openings are on top and route the
wires through the canopy (C) and then through the ball/
downrod assembly (B).
2
3
1
C
A
SS
L
HH
C
D
F
B
L
D
F
EE
DD
B
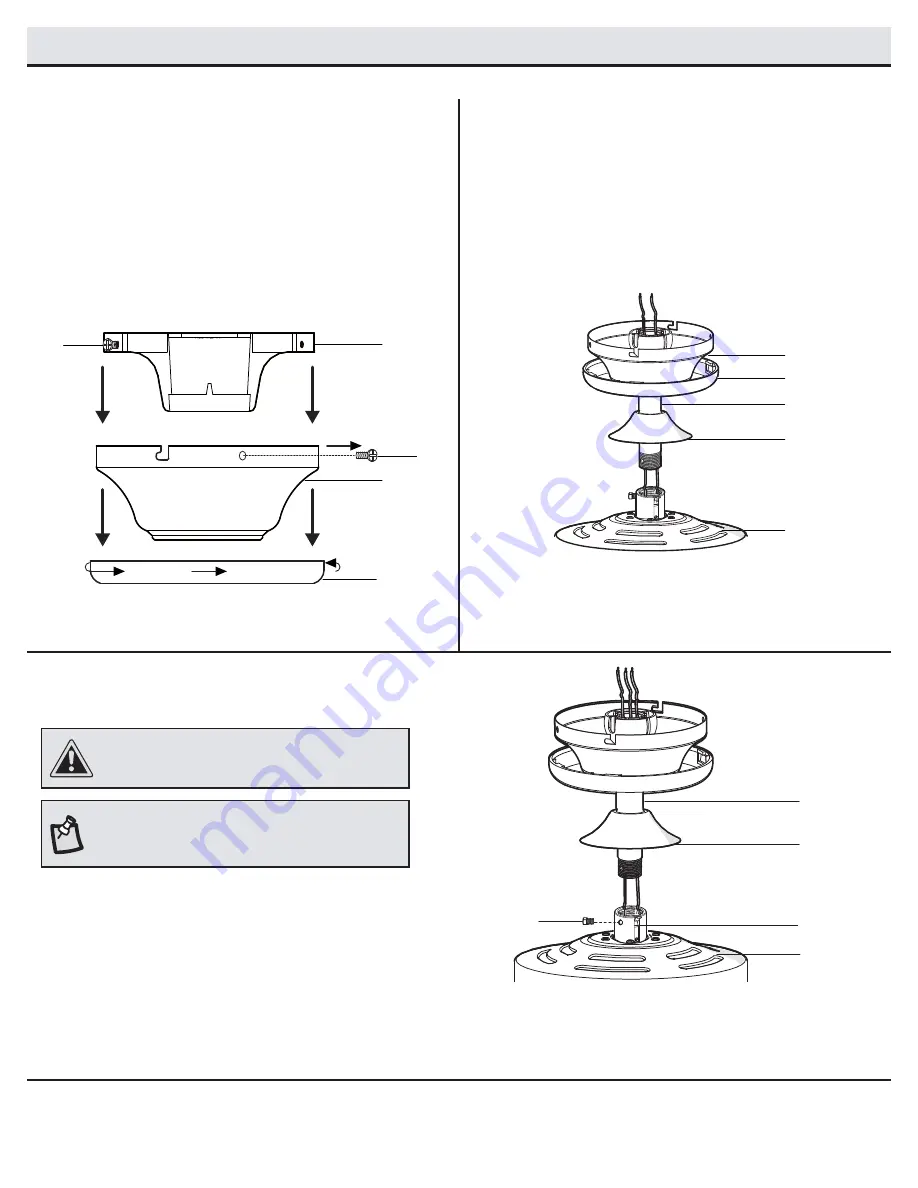
Remove the setscrew (DD) by turning it counterclockwise.
Install the downrod (B) by inserting it into the motor collar (FF),
and turning it clockwise until it is tight.
Reinstall the setscrew (DD) turning clockwise until tight.
NOTE:
This fan is equipped with a safety tab (EE). Should
the setscrew (DD) ever become loose while the fan is
running in reverse, the safety tab (EE) will engage and
stop the fan from falling.
CAUTION:
To ensure wobble-free operation and to avoid
damage to the fan, the downrod (B) and the setscrew
(DD) must be completely tightened


