Page | 6
Micro OSD V2
Advanced Installation
If there is no OSD on the screen after following the Basic setup steps or you see a ‘Waiting for
Heartbeats’ message then you may need to change the settings for the telemetry port. Make sure
the settings are the same as below:
These settings are found in Mission Planner in the ‘CONFIG’ and ‘Full Parameter Lists’ section. Ensure
that the SERIALx_BAUD (where x is the number of the telemetry port you’ve connected the Micro
OSD v2 to on your PixHawk) is set to 57 and the SERIALX_PROTOCOL is set to 1.
You can also change the layout of your HolyBro Micro OSD v2 and what elements of the OSD are
displayed.
To change the settings on your HolyBro Micro OSD V2 you will need a program on your computer
and an FTDI Adapter (not supplied). You can download the OSD configurator program from
http://www.holybro.com/Setting/Holybro_MicroOSD_v2.0_UpdateSoftware.rar
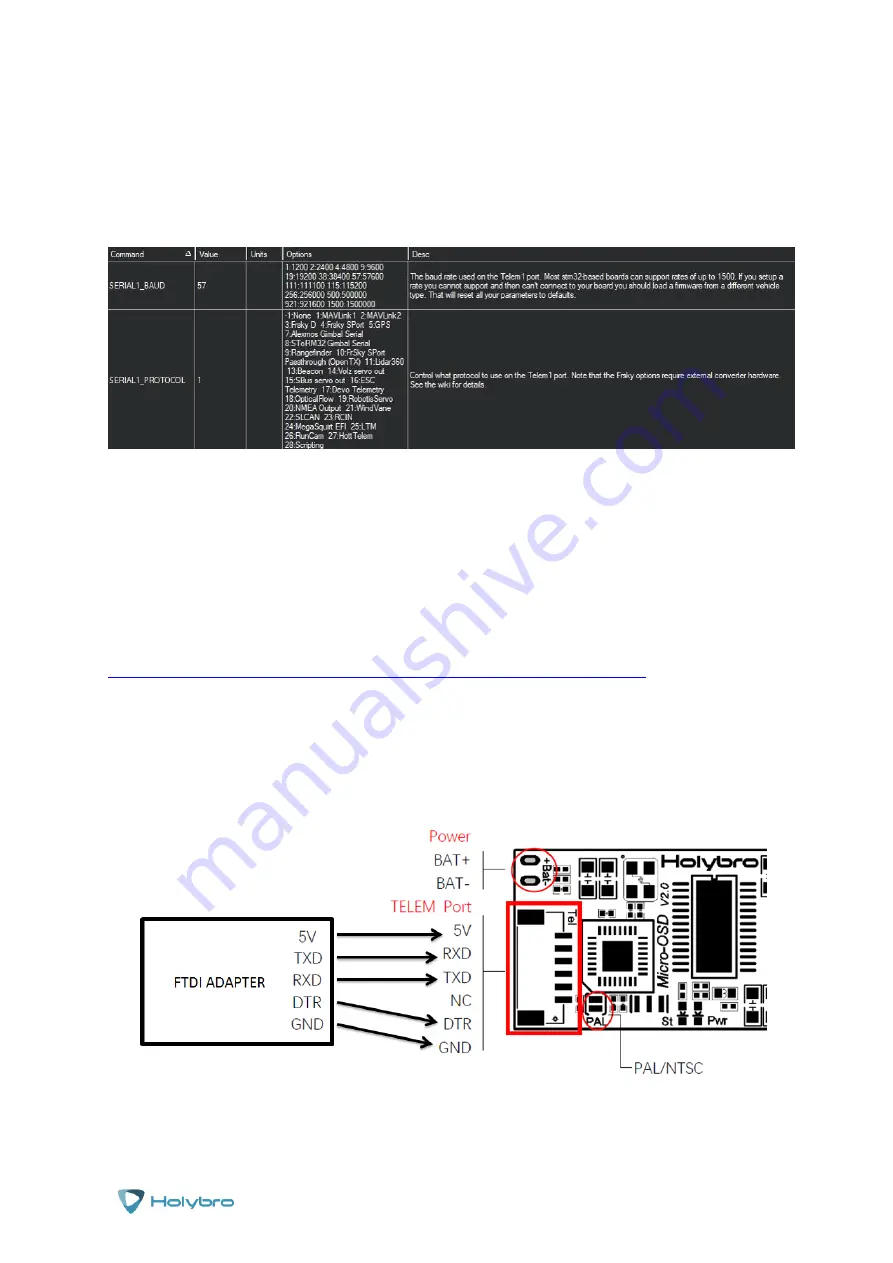
Connect the FTDI Adapter as shown below making sure that the power connections are correct and
that the Rx pins on one side connect to the Tx pins on the other. Make sure that the DTR pin is also
connected. You do not need to connect a battery as the board will be powered by the USB cable
plugged into the FTDI adapter.


