background image

ENGLISH 

- 6

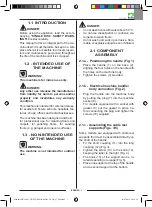
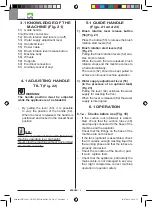
3.1 KNOWLEDGE OF THE 

MACHINE (Fig. 21)

51)  Guide handle

51a) Electric control box

52)  Brush rotation start levers (on-off)

53)  Water supply adjustment lever

54)  Handle tilt lever

55)  Power cable

56)  Brush rotation lever release button

57)  Machine body

58)  Wheels

59)  Supports

60)  Electrical connection

61)  Auxiliary socket (if any)

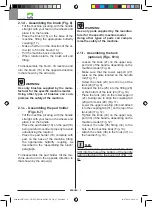
4.1 ADJUSTING HANDLE 

TILT 

(Fig. 22)

 WARNING:

The  handle  position  must  be  adjusted 

while the appliance is at a standstill.

-  By pulling the lever (63), it is possible 

to vary the position of the handle (62). 

When the lever is released, the handle is 

positioned and locked in the closest fixed 

position.

N.B.:

The correct position of the handle (62) during 

machine operation is at hip height.

Never start the machine without having tilted 

the handle correctly.

5.1 GUIDE HANDLE 

(Figs. 21 and 23) 

1)  Brush  rotation  lever  release  button 

(56) (Fig. 21)

  Press the button (56) to release the brush 

rotation start levers (52).

2)  Brush rotation start levers (52) 

  (Fig. 21)

  Pulling the brush rotation levers (52) ena-

bles brush rotation.

  When the levers (52) are released, brush 

rotation stops and the machine comes to 

a halt automatically.

  The levers (52) should be kept pulled to 

achieve continuous machine operation.

3)  Water supply adjustment lever (53)

  (in  the  presence  of  an  optional  tank) 

(Fig. 23)

  Pulling the lever (64) activates the water 

supply for washing the floor.

  When the lever is released (64) the water 

supply is interrupted.

6.1 OPERATION 

6.1.a -  Checks before use (Fig. 18)

-  If the suction unit (optional) is assem-

bled, check that the suction tubes (48) 

are properly connected to the base of the 

machine and the aspirator.

-  Check that the fittings on the base of the 

machine are not blocked.

-  If the tank (optional) is assembled, check 

that it contains enough washing liquid for 

the working phase and that the tubes are 

properly connected.

-  Check the condition of the brush or pad.

  If worn, replace them.

-  Check that the appliance, particularly the 

mains cable, is not damaged in any way 

that might compromise correct machine 

operation or operator safety.

Manuale HU30-923_HOLLU_EM143 EM143 DS_1ed_07-2019.indd   6

16/07/2019   08:10:52

Содержание EM 143

Страница 1: ...om hollu Systemhygiene GmbH DE Gebrauch und Wartung EN Use and Maintenance IT Uso e Manutenzione HU30 923 ed 12 2019 EM 143 EM 143 DS Copertina HU30 923_HOLLU_EM143 EM143 DS_1ed_07 2019 indd 1 15 07 2019 17 07 57 ...

Страница 2: ...marking are located on the plate on the machine body It is advisable to note the machine model and serial number on the table on the next page IT DATI IDENTIFICATIVI I dati identificativi e la marcatura CE della macchina sono posizionati sulla targhetta posta sul corpo macchina Si consiglia di trascrivere il modello della macchina e il relativo numero di matricola nella ta bella riportata nella pa...

Страница 3: ...urer Model Article code Working Ø IT Produttore Modello Codice articolo Ø di lavoro 5 6 7 DE Drehgeschwindigkeit Serien Nr Elektrische Eigenschaften EN Rotation speed Serial number Electrical characteristics IT Velocità di rotazione N Matricola Caratteristiche elettriche Copertina HU30 923_HOLLU_EM143 EM143 DS_1ed_07 2019 indd 3 15 07 2019 17 08 04 ...

Страница 4: ...4 Copertina HU30 923_HOLLU_EM143 EM143 DS_1ed_07 2019 indd 4 15 07 2019 17 08 04 ...

Страница 5: ...5 Copertina HU30 923_HOLLU_EM143 EM143 DS_1ed_07 2019 indd 5 15 07 2019 17 08 04 ...

Страница 6: ...6 Copertina HU30 923_HOLLU_EM143 EM143 DS_1ed_07 2019 indd 6 15 07 2019 17 08 04 ...

Страница 7: ...7 Copertina HU30 923_HOLLU_EM143 EM143 DS_1ed_07 2019 indd 7 15 07 2019 17 08 04 ...

Страница 8: ...8 Copertina HU30 923_HOLLU_EM143 EM143 DS_1ed_07 2019 indd 8 15 07 2019 17 08 04 ...

Страница 9: ...hpegel Sound level Livello sonoro Vibrationsexpositionswert Vibration level Livello vibrazioni Arbeitsdruck Working pressure Pressione di lavoro Messeinheit Units of measument Unità di misura Kg m db A m s 2 gr cm 2 EM 143 42 5 12 70 2 5 41 8 EM 143 DS 45 15 70 2 5 44 3 Modell Model Modello Technische Eigenschaften Technical features Caratteristiche tecniche Antriebsart Type of drive Tipo di trasm...

Страница 10: ...10 Copertina HU30 923_HOLLU_EM143 EM143 DS_1ed_07 2019 indd 10 15 07 2019 17 08 05 ...

Страница 11: ...formitätserklärung 11 EN English ENGLISH 1 Translation of original instructions Declaration of EC conformity 11 IT Italiano ITALIANO 1 Istruzioni originali Dichiarazione di conformità 11 Copertina HU30 923_HOLLU_EM143 EM143 DS_1ed_07 2019 indd 11 15 07 2019 17 08 05 ...

Страница 12: ...Copertina HU30 923_HOLLU_EM143 EM143 DS_1ed_07 2019 indd 12 15 07 2019 17 08 05 ...

Страница 13: ...e lange Lebensdauer entwickelt Damit ein gutes Produkt im Laufe der Zeit auch gut bleibt muss es ständig verbessert werden um jene zufrieden zu stellen die tagtäglich mit ihm umgehen Daher wünschen wir uns dass Sie nicht nur ein zufriedener Kunde sind sondern auch ein Partner der uns auch seine Meinungen und seine im täglichen Gebrauch gemachten Erfahrungen mitteilt Manuale HU30 923_HOLLU_EM143 EM...

Страница 14: ...5 2 1 i Elektroanschluss DE 5 3 1 MASCHINENÜBERSICHT DE 6 4 1 EINSTELLUNG DER NEIGUNG DER FÜHRUNGSSÄULE DE 6 5 1 FÜHRUNGSSÄULE DE 6 6 1 ARBEITSWEISE DE 6 6 1 a Kontrollen vor dem Gebrauch DE 6 6 1 b Einschalten der Maschine DE 7 6 1 c Gebrauch der Maschine DE 7 6 1 d Doppelte Geschwindigkeit falls vorhanden DE 7 6 1 e Anwendungsende und Ausschalten DE 8 6 1 f Transport DE 8 7 1 WARTUNG UND REINIGU...

Страница 15: ...aftstoff Benzin oder ätzende Reinigungsmittel zur Reini gung von Fußböden waschen und saugen Sie keine ätzenden entflammbaren explosiven Flüssigkeiten auch nicht wenn sie verdünnt sind 2 1 ZUSAMMENBAU DER BAUTEILE 2 1 a Einsetzen der Führungssäule Abb 1 setzen Sie die Führungssäule 1 so auf die Basis 2 dass die vier Bohrlöcher der Führungssäule mit den Bohrlöchern des Maschinennahes übereinstimmen...

Страница 16: ...e abzubauen kippen Sie die Maschine und drehen Sie die Scheibe entge gengesetzt zur Pfeilrichtung A HINWEIS Benutzen Sie nur die für das Modell pas senden Pads des Herstellers Der Gebrauch von anderen Padarten kann die Sicherheit der Maschine beeinträchtigen 2 1 f Einbau des Tanks optional Abb 8 14 Lockern Sie den Knauf 21 der oberen Halterung 22 der Führungssäule je nach Maschinenmodel Abb 8 Verg...

Страница 17: ...ts optional Abb 20 Wenn die zu waschende Oberfläche sehr schmutzig ist kann ein Zusatzgewicht auf die Maschine montiert werden das einen höhe ren Druck der Bürsten oder der Mitnehmer scheibe auf den Boden ermöglicht BEMERKUNG Auf Grund des höheren Kontaktdrucks kommt es zu einem höheren Verschleiß der Bürsten oder des Pads HINWEIS Das Zusatzgewicht besitzt zum Anheben passende Einkerbungen 50a Heb...

Страница 18: ...ug der Hebel zur Bürstendre hung 52 wird die Drehung der Bürste freigegeben Bei Loslassen der Hebel 52 hält die Drehung der Bürsten an und die Maschi ne stoppt automatisch Für einen Dauerbetrieb der Maschine werden die Hebel 52 kontinuierlich an gezogen 3 Hebel zur Einstellung der Wasserab gabe 53 bei Vorhandensein des op tionalen Tanks Abb 23 Durch Anzug des Hebels 64 wird die Wasserabgabe für di...

Страница 19: ...ben oder Heben des Griffs Durch leichten Zug des Griffs nach oben bewegt sich die Maschine nach rechts Durch leichten Druck des Griffs nach un ten bewegt sich die Maschine nach links Durch eine leichte Drehung an der rech ten Seite des Griffs fährt die Maschine nach vorne Durch eine leichte Drehung an der linken Sei te des Griffs fährt die Maschine nach hinten BEMERKUNG Führen Sie nur leichten Dru...

Страница 20: ...digkeit auszuwählen drücken Sie den Ge schwindigkeitsschalter 65 auf der Rück seite des Maschinenkörpers Der Gebrauch der Maschine mit doppel ter Geschwindigkeit entspricht der einer Maschine mit einfacher Geschwindigkeit Den Bewegungen muss jedoch grö ßere Aufmerksamkeit bei der Führung zuteil werden da die Führungsbefehle auf Grund der höheren Geschwindigkeit noch schwächer durchgeführt werden m...

Страница 21: ...em Tank abgelassen und der Tank gereinigt werden um Ablage rungen und Verkrustungen zu vermeiden Zum Entleeren des Tanks entfernen Sie des sen Halterungen HINWEIS Lagern Sie das Gerät in einem geschlos senen und trockenen Ort auf JE NACH BEDARF DURCHZUFÜHRENDE ARBEITEN 7 1 c Austausch der Bürste Ein Austausch der Bürste wird dann erfor derlich wenn durch Verschleiß die Bürsten borsten kürzer wie 2...

Страница 22: ...ungsmittel die für den Bodenbelag oder den zu beseitigenden Schmutz geeignet sind Reinigungslösung unzurei chend Einfüllen von Lösungsmittel in den Tank optional Bürste abgenutzt Bürste auswechseln Abschliff Polierung des Bo dens unzureichend Pad abgenutzt Pad auswechseln Die Maschine arbeitet unre gelmäßig oder vibriert stark Kontrollieren Sie dass die Bürste oder die Mitnehmer scheibe korrekt ei...

Страница 23: ...t EINZELBÜRSTE MODELL KENN NR EM 143 00 185EL HU EM 143 DS 00 197EL HU Einschlägige EG Richtlinien 2006 42 CE 2009 127 CE 2014 30 UE 2011 65 UE Angewandte harmonisierte Normen EN 60335 1 EN 60335 2 67 Angewandte nationale Normen Name und Beruf der autorisierten Person welche die Erklärung unterzeichnet Giuseppe Riello Vorstandsvorsitzender Ghibli Wirbel S p A Unterschrift ________________ Giuseppe...

Страница 24: ...DEUTSCH 12 Manuale HU30 923_HOLLU_EM143 EM143 DS_1ed_07 2019 indd 12 16 07 2019 08 10 18 ...

Страница 25: ...rder to remain so over time a good product requires continu ous updates aimed at satisfying the expectations of those who use it daily To this end we hope that you will be not only a satisfied customer but also a partner who does not hesitate to let us know your views and ideas resulting from personal experience on a day to day basis Manuale HU30 923_HOLLU_EM143 EM143 DS_1ed_07 2019 indd 1 16 07 2...

Страница 26: ...bling additional weight Optional EN 5 2 1 i Electrical connection EN 5 3 1 KNOWLEDGE OF THE MACHINE EN 5 4 1 ADJUSTING HANDLE TILT EN 6 5 1 GUIDE HANDLE EN 6 6 1 OPERATION EN 6 6 1 a Checks before use EN 6 6 1 b Starting the machine EN 6 6 1 c Using the machine EN 7 6 1 d Double speed if present EN 7 6 1 e End of use and turning off EN 7 6 1 f Transport EN 8 7 1 MAINTENANCE AND CLEANING EN 8 7 1 a...

Страница 27: ... not wash floors with water above 50 C do not use diesel petrol or corrosive de tergents to wash floors do not wash and suck up corrosive flam mable or explosive liquids even if diluted 2 1 COMPONENT ASSEMBLY 2 1 a Positioning the handle Fig 1 Place the handle 1 on the base 2 aligning the four holes on the handle with the holes on the machine body Tighten the screws 3 provided 2 1 b Electrical mac...

Страница 28: ...sh paragraph To disassemble the pad holder tilt the ma chine and turn it in the opposite direction to that shown by the arrow A WARNING Use only pads supplied by the manufac turer for the specific machine model Using other types of pads can compro mise the safety of the machine 2 1 f Assembling the tank optional Figs 8 14 Loosen the knob 21 on the upper sup port 22 of the handle depending on the m...

Страница 29: ...n the model Fig 19 2 1 h Assembling additional weight optional Fig 20 If the surface to be cleaned is very dirty an additional weight can be assembled on the machine to enable greater contact pressure of the brush or the pad holder on the floor N B Due of the increased contact pressure wear to the brush or pad also increases WARNING The additional weight is provided with special recesses 50a for l...

Страница 30: ...52 Fig 21 Pulling the brush rotation levers 52 ena bles brush rotation When the levers 52 are released brush rotation stops and the machine comes to a halt automatically The levers 52 should be kept pulled to achieve continuous machine operation 3 Water supply adjustment lever 53 in the presence of an optional tank Fig 23 Pulling the lever 64 activates the water supply for washing the floor When t...

Страница 31: ...ressing or lifting the machine grip Pulling or lifting the grip slightly makes the machine move to the right Pressing or gently lowering the grip makes the machine move to the left Slightly twisting the right hand side of the grip makes the machine move forward Slightly twisting the left hand side of the grip makes the machine move backward N B Move the grip gently in order to achieve man ageable ...

Страница 32: ...pright position Remove the tank optional and empty any solution out of it Remove the brush or pad holder after use WARNING Do not leave the machine at a standstill while the brush or pad holder are assem bled to prevent them from being dam aged If the pad is dirty wash it at a maximum temperature of 60 If the brush is dirty wash it under running water Unplug the power cable from the socket and wra...

Страница 33: ...drain and clean the water tank to prevent deposits or scale To empty the water tank release it from its supports WARNING Store the appliance in a dry sheltered place OPERATIONS TO BE CARRIED OUT AS REQUIRED 7 1 c Replacing the brush It becomes necessary to replace the brush due to wear when the bristles are less than 2 cm long or if it needs to be changed due to the type of floor to be washed Refe...

Страница 34: ...Use brushes or detergents that are suitable for the type of floor or dirt to be cleaned Insufficient detergent solution Fill the tank optional with detergent solution Worn brush Replace the brush Insufficient floor polishing sanding Pad worn Replace the pad The machine operates er ratically or vibrates heavily Check that the brush or pad holder are assembled cor rectly Replace the brush or pad hol...

Страница 35: ... DISC MODEL CODE EM 143 00 185EL HU EM 143 DS 00 197EL HU Relevant EU Directives 2006 42 CE 2009 127 CE 2014 30 UE 2011 65 UE Applied harmonized standards EN 60335 1 EN 60335 2 67 Applied national standards Name and position of the person authorised to sign the Declaration Giuseppe Riello Chief Executive Officer of Ghibli Wirbel S p A Signature ________________ Giuseppe Riello Name and address of ...

Страница 36: ...ENGLISH 12 Manuale HU30 923_HOLLU_EM143 EM143 DS_1ed_07 2019 indd 12 16 07 2019 08 11 10 ...

Страница 37: ...el tempo Noi siamo coscienti che un buon prodotto per restare tale nel tempo necessita di con tinui aggiornamenti mirati a soddisfare le aspettative di chi quotidianamente ne fa uso In tal senso noi ci auguriamo di avere in lei non solo un cliente soddisfatto ma anche un partner che non esita a trasmetterci opinioni e idee derivanti dalla personale quotidiana esperienza Manuale HU30 923_HOLLU_EM14...

Страница 38: ...ddizionale Optional IT 5 2 1 i Collegamento elettrico IT 5 3 1 CONOSCENZA DELLA MACCHINA IT 6 4 1 REGOLAZIONE INCLINAZIONE MANIGLIONE IT 6 5 1 MANIGLIONE GUIDA IT 6 6 1 FUNZIONAMENTO IT 6 6 1 a Controlli prima dell uso IT 6 6 1 b Avviamento macchina IT 7 6 1 c Uso della macchina IT 7 6 1 d Doppia velocità Se presente IT 7 6 1 e Fine uso e spegnimento IT 8 6 1 f Trasporto IT 8 7 1 MANUTENZIONE E PU...

Страница 39: ...china non è destinata a funzionare all aperto PERICOLO non lavare pavimenti con acqua superio re a 50 C non utilizzare gasolio benzine o detergen ti corrosivi per il lavaggio di pavimenti non lavare e aspirare liquidi corrosivi in fiammabili esplosivi anche se diluiti 2 1 ASSEMBLAGGIO COMPONENTI 2 1 a Posizionamento maniglione Fig 1 Posizionare il maniglione 1 sulla base 2 facendo combaciare i qua...

Страница 40: ...ribaltare la macchina e girarlo in senso opposto alla freccia A AVVERTENZA Utilizzare solo pad forniti dal costruttore relativi al modello di macchina L utilizzo di altri tipi di pad può compro mettere la sicurezza della macchina 2 1 f Montaggio Serbatoio Optional Figg 8 14 Allentare il pomello 21 del supporto su periore 22 del maniglione a seconda del modello macchina Fig 8 Assicurarsi che il sup...

Страница 41: ... caso in cui la superficie da lavare sia mol to sporca è possibile montare sulla macchina un peso addizionale che consente una mag giore pressione di contatto della spazzola o del disco trascinatore con il pavimento NOTA A causa della maggiore pressione di contat to aumenta anche l usura della spazzola o del pad AVVERTENZA Il peso addizionale è dotato di apposite rientranze 50a per il sollevamento...

Страница 42: ...e leve rotazione spazzola 52 si abilita la rotazione della spazzola Al rilascio delle leve 52 la rotazione del la spazzola si interrompe e la macchina si ferma automaticamente Le leve 52 vanno mantenute tirate per ottenere il continuo funzionamento della macchina 3 Leva regolazione erogazione acqua 53 in presenza di serbatoio Optional Fig 23 Tirando la leva 64 si abilita l erogazione dell acqua pe...

Страница 43: ...ella stessa Tirando ovvero alzando leggermente l impugnatura la macchina si sposta ver so destra Premendo ovvero abbassando legger mente l impugnatura la macchina si spo sta verso sinistra Effettuando una leggera torsione sulla parte destra del maniglione la macchina procede in avanti Effettuando una leggera torsione sulla parte sinistra del maniglione la macchina procede indietro NOTA Effettuare ...

Страница 44: ...sizionare verticalmente il maniglione Togliere il serbatoio Optional e svuotar lo dalla soluzione Smontare la spazzola o il disco trascina tore dopo l utilizzo AVVERTENZA Non lasciare la macchina ferma con spaz zola o disco trascinatore pad montato per evitare la compromissione degli stessi Se il pad risulta sporco lavarlo ad una temperatura massima di 60 Se la spazzola risulta sporca lavarla con ...

Страница 45: ...aricare e pulire il serbatoio dell acqua per evitare depositi o incrosta zioni Per svuotare il serbatoio acqua liberarlo da gli appositi supporti AVVERTENZA Conservare l apparecchio in un luogo co perto e privo di umidità OPERAZIONI DA EFFETTUARSI SECONDO NECESSITÀ 7 1 c Sostituzione spazzola Si rende necessaria la sostituzione della spazzola quando la stessa si presenta usu rata con lunghezza set...

Страница 46: ...porco da pulire Soluzione detergente insuf ficiente Riempire il serbatoio Optio nal di soluzione detergente Spazzola consumata Sostituire la spazzola Levigatura lucidatura pavi mento insufficiente Pad usurato Sostituire il pad La macchina funziona in modo irregolare o vibra for temente Controllare che la spazzola o il disco trascinatore siano montati correttamente Rimontare correttamente la spazzo...

Страница 47: ...ità Prodotto MONOSPAZZOLA MODELLO CODICE EM 143 00 185EL HU EM 143 DS 00 197EL HU Direttive CE pertinenti 2006 42 CE 2009 127 CE 2014 30 UE 2011 65 UE Norme armonizzate applicate EN 60335 1 EN 60335 2 67 Norme nazionali applicate Nome e posizione della persona autorizzata a fir mare la Dichiarazione Giuseppe Riello Amministratore Delegato Ghibli Wirbel S p A Firma ________________ Giuseppe Riello ...

Страница 48: ...ITALIANO 12 Manuale HU30 923_HOLLU_EM143 EM143 DS_1ed_07 2019 indd 12 16 07 2019 08 12 21 ...

Страница 49: ...Copertina HU30 923_HOLLU_EM143 EM143 DS_1ed_07 2019 indd 13 15 07 2019 17 08 05 ...

Страница 50: ...Copertina HU30 923_HOLLU_EM143 EM143 DS_1ed_07 2019 indd 14 15 07 2019 17 08 05 ...

Страница 51: ...Copertina HU30 923_HOLLU_EM143 EM143 DS_1ed_07 2019 indd 15 15 07 2019 17 08 05 ...

Страница 52: ...2 2019 Copertina HU30 923_HOLLU_EM143 EM143 DS_1ed_07 2019 indd 16 15 07 2019 17 08 08 hollu Systemhygiene GmbH A 6170 Zirl Salzstraße 6 Tel 43 5238 52800 Fax 43 5238 52800 990 E Mail info hollu com Website www hollu com ...

Отзывы: