ENGLISH
- 3
1.1 INTRODUCTION
DANGER:
Before using the appliance, read the accom-
panying
“SINGLE DISC SAFETY WARN-
INGS”
booklet carefully.
This manual forms an integral part of the ma-
chine itself. It must therefore be kept in a safe
place where it is accessible to all users (opera-
tors and maintenance personnel) throughout
the life of the machine until it is scrapped.
1.2 - INTENDED USE OF
THE MACHINE
WARNING:
This machine is for indoor use only.
DANGER:
Any other use releases the manufacturer
from liability for harm to persons and/or
property and invalidates any warranty
condition.
This machine is intended for commercial use,
for example in hotels, schools, hospitals, fac-
tories, shops, offices and rental businesses.
The machine has been designed and built:
for professional use, for cleaning floors and
carpets, for polishing floors, for sanding
floors (e.g. parquet and uneven surfaces).
1.3 - NON-INTENDED USE
OF THE MACHINE
WARNING:
The machine is not intended for outdoor
use.
DANGER:
- do not wash floors with water above 50 °C;
- do not use diesel/petrol or corrosive de-
tergents to wash floors;
- do not wash and suck up corrosive, flam-
mable or explosive liquids, even if diluted.
2.1 COMPONENT
ASSEMBLY
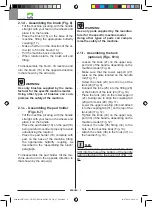
2.1.a - Positioning the handle (Fig. 1)
- Place the handle (1) on the base (2),
aligning the four holes on the handle with
the holes on the machine body.
- Tighten the screws (3) provided.
2.1.b - Electrical machine handle/
body connection (Fig. 2)
- Plug the handle into the machine body
by putting the plug (7) into the machine
socket (8);
For models equipped with a socket with
gasket (9) put the gasket in place be-
fore connecting the plug and tighten the
screws (10) supplied.
2.1.c - Assembling the cable reel
supports (Figs. 3/5)
Some models are equipped with cable reel
supports that must be assembled directly on
the shaft of the handle:
- Fit the short coupling (11) into the long
coupling (12) (Fig. 3).
- Tighten the screw (13) to the knob (14),
keeping the latter to the right (Fig. 4).
- The hook (15) of the support can be ro-
tated depending on usage (Fig. 5).
- Place one support at the top of the handle
and a second support at the bottom.
Manuale HU30-923_HOLLU_EM143 EM143 DS_1ed_07-2019.indd 3
16/07/2019 08:10:38
Содержание EM 143
Страница 4: ...4 Copertina HU30 923_HOLLU_EM143 EM143 DS_1ed_07 2019 indd 4 15 07 2019 17 08 04 ...
Страница 5: ...5 Copertina HU30 923_HOLLU_EM143 EM143 DS_1ed_07 2019 indd 5 15 07 2019 17 08 04 ...
Страница 6: ...6 Copertina HU30 923_HOLLU_EM143 EM143 DS_1ed_07 2019 indd 6 15 07 2019 17 08 04 ...
Страница 7: ...7 Copertina HU30 923_HOLLU_EM143 EM143 DS_1ed_07 2019 indd 7 15 07 2019 17 08 04 ...
Страница 8: ...8 Copertina HU30 923_HOLLU_EM143 EM143 DS_1ed_07 2019 indd 8 15 07 2019 17 08 04 ...
Страница 10: ...10 Copertina HU30 923_HOLLU_EM143 EM143 DS_1ed_07 2019 indd 10 15 07 2019 17 08 05 ...
Страница 12: ...Copertina HU30 923_HOLLU_EM143 EM143 DS_1ed_07 2019 indd 12 15 07 2019 17 08 05 ...
Страница 24: ...DEUTSCH 12 Manuale HU30 923_HOLLU_EM143 EM143 DS_1ed_07 2019 indd 12 16 07 2019 08 10 18 ...
Страница 36: ...ENGLISH 12 Manuale HU30 923_HOLLU_EM143 EM143 DS_1ed_07 2019 indd 12 16 07 2019 08 11 10 ...
Страница 48: ...ITALIANO 12 Manuale HU30 923_HOLLU_EM143 EM143 DS_1ed_07 2019 indd 12 16 07 2019 08 12 21 ...
Страница 49: ...Copertina HU30 923_HOLLU_EM143 EM143 DS_1ed_07 2019 indd 13 15 07 2019 17 08 05 ...
Страница 50: ...Copertina HU30 923_HOLLU_EM143 EM143 DS_1ed_07 2019 indd 14 15 07 2019 17 08 05 ...
Страница 51: ...Copertina HU30 923_HOLLU_EM143 EM143 DS_1ed_07 2019 indd 15 15 07 2019 17 08 05 ...

