


4
ASSEMBLY
✰
1. Remove the battery cover from the transmitter by pressing
on the cover and sliding it downward. Install four new “AA”
batteries, then replace the cover.
✰
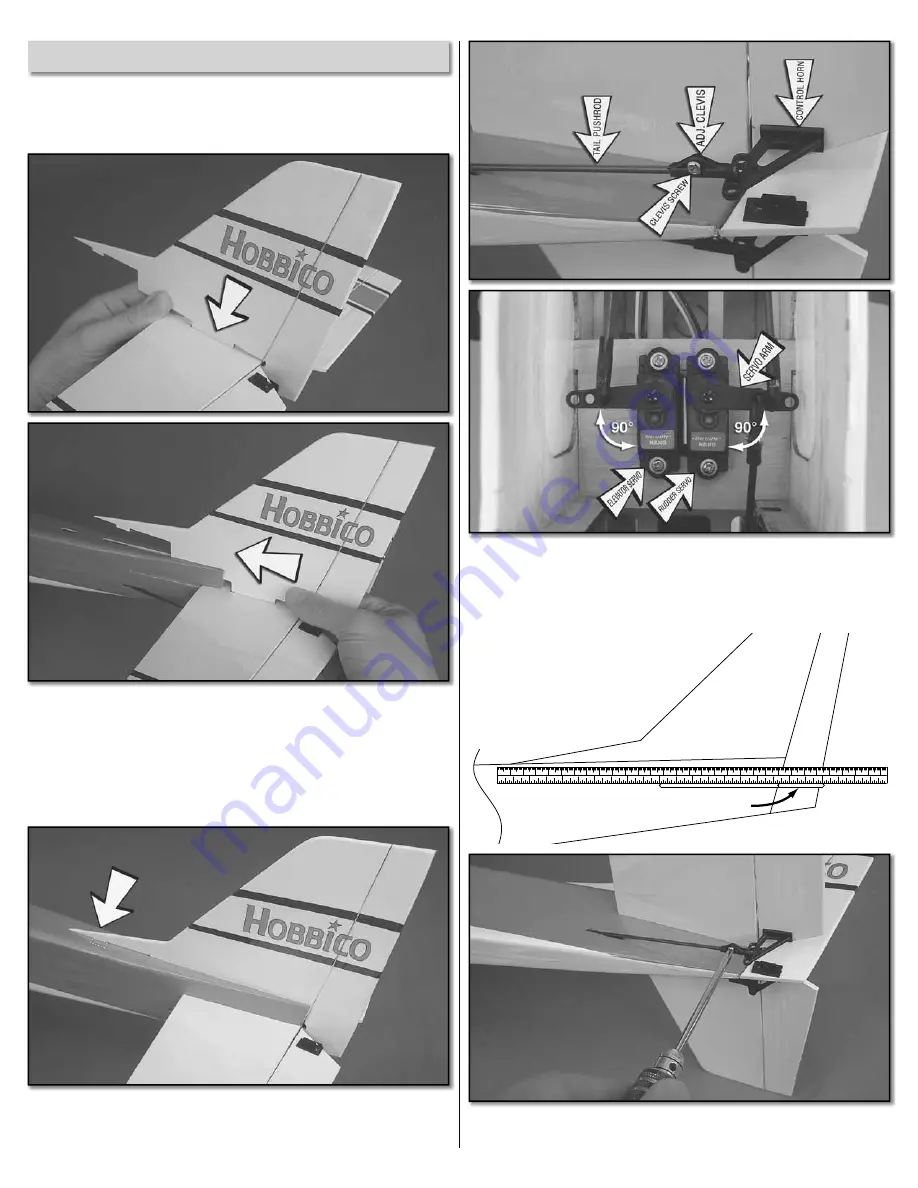
2. Fit the large
vertical fi n
tab part way into the slot in the
horizontal stabilizer
. Slide the two pieces together into the aft
end of the
fuselage
, but leave the pieces only partially inserted
into the fuse. Fit the tail pushrods into the
adjustable clevises
that are attached to the tail
control horns
. Slide the vertical fi n
and horizontal stabilizer as far forward as they can go.
✰
3. There is a slot in the fuselage that the large tab on the
vertical fi n must pass through which locks the horizontal stabilizer
in place.
✰
4. The tail surface servo arms must be perpendicular to the
servo cases as shown when adjusting the pushrod positions in
the clevises. If the servo arms are not perpendicular to the servo
cases, carefully move the arms by hand until they are.
20
30
40
10
1
130
90
70
60
80
50
2
3
100
110
120
4
5
170
140
150
160
6
210
180
190
200
7
8
300
260
240
250
220
230
9
10
280
290
270
11
ELEVATOR IS FLAT
✰
5. Move the elevator pushrod further in or out in the clevis
until the elevator halves are in the
neutral
position. The neutral
Содержание NexSTAR mini EP RxR
Страница 16: ... ...


