10
Balance the Model (C.G.)
DO NOT DISREGARD THIS STEP!
This important step
is also referred to as “checking the C.G.” (center of gravity).
Simply stated, the center of gravity is the point at which the
model balances when lifted under the wing. If the C.G. is
too far forward, the model will be “nose-heavy” and could be
diffi cult to takeoff and land and lose some of its self-correcting
tendencies. If the C.G. is too far aft, the model will be “tail-
heavy” and the controls may be too sensitive, making the
model too diffi cult to control—especially for an inexperienced
pilot! Follow the instructions to balance the model correctly,
thus giving you the greatest chances for success!
✰
1. Make certain the model is in “Ready-to-fl y” condition with all
components mounted and installed (propeller, spinner, receiver,
fl ight battery, etc.)
✰
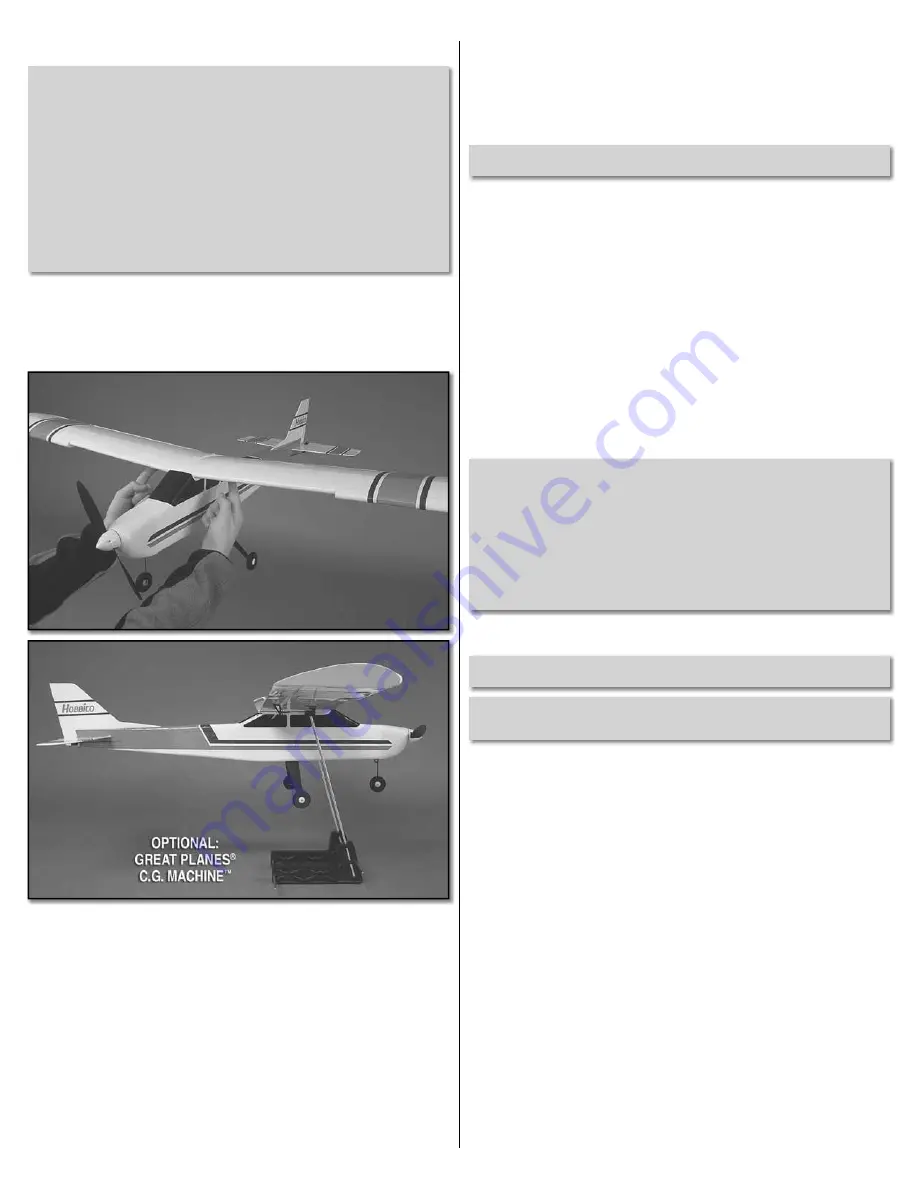
2. Mount the wing to the fuselage with the wing bolt. Lift the
model on both sides of the fuselage with your fi ngertips on the dots
on the bottom of the wing. You can also use a C.G. Machine which
is a useful tool designed for setting the C.G. of model planes.
✰
3. If the fuselage is level when lifting the model with your
fi ngers on the dots, the C.G. is correct. Proceed to the checklist
in the following section. If you cannot fi nd a spot between the two
lines where the airplane balances, then either one of the following
will happen: If the tail drops when lifting the model, the plane is
tail heavy and the fl ight battery will need to be moved forward on
the battery tray. If the nose drops, the plane is nose heavy and
the fl ight battery will need to be moved back on the battery tray.
When you have determined where the fl ight battery needs to be
positioned in order to balance the plane on the dots, make a mark
somewhere on the battery tray so you will have a reference point
when installing the battery for fl ight.
PREFLIGHT
Identify Your Model
No matter if you fl y at an AMA sanctioned R/C club site or if you
fl y somewhere on your own, you should always have your name,
address, telephone number and AMA number on or inside your
model. It is
required
at all AMA R/C club fl ying sites and AMA
sanctioned fl ying events. Fill out the identifi cation tag on page 19
and place it on or inside your model.
Charge the Batteries
Follow the battery charging instructions that came with your radio
control system to charge the transmitter battery. You should always
charge your transmitter battery the night before you go fl ying, and
at other times as recommended by the radio manufacturer.
CAUTION:
Unless the instructions that came with your radio
system state differently, the
initial
charge on
new
transmitter
batteries should be done for 15 hours
using the slow-charger
that came with the radio system
. This will “condition” the
battery so that the next charge may be done using the fast-
charger of your choice. If the initial charge is done with a fast-
charger the battery may not reach its full capacity and you may
be fl ying with a battery that is only partially charged.
MOTOR SAFETY PRECAUTIONS
Failure to follow these safety precautions may result in
severe injury to yourself and others.
✰
Get help from an experienced pilot when learning to
operate motors.
✰
Use safety glasses when running motors.
✰
Do not run the motor in an area of loose gravel or sand; the
propeller may throw such material in your face or eyes.
✰
Keep your face and body as well as all spectators away from
the plane of rotation of the propeller as you run the motor.
✰
Keep these items away from the prop: loose clothing, shirt
sleeves, ties, scarfs, long hair or loose objects such as pencils
or screwdrivers that may fall out of shirt or jacket pockets into
the prop.
✰
The motor gets hot! Do not touch it during or right
after operation.
✰
Do not throw anything into the propeller of a running motor.
Содержание NexSTAR mini EP RxR
Страница 16: ... ...


