25
Dual Aileron Servos & Flaps
The NexSTAR EP Select can also be equipped with dual
aileron servos and fl aps. To set up the airplane this way,
you need to follow the above instructions for the dual servo
installation and then install the fl aps as indicated below. The
necessary hinges on the wing were located where needed
when the wing was built.
For this section you will need:
1
- Additional Aileron Servo
to be used for fl aps
1
-6" [152mm] Servo
Extension
2
-6" [152mm] Pushrods
2
-Nylon Clevises
1
-Faslink
2
-5/32" [4mm] Wheel Collars
2
- 6-32 x 1/4" [6.4mm] Socket
Head Cap Screws
1
-Screwdriver
1
-Hobby Razor Saw
❏
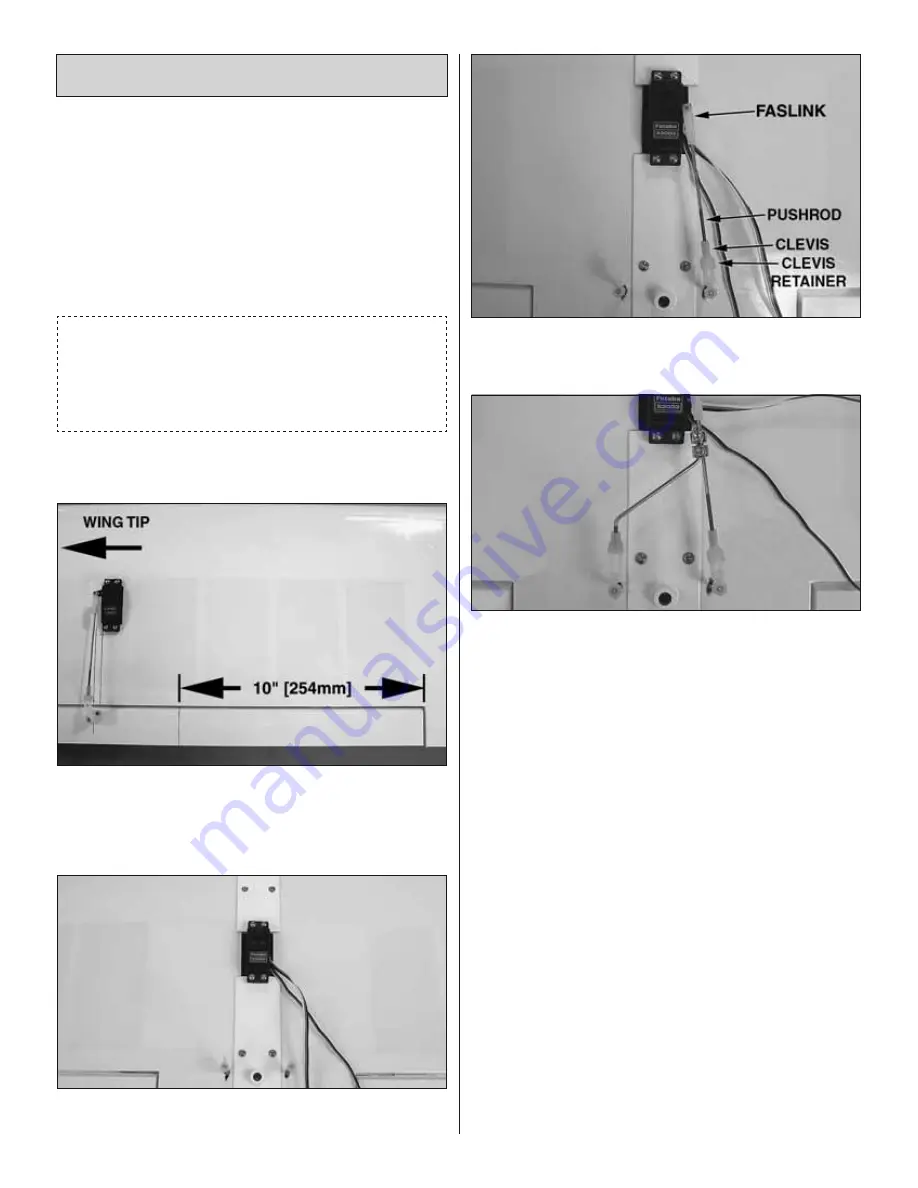
1. Draw a line on the aileron 10" [254mm] away from the
aileron end at the root and use a hobby razor saw to cut the
aileron at that line.
❏
2. Install the fl ap servo in the center of the wing, where the
original aileron servo was.
❏
3. Using one of the 6" [152mm] pushrods, a nylon clevis,
clevis retainer and a Faslink, make a pushrod and connect it
to the fl ap servo and fl ap horn as shown above.
❏
4. Bend the second pushrod as shown above and connect
it to the fi rst with two 5/32" [4mm] wheel collars.
Note:
Do not
use the small set screws typically included with the wheel
collars. Tighten the two 6-32 x 1/4" [6.4mm] SHCS to secure
the two fl ap pushrods together as shown above.
❏
5. The fl aps should only be able to move down 1/2" [13mm].
There is no up movement for the fl aps.
Flap installation is fi nished.
Important: When using servo controlled fl aps, only
deploy the fl aps at 1/3 throttle or less. Expect the plane
to pitch up until your speed is depleted.
Note:
The two aileron servo leads will connect to two different
channels in your receiver and then the fl ap servo to another
channel. Follow your radio manufacturer’s instructions to set-up
the aileron mixing and fl aps in your NexSTAR EP Select.
Follow these steps to activate your fl aps:
1. Plug the wire from the center servo that controls your fl aps
to channel 6 of your receiver.
2. Activate channel 6 on your transmitter. This is done by
pressing the “Mode” and “Select” keys simultaneously (with
your transmitter “ON”), and pressing the “Mode” key until you
see the screen that reads “FLTR”. You will also notice the


