19
❏
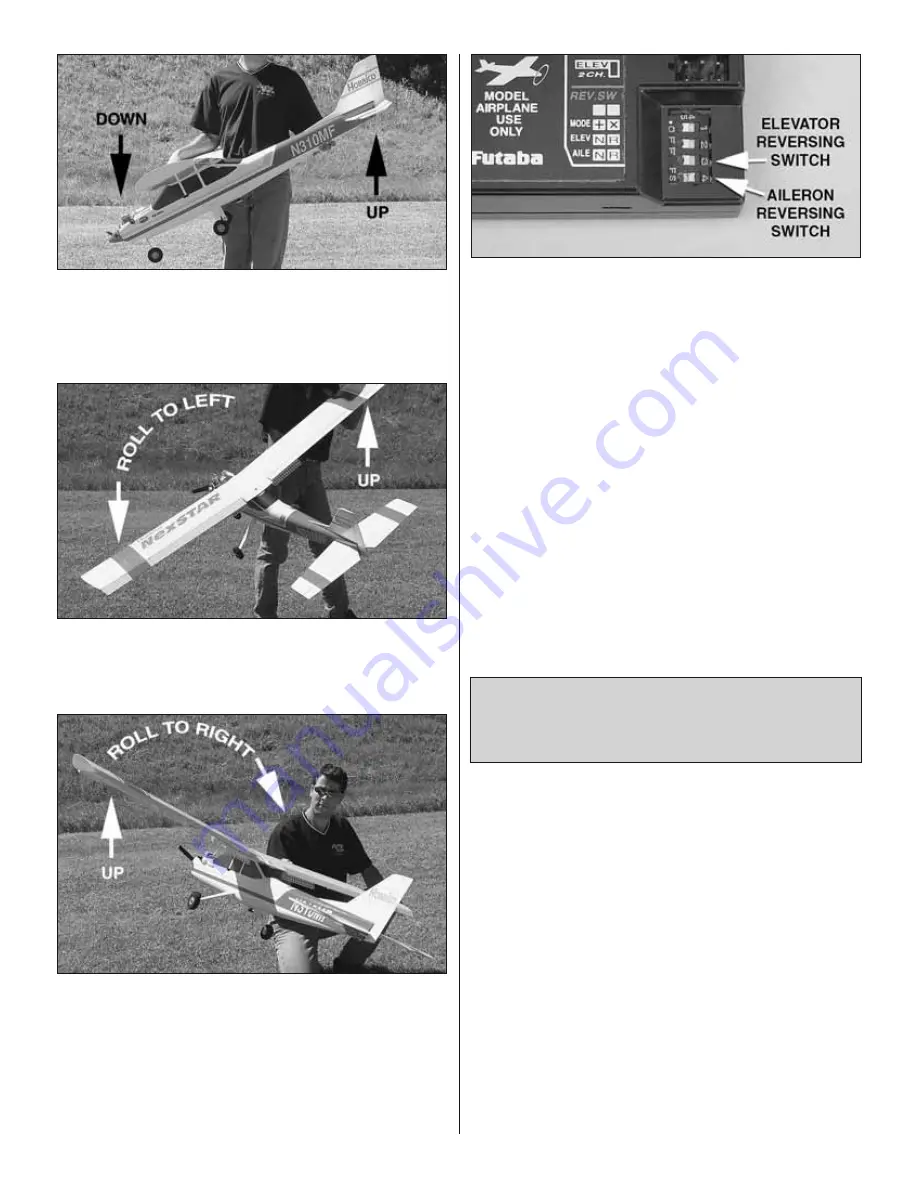
3. Point the nose of the airplane down. The elevator should
move up.
❏
4. With the airplane level, point the right wing up. The right
aileron should move up.
❏
5. With the airplane level, point the left wing up. The left
aileron should move up.
The amount of correction the PA-2 will induce on your servos
will depend on the gain setting of the unit. The higher the
gain; the larger the correction.
If any of the corrections made by the PA-2 are in the wrong
direction, you will need to reverse the correction direction using
the corresponding reversing switches on the PA-2 module.
Note:
While the airplane is on the ground, the shadows
underneath it will cause the PA-2 to add corrections to
the control surfaces. As you taxi, these corrections will
change. This is normal and it does not cause any undesired
performance from the airplane. Do your normal taxiing and
take off routine. As the airplane takes off, those corrections
due to the airplane’s shadow will go away and the PA-2 will
resume normal operation. Again, those corrections do not
cause any irregular, unexpected or undesired takeoff or
landing performance.
Note:
Because of the sensing characteristics of the PA-2
sensor, in bright light days the unit may have a slight tendency
to trim the airplane to fl y towards the sun. This tendency
normally amounts to one or two clicks of aileron trim into the
sun. This is normal and you should not worry about it unless
it becomes excessive in which case you should land and wait
for the conditions to change.
Adjusting the PA-2 from
Your Transmitter
It is possible to adjust the sensitivity of the PA-2 unit from
your transmitter, just follow these simple steps:
1.
Plug the red connector marked “AUX” into the channel 6
port on your receiver.
Note:
Channel 6 on your transmitter is
the dial on the upper right side of the transmitter.
2.
Activate channel 6 on your transmitter. This is done by
pressing the “Mode” and “Select” keys simultaneously (with
your transmitter “On”), and pressing the “Mode” key until you
see the screen that reads “FLTR”. You will also notice the
letters “INH” which tells you that the channel is “Inhibited” or
“Inactive”, push the DATA INPUT lever forward and the “INH”
will turn to “ON”. This tells you that the dial is now active and you
can adjust the sensitivity of your PA-2 from your transmitter.


