HME Clear-Com 104G070 Скачать руководство пользователя страница 4

Note:

 The storage ports do not charge batteries.

Fig. 4.1

© 2022 HME Clear-Com Ltd. All rights reserved.

4

4.  When the headset pairing ring turns solid 

green, pairing is successful. The headset status 
LED also turns solid green. Registration also 
happens automatically with the initial pairing. 
See Fig. 3.2 note if pairing fails. 

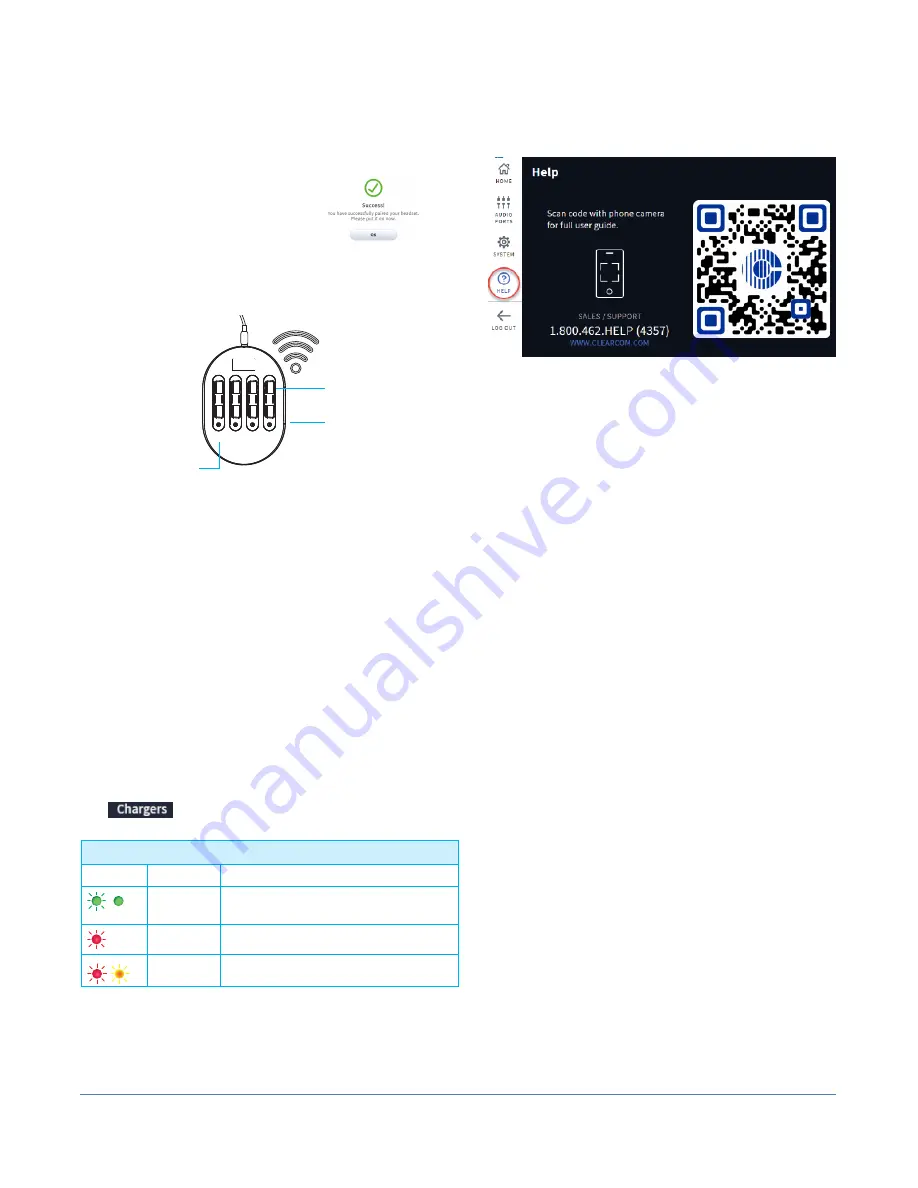
5.  Select

 Next

, and this Success   

prompt appears. Tap 

OK

 to 

begin using your headset.


HELP 

Need more help? Tap 

HELP

 and use the contact 

information or QR code presented on the screen. 

Fig. 4.2

1            2            3            4

BATTERY CHARGER

with POWER SUPPLY

(AC70)

Charging

Ports (x4)

on top

Storage

Ports (x4)

on sides

Status LEDs

Using the AC70 Battery Charger:


1.  Install the AC70 close to the base station (<10 ft 

(3 m)) and connect it to a power outlet. 

Note:

 The AC70 will still charge batteries outside 

this range but without base station monitoring.

2.  Insert a BAT70 battery into a charging port to 

begin charging (even new batteries must be 
charged). The Status LEDs on the AC70 indicate 
charge status (see AC70 LED Reference Table). 

Note

: When within range, battery status is 

provided via the base station 

HOME

 screen. Tap 


 on the 

HOME

 screen to view status.

AC70 LED Reference Table

LED

Color

Status/Description


Green

Flashing green = Charging
Solid green = Fully charged 


Red

Flashing red = Incompatible battery


Red/Yellow Flashing red & yellow = Fault condition

AC70 BATTERY CHARGER OVERVIEW

Содержание Clear-Com 104G070

Страница 1: ...component is online active and func tional In this example the Network is connected and functioning properly A red indicator means the feature component is offline inactive or requires attention In this example there are no headsets detected Turn on a head set and pair one for this indicator to turn green A yellow indicator is a transitional state In this example the transceiver is scanning for av...

Страница 2: ...mber above the knob indicates the current volume Use the or signs at the end of the slider bar for single step adjustments Note Sidebar Menu options like AUDIO PORTS require a four digit PIN to access The user receives this after installation Record here The SYSTEM screen is where you con figure the system such as date and time channel setup settings etc This screen also contains system info and u...

Страница 3: ...atus LED turns solid the Boom LED turns off Chan 2 Red Red Tap to talk to channel 2 The Status LED flashes red while the Boom LED turns on solid red Tap again to stop The Status LED turns solid the Boom LED turns off Volume Up Tap to increase volume the headset beeps become louder as confirmation Press and hold to maximize volume to loudest Volume Down Tap to decrease volume the headset beeps beco...

Страница 4: ...torage Ports x4 on sides Status LEDs Using the AC70 Battery Charger 1 Install the AC70 close to the base station 10 ft 3 m and connect it to a power outlet Note The AC70 will still charge batteries outside this range but without base station monitoring 2 Insert a BAT70 battery into a charging port to begin charging even new batteries must be charged The Status LEDs on the AC70 indicate charge stat...

Отзывы: