


© 2022 HME Clear-Com Ltd. All rights reserved.
2
Channels
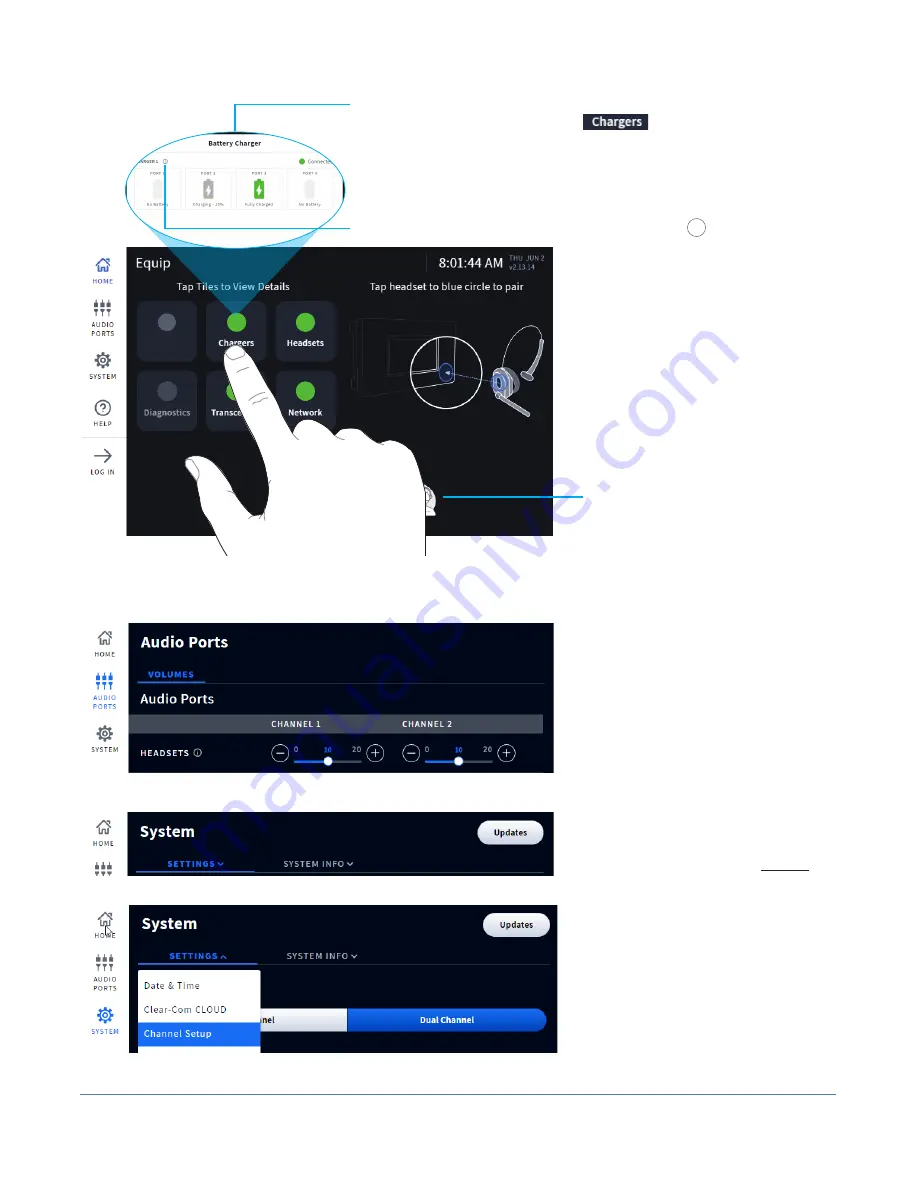
More details can be accessed by tapping on a feature/component.
For example, when you tap on the
tile (see Fig. 2.1), a
pop-up screen provides you with additional details. This pop-up
image to the left shows the four battery ports on the charger and the
charging status of any docked battery.
Note:
the charger must be
within 10 feet (3 m) of the base station to monitor it this way.
The
AUDIO PORTS
screen allows you
to adjust volume levels of external
audio port connections. Use the
white slider knob and drag to the
right to increase volume or to the
left to decrease volume. The blue
number above the knob indicates
the current volume. Use the - or +
signs at the end of the slider bar for
single-step adjustments.
Note
: Sidebar Menu options like
AUDIO PORTS
require a four-digit PIN
to access. The user receives this after
installation. Record here:
The
SYSTEM
screen is where you con-
figure the system, such as date and
time, channel setup/settings, etc.
This screen also contains system info
and updates. Tap on the
SETTINGS
or
SYSTEM INFO
tab and select from
the drop-down list. Fig. 2.4 shows
Dual Channel as the default channel
under Channel Setup. To change,
select Single Channel and Save.
Tooltips also provide you with information. Tap on
i
to open.
Fig. 2.1
Fig. 2.2
Fig. 2.3
Fig. 2.4
HOME SCREEN OVERVIEW
AUDIO PORTS & SYSTEM OVERVIEW
The
ACTIVITY
Indicator at the bottom
of the
HOME
screen shows dual or
single channel headsets in use.


