background image


22 


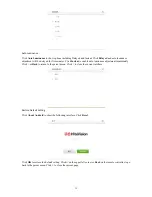
New White Board and Setting 

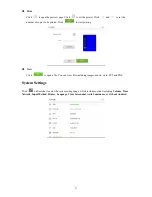
Click 

  and select New, View, Delete or Set from the menu. 


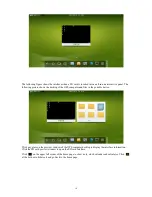
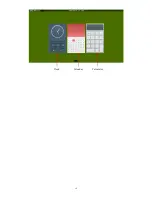
Click Set to set the color and shade of the white board as shown in the following figure: 


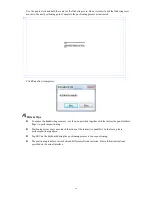
Pen/Line/Color 

If you want to use marker, click and hold 

  for two seconds to set the line and color.   


If you want to use highlighter, click and hold 

  for two seconds to set the line and color.   


Содержание 70GT deluxe series

Страница 1: ...anel Honghe Technology Group www honghe tech com V901 20140703 Please properly keep the manual for further reference This is the general user manual for all interactive panels Therefore it may be diff...

Страница 2: ...Operation 11 Start Up 11 Shutdown 11 Installation of HitePanel 12 Uninstall HitePanel 12 Position HitePanel 13 Assemble Built in Computer 17 Smartbar 17 Home Page 17 Task Manager 20 White Board 21 Ga...

Страница 3: ...ge 37 Sound Mode 37 Channel 39 Setting 39 Time 39 Parent Control 40 ECO Mode 40 Serial Port Control 41 Specifications of PC Mode VGA Input 42 Formats Supported by USB Mode 43 Instructions in Provision...

Страница 4: ...ntenance engineer to service it Do not let any liquid and metal object go into the product If any liquid or metal object goes into the product cut off the power and find a professional maintenance eng...

Страница 5: ...33E HD I7035E HD I7036E HD I7039E HD I7048E HD I7049E HD I7050E HD I7051E HD I7052E HD I7053E HD I7055E HD I7056E HD I7058E HD I7059E HD I7060E HD I7061E HD I7062E HD I7063E HD I7070E HD I7066E HD I70...

Страница 6: ...ng capacity of the mounting support must be at least four times of the actual weight of the display to ensure steadiness of the interactive panel Ventilation Ventilation requirements Distance to the m...

Страница 7: ...oincide with users preference Adopting infrared array scanning and sensing technology HID drive free plug and play Outstanding display edit functions supporting instant editing Multiple optional pens...

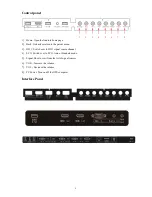
Страница 8: ...8 Outer Appearance Front view Front view Left loudspeaker Right loudspeaker Control panel OPS computer Interface panel Interface panel Rocker switch Left view Right view Rear view...

Страница 9: ...rent menu 3 HD 1 Switch over to HD 1 signal source channel 4 ECO Switch over to ECO Auto or Standard mode 5 Signal Show or exit from the list of signal sources 6 VOL Increase the volume 7 VOL Decrease...

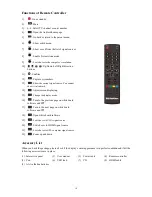
Страница 10: ...roid 14 Adjust screen displaying 15 Change the display mode 16 Turn to the previous page on white board software and PPT 17 Turn to the next page on white board software and PPT 18 Open white board so...

Страница 11: ...ed The power LED turns green Shutdown Press PC Power to turn off the OPS computer for all in one models only Press Power on the control panel or Standby on the remote controller to enter the standby s...

Страница 12: ...nel must be installed and run for Windows XP 1 Use the USB lead provided together with the display to connect the interactive panel to PC via the USB port 2 Inset the software installation disk into t...

Страница 13: ...anel under the following circumstances When you first use the interactive LED display Re install the drive program When you connect the display to another PC The handwriting display adopts nine point...

Страница 14: ...old the center of the flickering cross Do not release it until the flickering cross moves to the next positioning point Complete the positioning process as instructed After it completes you will retur...

Страница 15: ...5 Positioning Method for Windows 7 1 Connect the interactive panel to PC using the USB lead via the USB interface on the panel 2 Select Tablet PC Setting on Control Panel 3 Select on the setting windo...

Страница 16: ...he handwriting accuracy use the pen provided together with the interactive panel rather a finger to perform positioning Positioning errors may cause touch functions of the interactive panel fail In th...

Страница 17: ...hite board program is started the smartbar enters the white board mode under which you can choose a pen line and color to write on the white board Click and select New View Delete or Setting from the...

Страница 18: ...mputer and files in the portable device Click any place on the preview window of the OPS computer desktop to display the interface information Click the SD card preview window to open the SD card inte...

Страница 19: ...19 Clock Calendar Calculator...

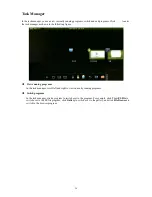
Страница 20: ...figure View running programs In the task manager scroll left and right to view currently running programs Switch programs In the task manager click a program to switch over to the program For example...

Страница 21: ...from the List to end the program White Board The white board provides the writing function In the white board program you can select a pen line and color to write and use eraser to erase content on t...

Страница 22: ...menu Click Set to set the color and shade of the white board as shown in the following figure Pen Line Color If you want to use marker click and hold for two seconds to set the line and color If you w...

Страница 23: ...the directory through the following ways 1 Go back to the home page and click on Smartbar to enter the file manager Find folder Screenimage in the file system 2 Click to enter Fast View and open folde...

Страница 24: ...to show all folders containing images Click a folder to show images contained in the folder Single image Click one image in a folder Scroll left to show the previous image and right to show the next U...

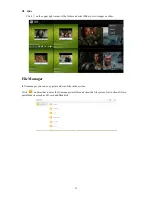
Страница 25: ...ect Slide to view images as slides File Manager In fire manager you can copy print and view files in the system Click on Smartbar to enter the fire manager interface and show the file system It also s...

Страница 26: ...26 Copy Click one file or tick off Multiple and choose several files Click to copy selected files to the portable device...

Страница 27: ...ted Click to start printing View Click to open a file You can view files including images music word PPT and PDF System Settings Click on Smartbar to enter the system settings page which includes opti...

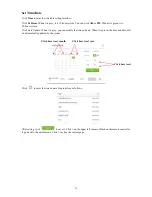
Страница 28: ...t is grey you can modify the time and date When it is green the time and date will be automatically updated by the system Click to enter the time zone setting interface as follows After setting click...

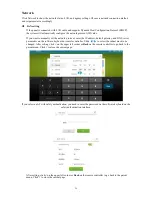
Страница 29: ...r the IP address default gateway and DNS server parameters on the software keyboard or remote controller Slide to select the subnet mask to be changed After setting click on the upper left corner or B...

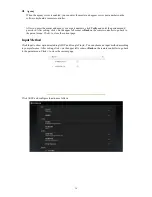
Страница 30: ...er setting click on the upper left corner or Back on the remote controller to go back to the parent menu Click to close the current page Input Method Click Input to show options including ASOP and Goo...

Страница 31: ...parent menu Click to close the current page Language Click Language to show options including Chinese Simplified Chinese Traditional and English Select a language Click or Back to return to the parent...

Страница 32: ...enable auto luminance adjustment immediately Click or Back to return to the parent menu Click to close the current interface Restore Default Setting Click About Android to show the following interface...

Страница 33: ...lick on the Smartbar or Listen Alone on the remote controller and the screen will turn black You can tap any place on the screen or press Listen Alone again under the Listen Alone mode to return to no...

Страница 34: ...34 Page 1 Page 2 Calculator Click to enter the calculation page Click numbers and characters on the keyboard Clock Click to enter the clock page Click Start to start timing and Stop to stop it...

Страница 35: ...ick to start the music program The system will display songs in the local disk by artists albums file names playlist and playing status ES File Click to open ES File You can copy cut delete move and r...

Страница 36: ...ct all files Temperature Measuring Click to measure the temperature of the panel Select Signal Channel There are three ways to select a signal channel 1 1 Press Signal on the remote controller 1 2 Pre...

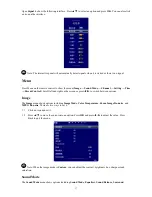
Страница 37: ...left and right on the screen or press to switch between options Image The Image menu shows options including Image Mode Color Temperature Zoom Image De noise and MPEG De noise There are two ways to se...

Страница 38: ...two ways to set it 1 1 Click an icon and set it 1 2 Press to move the cursor onto an option Press OK and press to adjust the value Press Back to quit the menu Note When the sound mode is set to Custo...

Страница 39: ...ng The Setting menu shows options including Display Time Switch Mode Color Range MHL Auto Switch Movie Mode and Default Setting There are two ways to set it 1 1 Click an icon and set it 1 2 Press to m...

Страница 40: ...mode ECO Auto Standard Press this button to switch among the three modes The power consumption will be halved under the ECO mode Under the Auto mode the display will automatically adjust the brightne...

Страница 41: ...9 CF 9 7F 08 99 A2 B3 C4 02 ff 01 29 CF HD 1 7F 08 99 A2 B3 C4 02 ff 01 0A CF 0 7F 08 99 A2 B3 C4 02 ff 01 2A CF HD 2 7F 08 99 A2 B3 C4 02 ff 01 0B CF OK 7F 08 99 A2 B3 C4 02 ff 01 2B CF OPS computer...

Страница 42: ...Vertical Frequency Hz Horizontal Vertical Sync Polarity TTL 1 VESA 640X480 60 31 5 60 N N 2 VESA 640X480 72 37 9 72 N N 3 VESA 640X480 75 37 5 75 N N 4 VESA 800X600 56 35 1 56 P P 5 VESA 800X600 60 3...

Страница 43: ...er than a finger to write Grasp the pen as far to the nib as possible The angle between the pen and display should be larger than 60 degrees Do not let sleeve or wrist touch the display Strong light o...

Страница 44: ...ow at the top of the remote controller Check if it is blocked 3 Check contacts of the batteries Computer cannot be started applicable for models with computers 1 Check if the computer adapter is corre...

Страница 45: ...upply Do not maximize the brightness and contrast of the LED display for a long period of time which can shorten the LED display s service life Do not write on the touch screen with a hard object whic...

Страница 46: ...ith the instructions may cause harmful interference to radio communications However there is no guarantee that interference will not occur in a particular installation If this equipment does cause har...

Отзывы: