


--- 32 ---
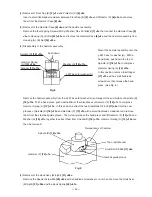
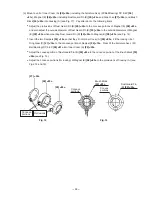
(6) Mounting Guide Sleeve (D)
[4]
(Model WH 9DMR only)
Insert the two Steel Balls D 3.5
[9]
into the hole of Anvil (F)
[10]
. Mount Guide Sleeve (D)
[4]
, Guide Spring
(B)
[3]
and Washer (D)
[2]
in sequence. Mount the Retaining Ring
[1]
into the groove of anvil using the J339
jigs (E) and (F) for retaining ring as illustrated in Fig. 18.
NOTE: Be sure to replace the Retaining Ring [1] with new one because the Retaining Ring [1] may be
deformed and Guide Sleeve (D) [4] can come off if the deformed Retaining Ring [1] is used
again.
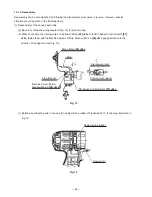
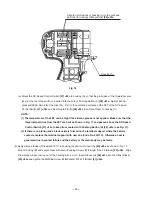
(7) Reassembly of the hook
Check that the V-Lock Nut M5
[43] <38>
is mounted into the Hook Ass'y (W/Light)
[41] <36>
. Mount the Hook
Spring
[48] <43>
and secure it with the Special Screw M5
[49] <44>
. (Make sure to mount the Hook Spring
[48] <43>
with its larger diameter side pointing inward the housing.)
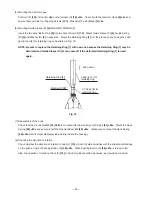
(8) Checking the direction of rotation
Check whether the direction of rotation of Anvil (F)
[10]
or Anvil (U)
<5>
coincides with the directional markings
on the push-on side of Pushing Button (A)
[38] <33>
. When Pushing Button (A)
[38] <33>
is turned to (R)
side, the direction of rotation of Anvil (F)
[10]
or Anvil (U)
<5>
should be clockwise, as viewed from behind.
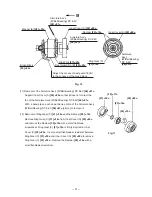
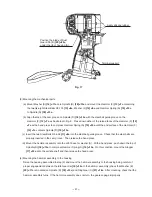
(5) Mounting the hammer case
Put Anvil (F)
[10]
or Anvil (U)
<5>
on the Spindle (D)
[18] <13>
. Cover it with the Hammer Case
[8] <4>
and
secure them with the four Tapping Screws (W/Sp. Washer) D4 x 25 (Black)
[7] <3>
.
Push down.
J-339 jig (F) for
retaining ring
J-339 jig (E) for
retaining ring
Fig. 18
Washer (D)
[2]
Retaining Ring
[1]
Содержание WH 9DMR
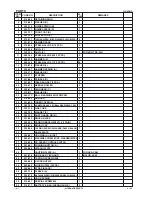
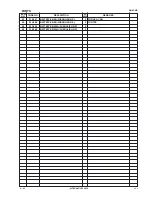
Страница 46: ... 4 ITEM NO CODE NO DESCRIPTION REMARKS NO USED 4 05 WR 9DMR Printed in Japan 050401N ...
Страница 47: ......