background image

TABLE OF CONTENTS 


1


HITACHI 

VIDEO DECK 


VT-MX424A 

Owner's Manual 

Your Complete Guide to Videocassette Viewing and Recording 

Using these quality features: 

• Rotary 4-head Record/Playback System  
• Bilingual on-screen menu display selectable in English or Spanish  
• Infrared remote control  
• Real time tape counter  
• 181 channel capability PLL frequency synthesizer tuner with direct station call 
• Auto power on and off system  
• Auto counter reset  
• Auto rewind when the end of a tape is reached 
• Direct Button Operation  
• 2 Step Picture Search Operation  
• Still  
• Digital Auto Tracking (DTR)  
• Auto Repeat  
• Rental Play Mode  
• Three different tape speeds (SP/LP/SLP)  
• IRT (Instant Recording Timer)  
• 1 Year, 7 events (including Daily and Weekly Timer Recording)  
• Auto Return  
• Time Search / Quick-Find / Index Search  
• Just-In-Time Recording 
• Remaining Tape Running Time Display 
• Slow Motion 
• The VCR Plus+ system 
• The VCR+ C3 system 

VCR Plus+, C3, and Plus-Code are trademarks of Gemstar Development Corporation.  The VCR Plus+ system is 
manufactured under license from Gemstar Development Corporation. 
With the VCR Plus+ C3 system, this video cassette recorder can automatically select the appropriate channel on your 
compatible cable box.  C3 and VCR Plus+ C3 are trademarks of Gemstar Development Corporation. 

HITACHI HOME ELECTRONICS (AMERICA), INC. 
3890 Steve Reynolds Blvd.,  
Norcross, GA 30093  
Tel. 770-279-5600 

HITACHI SALES CORPORATION OF HAWAII, INC. 
3219 Koapaka Street  
Honolulu, HI 96819  
Tel. 808-836-3621 

HITACHI (HSC) CANADA INC. 
6740 Campobello Road,  
Mississauga, Ontario L5N 2L8  
Tel. 905-821-4545 

Содержание VT-MX424A

Страница 1: ... Year 7 events including Daily and Weekly Timer Recording Auto Return Time Search Quick Find Index Search Just In Time Recording Remaining Tape Running Time Display Slow Motion The VCR Plus system The VCR C3 system VCR Plus C3 and Plus Code are trademarks of Gemstar Development Corporation The VCR Plus system is manufactured under license from Gemstar Development Corporation With the VCR Plus C3 s...

Страница 2: ...MINALS 14 INSTALLING THE BATTERIES 15 PRESET FOR USE 15 AUTOMATIC CHANNEL PRESET Without a Cable Box 15 TO SELECT A DESIRED CHANNEL 16 SETTING THE CLOCK 16 TO CHANGE CLOCK SETTING 17 TO DELETE PRESET CHANNELS 18 CHANNEL PRESET AGAIN 18 SELECTING THE LANGUAGE 19 CABLE BOX CONTROLLER 19 POSITIONING THE CABLE CONVERTER BOX 19 SETTING THE CABLE BOX CONTROLLER 19 If the codes you entered do not work 20...

Страница 3: ...A PAIR OF CHANNEL NUMBERS 34 TIMER RECORDING USING THE VCR PLUS SYSTEM 35 HINTS FOR TIMER RECORDING 36 AUTO RETURN 36 USING THE AUTO RETURN BUTTON 36 USING THE MENU 37 WATCH THE RECORDED PROGRAM 37 JUST IN TIME RECORDING 37 SETTING THE REMAINING TIME 38 REMAINING TAPE RUNNING TIME DISPLAY 39 COPYING A VIDEO TAPE 40 TO MONITOR THE RECORDING 40 ON SCREEN DISPLAY 40 DIGITAL DISPLAY 41 SPECIAL FEATURE...

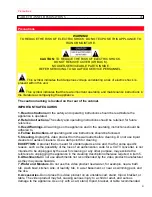
Страница 4: ... Instructions All operating and use instructions should be followed 5 Cleaning Unplug this video product from the wall outlet before cleaning Do not use liquid cleaners or aerosol cleaners Use a damp cloth for cleaning EXCEPTION A product that is meant for uninterrupted service and that for some specific reason such as the possibility of the loss of an authorization code for a CATV converter is no...

Страница 5: ...outed so that they are not likely to be walked on or pinched by items placed upon or against them paying particular attention to cords at plugs convenience receptacles and the point where they exit from the appliance 13 Outdoor Antenna Grounding If an outside antenna or cable system is connected to the video product be sure the antenna or cable system is grounded so as to provide some protection a...

Страница 6: ... other hazards 21 Safety Check Upon completion of any service or repairs to this video product ask the service technician to perform safety checks to determine that the video product is in proper operating condition 22 Heat This video product should be situated away from heat sources such as radiators heat registers stoves or other products including amplifiers that produce heat LOCATION For safe ...

Страница 7: ...ringe upon the fights of copyright owners WARNING TO PREVENT ELECTRIC SHOCK MATCH WIDE BLADE OF PLUG TO WIDE SLOT FULLY INSERT The serial number of this product may be found on the back of the VCR No other VCR has the same serial number as yours You should record the number and other vital information here and retain this book as a permanent record of your purchase to aid identification in case of...

Страница 8: ...f the REC IRT button 1 Year 7 events including Daily and Weekly Timer Recording The built in timer allows you to record up to 7 programs at different times on different channels up to 1 year in advance The daily timer allows recordings to be made of daily broadcasts and the weekly timer allows recording to be made once a week up to the end of the tape Auto Return After finished timer recording the...

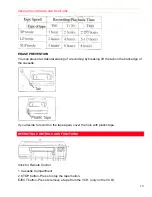
Страница 9: ...ature and the moisture has evaporated Avoid extreme heat high humidity and magnetic fields Do not tamper with the cassette mechanism Do not touch the tape with your fingers INSERTING A CASSETTE Insert the cassette in the direction as shown Push in gently but continuously on the center back of the cassette until it is drawn into the VCR The VCR will automatically turn on REMOVING A CASSETTE 1 In th...

Страница 10: ...ing off the tab on the back edge of the cassette If you decide to record on the tape again cover the hole with plastic tape OPERATING CONTROLS AND FUNCTIONS Click for Remote Control 1 Cassette Compartment 2 STOP button Press to stop the tape motion EJECT button Press to remove a tape from the VCR only on the VCR ...

Страница 11: ...ermine your selection and proceed to the next step you want to input Press to determine the setting modes from the on screen menu Press to add or delete channel numbers during channel preset only on the remote control 6 PAUSE button Press to temporarily stop the tape during recording or to view a still picture during playback Frame Advance function Press to advance the picture by one frame during ...

Страница 12: ...n Press to reduce the playback speed Slow speed can be controlled by pressing the F FWD button faster or the REW button slower 20 MUTE button Press to mute the TV s sound Press it again to resume the sound 21 COUNTER MEMORY button Press to set counter memory on and off 22 COUNTER RESET button Press to reset counter to 0 00 00 Press to ad or delete channel numbers during channel preset 23 VCR PLUS ...

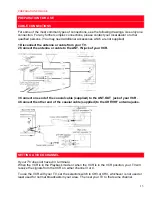
Страница 13: ...or cable to the ANT IN jack of your VCR 3 Connect one end of the coaxial cable supplied to the ANT OUT jack of your VCR 4 Connect the other end of the coaxial cable supplied to the UHF VHF antenna jacks SETTING A VIDEO CHANNEL If your TV does not have A V terminals When the VCR is in the Playback mode or when the VCR is in the VCR position your TV will receive the signals from the VCR on either ch...

Страница 14: ...enter 00 with number button on the remote control so that AUX appears on the screen NOTE AUX is found before the lowest memorized channel Example CH2 A V TERMINALS If your TV has A V input jacks you may connect your VCR s AUDIO VIDEO OUTPUT jacks to the audio video input jacks on back of your TV Direct audio video connections usually result in a better picture and sound quality for tape playback P...

Страница 15: ...must use the remote control for this procedure AUTOMATIC CHANNEL PRESET Without a Cable Box NOTES Follow the steps below only when you plug the VCR power core into a standard AC outlet for the first time If you unplug the VCR and move it to another area you need to CHANNEL PRESET AGAIN In this case see CHANNEL PRESET AGAIN on page 14 You must follow the steps below before attempting to play or rec...

Страница 16: ...the remote control Note for using the number buttons When selecting cable channels which are higher than 100 press the 100 ENT button first then press the last two digits Example to select channel 125 first press the 100 ENT button then press 2 and 5 You must precede single digit channel numbers with a zero For example 02 03 04 and so on SETTING THE CLOCK Set the clock accurately for proper automa...

Страница 17: ...or STOP button repeatedly until your desired minute appears Example 40 Then press the F FWD button 7 Select AM or PM Press the PLAY or STOP button to point to AM or PM Example PM 8 Start the clock Press the RESET EXIT or F FWD button Although seconds are not displayed they begin counting from 00 when you press the RESET EXIT or F FWD button Use this feature to synchronize the clock with the correc...

Страница 18: ...utton repeatedly to point to ADD DELETE CH Then press the F FWD button NOTE You cannot select ADD DELETE CH when you set CABLE BOX CONTROLLER to ON page 15 4 Enter the desired channel number Press the number buttons or the PLAY or STOP button until your desired channel number appears Example CH02 5 Delete it from memory Press the F FWD or REW button so that DELETE flashes on the TV screen To delet...

Страница 19: ...R as shown The cable converter box should tilt upward slightly You may need to place a small object under one side of the cable converter box in order to tilt the cable converter box It is best to place the cable converter box beyond the center of the VCR or along the back of the VCR If the cable converter box does not receive the signals try to slide the cable converter box to the right or left o...

Страница 20: ...ect code was entered 7 Cable box channel changed to channel 9 Press MENU button to end this setting You can select the channel on your compatible cable converter box by CHANNEL or button NUMBER buttons VCR mode on the VCR remote control Press 00 to select AUX Channel number on the VCR can select OUTPUT CHANNEL or AUX If you select AUX for OUTPUT CHANNEL at step 3 Channel buttons are usefulness Cab...

Страница 21: ...set the TV channel to the same video output channel as located on the back of the VCR CH 3 or 4 Press VCR TV button on the remote control so that the VCR indicator appears on the display 1 Insert a prerecorded tape Counter mode appears at 0 00 00 on the TV screen If the erase protection tab has been removed the VCR will start playback automatically 2 To begin playback Press the PLAY button NOTE If...

Страница 22: ... to return to playback NOTES You can advance the picture by one frame at a time by pressing the PAUSE button on the remote control during the still mode If it is left in the Still mode for more than five minutes the VCR will automatically switch to the Stop mode VERTICAL HOLD CONTROL When the picture begins to vibrate vertically stabilize the picture by pressing CHANNEL or button in the Still mode...

Страница 23: ... to memorize the beginning point that you want to review And you can search it easily by rewinding or fast forwarding Make sure Insert a prerecorded tape 1 Stop tape at your desired point Rewind or fast forward the tape to the beginning point at which you want to review 2 Reset the counter to 0 00 00 Press the COUNTER RESET button on the remote control once or twice 3 Select the Counter Memory mod...

Страница 24: ...ress PLAY or STOP button repeatedly to point to AUTO REPEAT 3 Begin Auto repeat playback Press the F FWD button so that ON will appear next to AUTO REPEAT on the TV screen Repeat playback mode will start automatically NOTES Once you select the Auto Repeat mode it stays in effect even after you turn off the VCR When the COUNTER MEMORY is activated the tape will rewind to 0 00 00 and the VCR will be...

Страница 25: ... index mark will be made automatically when the REC button is pressed It will also be marked at the starting point of Timer recording IRT The index mark will not be recorded if the PAUSE button on the remote control is pressed and released during recording The time gap between making the index marks on the tape should be greater than 1 minute for SP recording 2 minutes for LP recording and 3 minut...

Страница 26: ...ape to your desired position simply by entering the exact amount of playback time you want to skip Example To watch a program after 2 hours and 50 minutes from the present position in either direction 1 Select SEARCH SELECT Press the MENU button on the remote control so that the SEARCH SELECT menu appears 2 TIME SEARCH Press the PLAY or STOP button to point to TIME SEARCH Then press the F FWD butt...

Страница 27: ...n not in the reverse direction A video cassette must be inserted in the VCR for this function to work RECORDING Make sure VCR power must be turned on Turn on the TV and set the TV channel to the same video output channel as located on the back of the VCR CH 3 or 4 Press VCR TV button on the remote control so that the VCR indicator appears on the display Insert a cassette tape with its erase preven...

Страница 28: ... RECORDING ONE PROGRAM WHILE VIEWING ANOTHER You can record one program while viewing another To start recording follow steps 1 to 3 under VIEWING AND RECORDING THE SAME PROGRAM NOTE When you record with a cable converter box you cannot record one program while viewing another 4 Select the TV mode Press the VCR TV button on the remote control to select TV so that the VCR indicator disappears from ...

Страница 29: ...30 minutes It can be set for up to 8 hours NOTES Recording starts immediately when the REC IRT button is pressed whether you are watching the same or a different channel When the REC IRT button is pressed 18 times the VCR returns to the normal recording mode To stop the IRT operation press the STOP button on the VCR or on the remote control To show the remaining time press the DISPLAY button on th...

Страница 30: ... to the point at which you want to begin recording Avoid overlap of programs There is a case that a program will not be performed When programs overlap The program with an earlier start time has priority When the earliest program has finished and the programs which should start still overlap the recording will start in order of the program number If you programmed as the illustration below the tim...

Страница 31: ...u want to start First press the PLAY or STOP button until the desired month appears Example 05 for May Then press the F FWD button Next press the PLAY or STOP button until the desired day appears and then press the F FWD button Example 06 for 6th 5 Set the start hour Press the PLAY or STOP button until the desired hour appears Example 07 Then press the F FWD button 6 Set the start minute Press the...

Страница 32: ...button to turn off The indicator appears on the display Please see HINTS FOR TIMER RECORDING on page 31 for more notes TO CORRECT AN AUTOMATIC TIMER PROGRAM 1 Turn the power on and press VCR TV button on the remote control so that the VCR indicator appears on the display 2 Repeat steps 1 to 3 on page 24 3 Go to the digit you want to change by using the F FWD button or REW button 4 Enter correct nu...

Страница 33: ...SER CH columns You must set all of these channel numbers that don t match using the following procedure before you program the automatic timer recording using the VCR Plus system This setting only needs to be set once but must be done again if you use this VCR in another area by moving it 1 Select INITIALIZE Press MENU button repeatedly so that the INITIALIZE menu appears 2 Select GUIDE CHANNEL SE...

Страница 34: ...n press F FWD button 3 Enter the correct guide channel number using the number buttons or PLAY or STOP button Then press F FWD button 4 Enter the correct user channel numbers using the number buttons or PLAY or STOP button Then press MEMORY button 5 Press MENU button to return to original mode TO CANCEL A PAIR OF CHANNEL NUMBERS 1 Select INITIALIZE Press MENU button repeatedly so that the INITIALI...

Страница 35: ...t up mode Press VCR PLUS button NOTE If you have not yet set the clock SETTING CLOCK appears If so follow the steps 2 to 8 on page 13 Then set the timer 2 Set the PlusCode number Press the number buttons to set the PlusCode numbers of the program you want to record Then press VCR PLUS button NOTES Press REW button to go back one digit from current digit while you set the code If the code is not av...

Страница 36: ...t the VCR PLUS set up mode Press MENU button To set another program repeat steps 1 to 6 7 Set the timer Press POWER button The indicator appears on the display Please see HINTS FOR TIMER RECORDING on page 31 for more notes HINTS FOR TIMER RECORDING If there is a power failure or the VCR is unplugged for more than 30 seconds the clock setting and all timer settings will be lost If the tape runs out...

Страница 37: ...iginal mode NOTE To exit the auto return programming repeat steps 1 to 2 Then press the F FWD button AUTO will then disappear from the menu Press the RESET EXIT button to return to TV mode WATCH THE RECORDED PROGRAM Press the POWER button to turn on the VCR Then press the PLAY button JUST IN TIME RECORDING This function allows you to fully utilize the available tape length for timer recording The ...

Страница 38: ...s or different types of cassette tapes may fail to make complete recording SETTING THE REMAINING TIME You can set the remaining tape running time of your tape Follow the steps below to correct the tape remaining indication Make sure You must use the remote control for the following procedure VCR power must be turned on Turn on the TV and set the TV channel to the same video output channel as locat...

Страница 39: ... the time display as an informative number only During recording the remaining tape running time is estimated based on the current recording mode SP LP SLP During playback the remaining tape running time is calculated based on the current playback mode Remain time will not appear on TV screen while in the Fast forward or Rewind mode There will be a delay of up to 1 minute before the remain time ap...

Страница 40: ...the source playing VCR NOTES For best results during dubbing use the VCR s front panel controls whenever possible The remote control might affect the playback VCR s operation Always use video quality shielded cables with RCA type connectors Standard audio cables are not recommended You can use a video disc player satellite receiver or other audio video component with A V outputs in place of the pl...

Страница 41: ...n the VCR is in the Recording mode Flashes when a recording has been paused 6 Clock Feature Channel indicator Indicates the current time when the clock is set and briefly displays which feature the VCR is currently performing as the illustration SPECIAL FEATURES REAL TIME TAPE COUNTER This shows the elapsed recording or playback time in hours minutes and seconds not in the case of blank portion Th...

Страница 42: ... every one made If your TV or cable box does not respond the way it should when you program if as explained follows this remote may be incapable of operating it Once you have programmed the remote you won t have to do it again until you change the batteries REMOTE CONTROL OF THE TV PROGRAMMING THE REMOTE CONTROL OF THE TV 1 Turn on the TV Turn on the TV any channel is okay 2 Program the remote con...

Страница 43: ...L OF THE CABLE CONVERTER If you have a cable converter you will probably want to program your VCR s remote control so you can easily change channels The process is the same as for programming the remote to operate your TV For additional details see the previous PROGRAMMING THE REMOTE CONTROL OF THE CABLE CONVERTER 1 Program the remote control Hold down the CATV button and press the number of your ...

Страница 44: ...assette is missing Place a plastic tape over the hole No picture or poor picture on playback The TV and or VCR is in the TV mode The TV fine tuning is not set correctly Set your TV to the VCR mode and or press VCR TV button on the remote control so that the VCR indicator appears on the display Fine tune your TV Noise in picture on playback Video heads are dirty Head cleaning is necessary consult t...

Страница 45: ...rogram reception is clear Dirt accumulated on the video heads after long periods of use or the usage of rental or worn tapes can cause this problem If a streaky or snowy picture appears during playback the heads of your VCR may need to be cleaned 1 Please visit your local Audio Video store and purchase a good quality VHS Video Head Cleaner 2 If a Video Head Cleaner does not solve the problem consu...

Страница 46: ...remote control unit Part No HL10793 2 AA batteries Check your cable company s compatibility requirements Design and specifications subject to change without notice CABLE CHANNEL DESIGNATIONS If you subscribe to cable TV the channels are displayed as 1 125 Cable companies often designate channels with letters or letter number combinations Please check with your local cable company The following is ...

Отзывы: