3 - 10
3. VCR SECTION ADJUSTMENT
3.1
Test Equipment and Alignment Tapes
Necessary for Adjustment
Test Equipment, Jigs etc.
Digital Voltmeter (DVM)
Color Video Monitor
DC Power Supply (DC 0 - 8V/3A)
DC Power Supply (DC 5V/1A)
Adjustment Floppy Disk
Personal Computer
Personal Computer 9-pin or 25-pin (RS232C) Cable
DSP-R Jig
DSP AV Output Jig
8 - 20 Pin Extension Cable
ODC DC Cord
Alignment Tape
Alignment Tape
Blank Tape
3.2
Adjustment Condition
1. Check that the camera, LCD monitor and EVF sections
has been adjusted correctly before adjusting the VCR
section.
2. Connect this unit, a power supply and a color video
monitor as shown in Fig. 1-1.
3. Use the 10:1 probe of the oscilloscope when other not
specified.
4. When "Record mode" is specified, load a blank tape
and set the 8mm video camera/recorder to the record
mode by the following procedure.
1) Set the CAM/OFF/VIDEO switch to the CAM
position.
2) Set the SUB POWER switch to STANDBY
position.
3) Press the REC START/STOP button on the unit
(or REC START/STOP button on the remote
control).
5. Ground of test equipment: Pre-Amp Shield (GND).
3.3
Preset Positions of Switches and
Controls During Adjustment
CAM/OFF/VIDEO switch .................. "VIDEO" position
TITLE ................................................ Not Display mode
PAL CONV. on the MENU ................ OFF mode
3.4
Check After Replacing Major
Components in the VCR Section
After replacing major components, perform checks,
referring to the table below.
The following table shows the minimum adjustments
required after major components are placed.
The table below may not apply when several components
are replaced, depending on the symptom of the defect.
NAME OF MAJOR COMPONENTS
ITEM NAME OF
VCA
Cylinder
IC0901
No. ADJUSTMENT
Circuit
Board
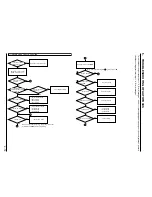
SYSTEM CONTROL/SERVO CIRCUITS ADJUSTMENT
(1)
Power Shut Off
level Adjustment
(2)
Head Switching
Point Adjustment
3.5
System Control/Servo Circuits
Adjustment
Before Starting Adjustment
1. System control/servo circuits adjustment also needs a
personal computer. Connect the camera/recorder,
jigs, power supply, etc. in the same way as in camera
section adjustment.
2. Be sure to perform this adjustment after replaceing or
initializing the EEPROM and VCA circuit board.
3. When an error message appears during adjustment,
refer to "4. Error Massage".
4. If [ESC] (escape) is pressed, the computer's display
returns to MAIN MENU display.
5. To complete adjustment, press to [ESC] (escape) key
twice to restore the MS-DOS screen and then turn off
the camera/recorder and jigs.
(1)
Start the MAP.
(2)
Refer to display 2-6.
(3)
Press
C
key.
(4)
Refer to display 8-1.
(5)
Select the number of the required adjustment.


