


12
Lens installation
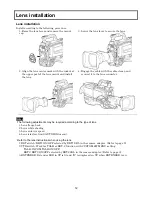
Lens installation
Install according to the following procedure.
1. Raise the lens lever and remove the mount
cap.
3. Lower the lens lever to secure the lens.
2. Align the lens center mark with the indent at
the upper part of the lens mount and install
the lens.
4. Engage the cable with the cable clamp and
connect it to the lens connector.
Notes
The following adjustments may be required according to the type of lens.
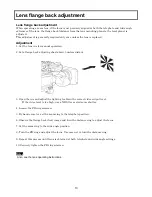
1. Lens flange back
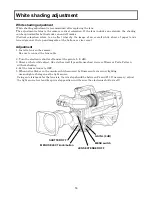
2. Lens white shading
3. Lens auto iris speed
4. Lens iris close limit (AUTO IRIS menu)
Refer to the lens instructions when using the lens.
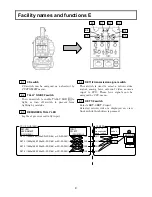
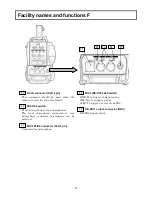
1. RET switch: RET1 ON/OFF selected by RET1 SEL in the camera adapter. (Refer to page 9)
2. VTR switch: Work for TALK or RET-2 function with CUSTOM SW MENU setting.
TALK: INCOM TALK ON/OFF,
RET2: RET2 ON/OFF selected by RET2 SEL in the camera adapter. (Refer to page 9)
3. EXTENDER: Extender LED in VF is lit and “E” is displayed on VF when EXTENDER is on.
Содержание SK-HD1800
Страница 4: ......
Страница 14: ......
Страница 84: ...70 Specifications Dimensions SK HD1800 CA HF1000 CX HD1000 VF 402 133 166 262 348 CA HF1000 360 CX HD1000 191 ...
Страница 85: ...71 Specifications VF L90HD ...