37
English
3. Lubrication
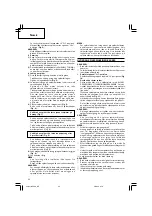
(1) Be sure to lubricate this nailer at least twice a day. To
lubricate, pour 10 to 15 drops of oil into the air plug
before and after using this nailer. The oil applied
before use lubricates this nailer; the oil applied after
use prevents rust.
(2) It is recommended using the recommended oil (SHELL
TONNA). Other applicable oils are listed. Never mix
two or more types of different oils.
4. Load Nails
(1) Grip the nail guide and knob with finger.
Press the knob down and swing the nail guide open.
And open the magazine cover (
Fig. 3
).
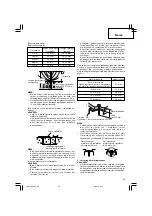
(2) Adjust the position of the nail holder according to the
nail length (
Fig. 4
).
The nail will not feed smoothly if the nail holder is
not correctly adjusted.
Pull the nail holder towards your and then insert it
into either the upper stage, middle stage or lower
stage for adjustment purposes.
To be inserted into the upper stage for nails with a
length of 19 mm, 22 m, 25 mm and 27 mm, in the
middle stage for nails with a length of 32 mm and 38
mm, and in the lower stage for nails with a length of
45 mm and 50 mm.
(3) Place the nail coil into the magazine (
Fig. 5
).
Uncoil enough nails to reach the driving hole (
Fig. 6
).
When using nails for attaching thin steel sheets
to concrete (Fig. 7)
Insert the heads of the nail array into the guide slot at
the top of the sheet, and insert the bottom of the
sheet into the sheet guide on the top surface.
Press down on the surface of the sheet guide, insert
the head of the nail into the outlet, and then insert the
second nail between the (1) and (2) pawls.
When using nails for attaching wood to concrete
or C-shaped steel (Fig 8)
Insert the heads of the nail array into the guidance
groove at the top of the sheet, and then insert the
bottom of the sheet into the top of the pawl (1).
Press down on the surface of the sheet guide, insert
the head of the nail into the outlet, and then insert the
second nail between the (1) and (2) pawls.
(4) Close the magazine cover first and swing the nail
guide closed (
Fig. 9
).
(5) Lock the knob correctly.
NOTE:
Be careful not to disengage the nails with the guide
surface.
Otherwise, the nail guide will not close correctly.
CAUTION
To prevent unintentional operation, never touch the
trigger or place the top end of the push lever on a
work bench or floor. Also, never face the nail outlet
toward any part of a person.
NOTE:
Before loading the nails in the magazine, position the
nail holder according to the length of the nail. If the
nail holder position is not adjusted properly, nail
feed may jam. If the cover is forcibly closed without
adjusting the position of the nail holder, the nail
holder may be damaged.
HOW TO USE THE NAILER
CAUTION
䡬
Never use the head or body of this device as a
hammer.
䡬
Take precautions to ensure the safety of persons in
the vicinity during operation.
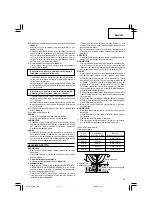
1. Set the lock lever to “Free” position
Turn the lock lever and align it with the “Free” position
(
Fig. 10
).
2. How to drive nails
This product is a nailer using SINGLE SEQUENTIAL
ACTUATION MECHANISM. If you pull the trigger
first, nothing will happen even if you press the push
lever up against an object.
Depress the nail outlet onto the desired point; then
pull the trigger to drive a nail in a single shot (See
Fig. 11
).
After nailing once, nailing will not be possible again
until the trigger is released and pressed again.
You cannot drive a nail by first pulling on the trigger
and then pressing the push lever against an object
(continuous nailing).
WARNING:
A nail will fire each time the trigger is depressed as
long as the push lever remains depressed.
CAUTION
Exercise care when nailing corners of lumber, metal
plate or concrete. When continuous nailing corners
of lumber, metal plate or concrete, a nail may go
astray or break through the corner.
NOTE:
䡬
Precautions on no-load operation.
Sometimes nailing will continue after driving in all
nails previously contained in the magazine.
This is termed “no-load operation”. Such operation
may deteriorate the bumper, magazine, and nail
feeder.
To avoid no-load operation, occasionally confirm the
amount of remaining nails. On the other hand, all
nails should be removed after using this nailer.
䡬
After completing operation, put into the body about
2 cc oil through the hose joint to protect the tool from
rust.
䡬
Under low temperature conditions, the machine
sometimes does not operate correctly. Always operate
the machine at the appropriate ambient temperature.
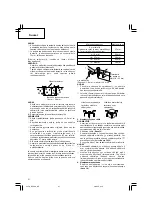
(1) Selecting hardened nails for use with concrete
CAUTION
䡬
Use hardened nails designed for use with concrete.
䡬
Place the nailer vertically over the location into which
the nail is to be driven.
䡬
Do not drive nails into the edge of concrete.
䡬
Do not use the nailer in locations from which other
items are suspended (suspended pipes, etc.).
05Eng_NC50H_NE
4/26/12, 9:42
37
Содержание NC 50H
Страница 45: ...44 06Back_NC50H_NE 4 26 12 9 17 44 ...
Страница 46: ...45 06Back_NC50H_NE 4 26 12 9 17 45 ...
Страница 47: ...46 06Back_NC50H_NE 4 26 12 9 17 46 ...

