


33
You can search by inputting the time code.
The time code corresponds to the approximate actual playing
time. For example, to search for a scene 2 hours 30 minutes
20 seconds past the beginning, key in 02:30:20.
Note
•
This function is not available for CD and MP3.
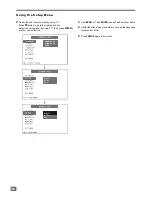
If the playing disc is DVD
1
Press the
GOTO
button, the following menu appears on
the TV screen.
TITLE 02 / 05 CHAPTER
001
/ 006
2
Use the
or
button to select title number or chapter
number.
TITLE 02 / 05 CHAPTER
001
/ 006
TITLE
02
/ 05 CHAPTER 001 / 006
Use the number buttons (
0~9 / +10
) to input the title or
chapter number you want.
3
Press
ENTER
to play your selection.
4
Follow Step 1, press the
GOTO
button again to enter time
menu shown as below.
TITLE 02 / 05 TIME - - : - - : - -
5
Use the number buttons (
0~9 / +10
) to input the time code
you want.
For example, key in 0, 1, 2, 3, 4, 5.
TITLE 02 / 05 TIME 01 : 23 : 45
6
Press
ENTER
to start playing (from the point of 01:23:45).
7
Follow Step 4, press the
GOTO
button again to exit.
Note
•
If the title number, chapter number or time code you input is
not exist in the disc, the system will not execute your selec-
tion and the selecting menu will exit.
•
The selecting menu will time out for a few seconds if you do
not input valid number.
If the playing disc is Video CD
1
Press the
GOTO
button.
The time menu appears on the TV screen.
GOTO: - - : - -
2
Use the number buttons (
0~9 / +10
) to input the time code
you want.
For example, key in 0, 1, 2, 3.
GOTO: 01 : 23
When the last digit is input and the time code is valid, the
system will begin to play (from the point of 01:23).
3
Follow Step 1, press the
GOTO
button again to exit.
S e l e c t i n g a T r a c k U s i n g
Number Buttons
You can select a track directly using the number (
0~9 / +10
)
buttons
•
In play or stop mode, press the number button to select a
track you want. The system will go to the beginning of the
selected track and start playing it.
•
If the track number is more than 10, use the
+10
button. The
number will increase 10 whenever you press
+10
once.
For example, you want to select the track of 25. Press the
+10
button twice, then press
5
button.
Note
•
This function is not available for DVD.
•
If the PBC function is set to on, you cannot select the track
on the Video CD (Ver. 2.0) or SVCD using number buttons
directly. About PBC, see page 30.
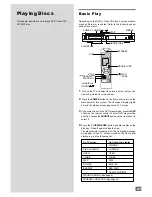
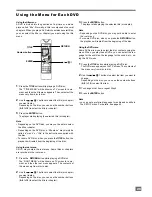
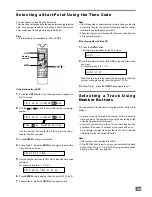
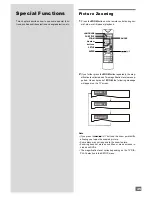
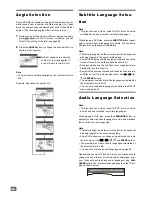
Selecting a Start Point Using the Time Code
Number
buttons
/
/ /
GOTO
S T A N D B Y
SUB
TITLE
DVD
T U N E R
AUX
L A N G U A G E
TITLE
R E T U R N
A N G L E
G O T O
M E N U
/PBC
Z O O M
S E T U P
A U D I O
1
D I S P L A Y
2
3
4
5
6
7
8
9
>10
0
N/P
S L E E P
M U T E
O P E N /
CLOSE
ENTER
N
A - B
R E P E A T
P R O G .
S E L E C T
L I S T E N I N G
TEST
T O N E
A D J / V O L
S T O P
P L A Y / P A U S E
S T E P
S L O W
+
STA
-
STA
+
S T / M O
TU
TUN
+
MEMO
ENTER


