background image

19

Italiano

3. Prolunga del cavo

Quando l'ambiente di lavoro è lontano da una presa
di corrente, usare una prolunga del cavo di sufficiente
spessore e di prestazione adeguata. La prolunga
deve essere più corta possibile.

4. Montaggio della carta abrasiva

Poiché l'accessorio è di tipo ad aggancio, la
cartavetrata può essere applicata facilmente
premendo sul cuscinetto.
Quando si applica la carta vetrata, per farla
corrispondere ai fori sul cuscinetto, piegarla lungo
l'asse dei due fori come mostrato nella 

Fig. 4

.

Quindi, usare i fori lungo la piegatura come guida
per fare corrispondere la cartavetrata al cuscinetto.
Per ultimo, stendere uniformemente la cartavetrata
sul cuscinetto.

5. Installazione e rimozione del porta polvere

(1) Installazione

Come mostrato nella 

Fig. 5

 tenere l'uscita polvere

e spingere il portapolvere apposito.

(2) Rimozione

Come mostrato nella 

Fig. 6

, spingere con forza la

linguetta dell'uscita polvere e estrarre il portapolvere.

6. Rimozione e installazione della manopola anteriore

La manopola anteriore può essere rimossa quando
è di intralcio, per esempio quando si smerigliano
gli angoli.

(1) Rimozione

Come mostrato nella 

Fig. 7

, premere fermamente

il gancio della manopola anteriore e tirare la
manopola anteriore in direzione delle frecce.

(2) Installazione

Come mostrato nella 

Fig. 8

 fare corrispondere la

parte superiore della manopola anteriore con la
parte superiore dell'area di contatto della manopola
anteriore e premere la manopola anteriore in
direzione della freccia.

7. Regolazione della velocità (solo FSV13Y)

È il FSV13Y che consente di regolare la velocità in
modo continuo. Per regolare la velocità far girare
il selettore nel modo illustrato in 

Fig. 9

. Quando

il selettore si trova in posizione “1”, la levigatrice
funziona al regime minimo (6500/min). Quando il
selettore si trova in posizione “5”, la levigatrice
funziona al regime massimo (11000/min). Regolare
la velocità a seconda del materiale da tagliare e
dell'efficienza richiesta.

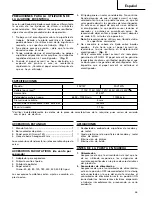
Materiale

Grena

Scala

Smerigliatura grossolana

Smerigliatura fine

Lavori vernicianti:

Smerigliatura

180

400

3 ~ 5

Riparazioni di Smerigliatura
(graffi, punti arrugginiti)

120

240

2 ~ 4

Sverniciature

40

80

2 ~ 4

Legno:

Legno morbido

60 – 80

240

3 ~ 5

Legno duro

60

180

3 ~ 5

Verniciato

240

320

2 ~ 4

Metalli:

Alluminio

80

240

2 ~ 4

Acciaio

60

240

3 ~ 5

Acciaio inossidabile

120

240

3 ~ 5

NOTA:

 Si prega di usare questa tabella come standard.

Regolando la scala, fare corrispondere la velocità al materiale e tipo di lavoro.

PROCEDIMENTI DI FUNZIONAMENTO
PRATICO

ATTENZIONE

No aggiungere mai acqua o fluido abrasivo mentre si
smeriglia. Ne può derivare una folgorazione.

1. Come tenere la levigatrice

Tenere la maniglia della manopola anteriore e
premere leggermente la levigatrice in basso in modo
che la cartavetrata tocchi in modo uniforme la
superficie di lavoro 

(Fig. 10)

.

La parte superiore dell'alloggiamento può essere
tenuta anche con una mano per controllare la
levigatrice 

(Fig. 11)

.

AVVERTENZA:

Quando si usa l'unità tenendola con
una sola mano, assicurarsi di no coprire
il foro di ventilazione.

2. Come muovere la levigatrice

Spostare la levigatrice muovendola in alto o in
basso o in cerchio spostandosi gradualmente in
direzione laterale 

(Fig. 12 

e

 13)

.

3. Accensione della levigatrice

Collocare la levigatrice sulla superficie di lavoro
prima di accenderla. Tenere la levigatrice in contatto
con la superficie di lavoro anche dopo averla spenta.

AVVERTENZA

Mentre gira, il cuscinetto può volare via. Assicurarsi
perciò di non attivare l'interruttore quando si stacca
la levigatrice dalla superficie di lavoro e non usare
la levigatrice quando è sollevata.

Содержание FSV 13Y

Страница 1: ... Instrucciones de manejo Read through carefully and understand these instructions before use Diese Anleitung vor Benutzung des Werkzeugs sorgfältig durchlesen und verstehen Lire soigneusement et bien assimiler ces instructions avant usage Prima dell uso leggere attentamente e comprendere queste istruzioni Deze gebruiksaanwijzing s v p voor gebruik zorgvuldig doorlezen Leer cuidadosamente y compren...

Страница 2: ...1 1 2 3 4 5 6 7 8 9 10 1 2 3 4 5 6 7 8 9 0 A ...

Страница 3: ...11 13 12 14 15 16 17 18 2 B C D E F M I J K L H G ...

Страница 4: ... Español Carta abrasive Schuurpapier Papel esmeril Pannello Sttotkussen Amortiguador Impugnatura interruttore Schakelhendel Asa del interruptor Sacca di raccolta della polvere Stofzak Bolsa colector de polvo uscita polvere Stofschuif Boca de salida del serrín Sostegno porta polvere Stofzakhouder Soporte de la bolsa para el serrín Fermo condotto polvere Klink voor de stof opening Fiador de la compu...

Страница 5: ......

Страница 6: ...than using your hand and it frees both hands to operate tool 13 Do not overreach Keep proper footing and bal ance at all times 14 Maintain tools with care Keep cutting tools sharp and clean for better and safer performance Fol low instructions for lubrication and changing ac cessories Inspect tool cords periodically and if damaged have it repaired by authorized service center Inspect extension cor...

Страница 7: ...enuine sanding paper particularly ventilated discs can cause the pad hooks to clog This will prevent sanding paper from clinging to the pad STANDARD ACCESSORIES 1 Front knob 1 2 Dust bag 1 3 Sanding paper Grain 120 1 4 Hexagon bar wrench 4 mm 1 Standard accessories are subject to change without no tice OPTIONAL ACCESSORIES sold separately 1 Cleaner adapter 2 Dust cover 3 Polyester buff 4 Sanding p...

Страница 8: ...d result in electrical shock 1 How to hold the random orbit sander Hold the handle and front knob and lightly press the sander down so that the sanding paper uni formly touches the work surface Fig 10 The top of the housing can also be held with one hand to control the sander Fig 11 CAUTION When operating with one hand make sure not to cover the whole ventilation hole 2 How to move the random orbi...

Страница 9: ...and dis pose of the contents 2 Inspecting the sanding paper Since use of worn out sanding paper will degrade efficiency and cause possible damage to the pad replace the sanding paper as soon as excessive abrasion is noted 3 Inspecting the mounting screws Regularly inspect all mounting screws and ensure that they are properly tightened Should any of the screws be loose retighten them immediately Fa...

Страница 10: ...Arbeitsplatz gut absichern Zwingen oder einen Schraubstock zur Befestigung des Werkstücks verwenden Das ist sicherer als die Benutzung der Hände und macht beide Hände zur Bedienung des Werkzeugs frei 13 Sich niemals weit überbeugen Immer einen festen Stand und ein sicheres Gleichgewicht bewahren 14 Die Werkzeuge sollten sorgfältig behandelt werden Für einen einwandfreien und sicheren Betrieb sollt...

Страница 11: ...papier zum Überhitzen und verursacht Verschlechterung des Polsters Abb 3 7 Nur Original Schleifpapier von HITACHI verwenden Anderes Schleifpapier besonders Scheiben mit Ventilationslöchern können Verstopfen der Polsterhaken bewirken Hierdurch wird Haften des Schleifpapiers am Polster verhindert TECHNISCHE DATEN Model FSV13Y FSV13YA Spannung jenach Gebiet 110V 115V 120V 127V 220V 230V 240V Leistung...

Страница 12: ... Staubbeutels 1 Anbringen Wie in Abb 5 den Staubausgang festhalten und den Staubbeutel zur Befestigung an die Staubbeutelhalter andrücken 2 Entfernen Wie in Abb 6 fest auf den Zapfen des Staubausgangs drücken und den Staubbeutel lösen PRAKTISCHE ARBEITSWEISE ACHTUNG Niemals Wasser oder Schleifflüssigkeit beim Arbeiten mit dem Exzenterschleifers verwenden Das kann zu elektrischen Schlägen führen 1 ...

Страница 13: ...elentfernen Erbefindet sich hinten im Handgriff Nach dem Entfernen der Schraube sicherstellen daß die Vorsprünge am Schleifer mit den Löchern im Haltestück angeglichen sind Abb 17 Um bessere Hebelkraft zum Drehen der Schraube zu erzielen kann ein Schraubenzieher durch ein Ansaugloch in die Nut im Gehäuse gesteckt werden Dadurch wird das Haltestück stabilisiert und das Entfernen der Schraube erleic...

Страница 14: ...er Utiliser des agrafes ou un étau pour la maintenir C est plus sûr que d utiliser ses mains et cela les libêre pour faire fonctionner l outil 13 Ne pas présumer de ses forces Essayer de garder son équilibre en toute circonstance 14 Entretenir les outils avec soin Les conserver bien aiguisés et les nettoyer afin d en obtenir les meilleures performances et de pouvoir les utiliser sans danger Suivre...

Страница 15: ... ce qui provoquera une détérioration du patin Fig 3 7 Utiliser uniquement du papier de verre de rechange HITACHI d origine L utilisation de papier de verre en particulier des disques ventilés non d origine risque de provoquer un colmatage des crochets du patin Cela empêchera le papier de verre de coller au patin SPECIFICATIONS Modèle FSV13Y FSV13YA Tension per zone 110V 115V 120V 127V 220V 230V 24...

Страница 16: ...r régler la vitesse tourner le cadran montré à la Fig 9 Quand le cadran est réglé sur 1 la ponceuse excentrique fonctionne à la vitesse minimale 6500 min Quand le cadran est réglé sur 5 la ponceuse excentrique fonctionne à la vitesse maximale 11000 min Régler la vitesse suivant le matérial devant être coupé et le rendement de travail Matériau Grain Echelle graduée Polissage grossier Polissage fin ...

Страница 17: ...ère et des débris ne la mettez pas dans un endroit couvert de poussière ou de débris quand elle tourne encore juste après que vous l ayez arrêtée MONTAGE DES ACCESSOIRES EN OPTION 1 Installation du disque en polyester Etant donné que la fixation est de type à rabattement comme pour le papier de verre il suffit de presser le disque en polyester contre le patin pour l installer Fig 14 Quand vous uti...

Страница 18: ...sita cuffia protettiva 9 Usare occhiali protettivi Esegundo dei lavori di taglio che producono molta polvere usare anche una mascherina antipolvere 10 Collegare apparecchiature di rimozione della polvere Se sono forniti dispositivi per il collegamento di apparecchiature di rimozione e raccolta della polvere assicurarsi che siano collegati e usati correttamente 11 Non maltrattare il cavo della corr...

Страница 19: ... La carta abrasiva non autentica particolarmente dischi ventilati può causare intasamenti dei ganci pannello Questo impedisce alla carta abrasiva di aderire al pannello CARATTERISTICHE Modello FSV13Y FSV13YA Voltaggio per zona 110V 115V 120V 127V 220V 230V 240V Potenza assorbita 270 W Velocità senza carico 6500 11000 min 11000 min Diametro orbitale 5 mm Dimensioni cuscinetto Diametro esterno 125 m...

Страница 20: ...selettore si trova in posizione 1 la levigatrice funziona al regime minimo 6500 min Quando il selettore si trova in posizione 5 la levigatrice funziona al regime massimo 11000 min Regolare la velocità a seconda del materiale da tagliare e dell efficienza richiesta Materiale Grena Scala Smerigliatura grossolana Smerigliatura fine Lavori vernicianti Smerigliatura 180 400 3 5 Riparazioni di Smeriglia...

Страница 21: ...trice Si trova nella parte posteriore della maniglia dei comandi Dopo avere rimosso il bullone togliere il cuscinetto e sostituirlo Quando si monta il cuscinetto assicurarsi che le sporgenze sulla levigatrice corrispondano con i fori sul cuscinetto Fig 17 Inoltre per fare più leva quando si gira il bullone inserire un cacciavite in un foro di ventilazione nelle intagliature dell alloggiamento Ques...

Страница 22: ...heid in acht Gebruik klemmen of een bankschroef om het werkstuk vast te zetten Hierdoor heeft u uw handen vrij om het gereedschap te bedienen 13 Buig u nooit te ver naar voren Kies een goede plaats en behoud altijd uw evenwicht 14 Behandel het gereedschap voorzichtig Zorg ervoor dat het gereedschap scherp en schoon is zodat een goed en veilig prestatievermogen wordt verkregen Volg de gebruiksaanwi...

Страница 23: ...dige slijtage van het schuurvlak tot gevolg Afb 3 7 Gebruik uitsluitend het originele HITACHI schuurpapier ter vervanging Bij gebruik van ander schuurpapier vooral schijven met gaten zullen de haken van het schuurvlak mogelijk verstopt raken waardoor het schuurpapier van het schuurvlak los zal komen TECHNISCHE GEGEVENS Model FSV13Y FSV13YA Voltage verschillend van gebied tot gebied 110V 115 120V 1...

Страница 24: ...s uitgerust met een elektrisch regelingscircuit hetgeen traploze snelheidsregeling mogelijk maakt Draai de schijf zie Afb 9 om de snelheid in te stellen Wanneer de schijf op 1 is gezet funktioneert de schuurmachine met de mini mum snelheid 6500 min Wanneer de schijf op 5 is gezet funktioneert de schuurmachine met de maximum snelheid 11000 min Stel de snelheid overeenkomstig de te behandelen materi...

Страница 25: ...aat het risiko dat dit uit elkaar vliegt Duw het schuurkussen met een hand aan en verwijder de centrale bout met de zeshoekige sleutel die met het apparaat wordt geleverd de sleutel bevindt zich in het achtergedeelte van de handgreep Nadat u de bout verwijderd heeft neemt u het schuurkussen weg en vervangt u dit Let bij het aanbrengen van het nieuwe schuurkussen goed op dat de nokken op de behuizi...

Страница 26: ...a operar la herramienta 13 No extenderse excesivamente para efectuar un trabajo Mantener en todo momento un buen balance y base de apoyo 14 Mantener cuidadosamente las herramientas Tener las siempre limpias y afiladas para obtener un mejor rendimiento y un funcionamiento más seguro Seguir siempre las instrucciones para la lubricación y el cambio de accesorios Inspeccionar periódicamente los cables...

Страница 27: ...eemplazo genuino de HITACHI El papel esmeril no genuino especialmente discos ventilados podría hacer que se obstruyesen los ganchos del amortiguador Esto impediría que el papel esmeril se adhiriese al amortiguador ESPECIFICACIONES Modelo FSV13Y FSV13YA Voltaje por áreas 110V 115V 120V 127V 220V 230V 240V Acometida 270 W Velocidad marcha en vacío 6500 11000 min 11000 min Diámetro de la órbita 5 mm ...

Страница 28: ...3Y El modelo FSV13Y está equipado con un circuito eléctrico de control que permite controlar la velocidad sin ir paso a paso Para ajustar la velocidad girar el selector como se muestra en la Fig 9 Cuando el selector indica 1 la lijadora funciona a la mínima velocidad 6500 min Cuando el selector indique 5 la lijadora funciona a la máxima velocidad 11000 min Adjustar la velocidad de acuerdo al mater...

Страница 29: ...esione la almohadilla con una mano y extraiga el perno centralconlallavehexagonalsuministradaconlalijadora Seencuentraenlaparteposteriordelasadelinterruptor Después de haber extraído el perno quite la almohadilla y reemplácela Cuando monte la nueva almohadilla cerciórese de que los salientes de la lijadora coincidan con los orificios de la almohadilla Fig 17 Además para mejor nivelación cuando gir...

Страница 30: ......

Страница 31: ......

Страница 32: ......

Страница 33: ......

Страница 34: ...33 ...

Страница 35: ...ring 6002DDUCMPS2S 24 Washer 25 Flat Hd Screw M4 10 26 Bearing Holder 27 Machine Screw W Washers M3 16 28 Pad Pressure Sensitive Type 29 Hex Socket Button Bolt M6 10 30 Internal Wire A 31 Internal Wire A 32 Internal Wire 33 Tapping Screw W Flange D4 20 34 Name Plate 501 Dust Bag 502 Sanding Discs 125MM AA120 503 Hex Bar Wrench 4MM Part Name Item No FSV13Y Parts are subject to possible modification...

Страница 36: ...35 ...

Страница 37: ...36 ...

Страница 38: ...os documentos de normalización EN50144 HD400 EN55014 EN60555 y o EN50082 1 según indican las Directrices del Consejo 73 23 CEE 89 392 CEE y o 89 336 CEE Esta declaración se aplica a los productos con marcas de la CE English EC DECLARATION OF CONFORMITY We declare under our sole responsibility that this product is in conformity with standards or standardized documents EN50144 HD400 EN55014 EN60555 ...

Отзывы: