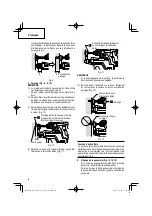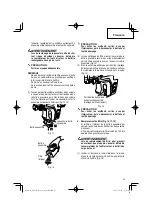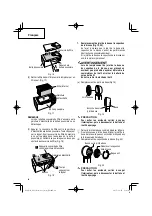
background image

 CAUTION


To prevent accident, make sure to turn the switch 

o

 , then disconnect the battery and the drilling 

tool.

6. Replacing 

the 

fi

 lter (Fig. 16, 17, 18)

 If 

the 

fi

 lter inside the dust box becomes clogged, the 

dust extraction performance declines.


As a guideline, replace the 

fi

 lter after every 100 times 

that the dust box becomes full.

WARNING

  When replacing the 

fi

 lter, in order to prevent an 

unlikely  accident,  be  sure  to  turn  o

  the tool’s 

switch and remove the battery from the tool 

body.

(

1

)

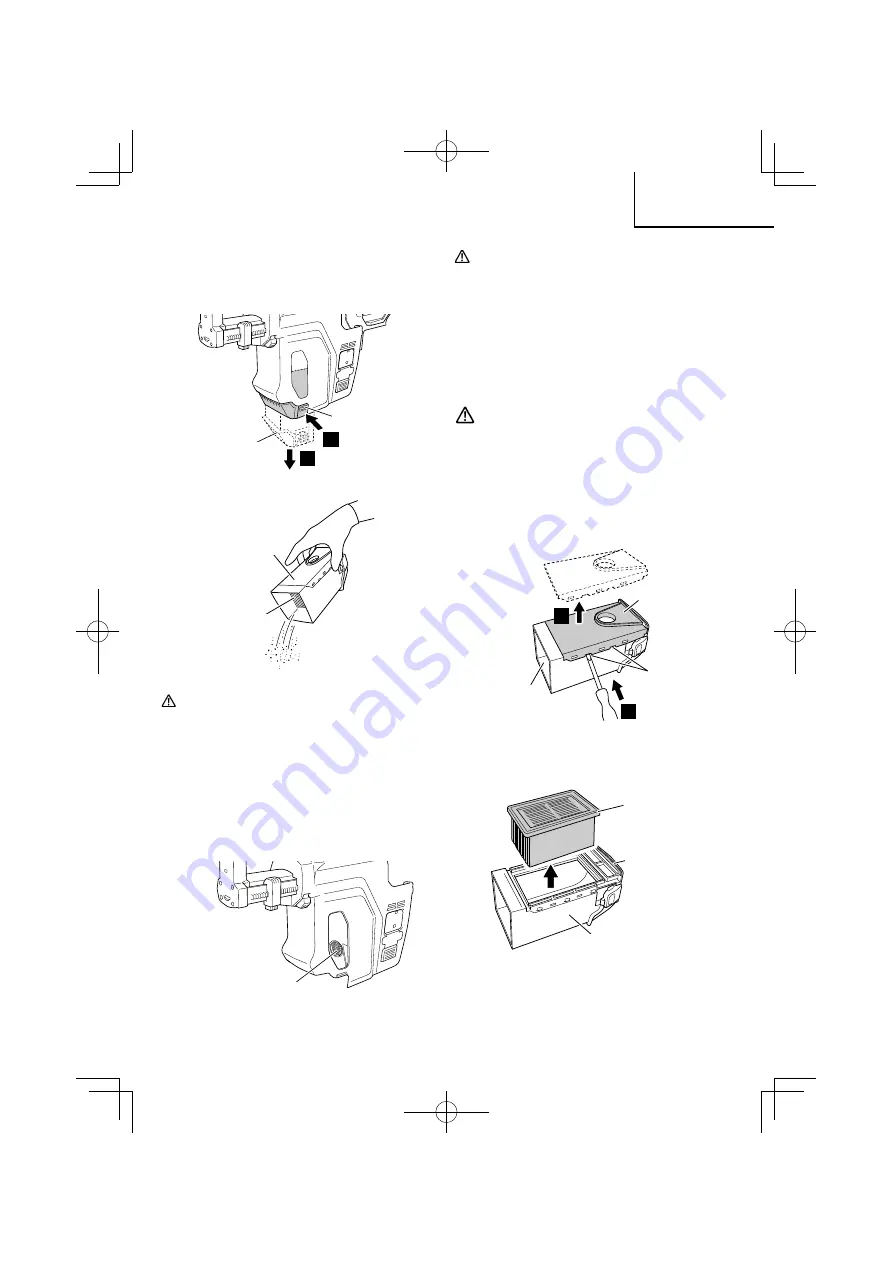
 Insert a 

fl

 at-head screwdriver into the groove on the 

side of the 

fi

 lter cover and remove the 

fi

 lter  cover. 

(

Fig. 16

)

2

1

Dust box

Filter cover

Groove of 

dust box

Fig. 16

(

2

)

 Remove the 

fi

 lter from inside, and replace it with a 

new one. 

(

Fig. 17

)

Dust box

Filter 

(

internal

)

Seal packing

Fig. 17

NOTE


When removing the 

fi

 lter cover, be sure that the seal 

packing of the dust box does not peel o

 .

(

1

)

  While keeping the dust extractor system level and 

upright, press and hold the dust box latches and pull 

the dust box out of the dust extractor system. Dispose 

of the dust inside. 

(

Fig. 13, 14

)

2

1

Dust box latch

Dust box

Fig. 13

Dust box

Filter 

(

internal

)

Fig. 14

 CAUTION


To prevent accident, make sure to turn the switch 

o

 , then disconnect the battery and the drilling 

tool.

(

2

)

  When cleaning the 

fi

 lter, face the opening in the dust 

box downward and tap the dust box gently to knock 

the dust out. 

(

Fig. 14

)

(

3

)

  If dust is adhered to the intake port 

(

mesh covering

)


or the area around it, clean it o

  with a soft brush. 

(

Fig. 15

)

Dust extractor system intake port 

(

mesh covering

)

Fig. 15

11

English

000Book̲Dust extractor system̲NA.indb   11

000Book̲Dust extractor system̲NA.indb   11

2017/12/05   13:42:58

2017/12/05   13:42:58

Содержание Dust extractor system

Страница 1: ...e et de comprendre ce mode d emploi AVANT d utiliser l outil motorisé Garder ce mode d emploi à la disponibilité des autres utilisateurs et propriétaires avant qu ils utilisent l outil motorisé Ce mode d emploi doit être conservé dans un endroit sûr INSTRUCCIONES DE SEGURIDAD Y MANUAL DE INSTRUCCIONES ADVERTENCIA La utilización INAPROPIADA O PELIGROSA de esta herramienta eléctrica puede resultar e...

Страница 2: ...E EXTRACTEUR DE POUSSIÈRE 18 SYMBOLES 19 DESCRIPTION FONCTIONNELLE 20 NOM DES PARTIES 20 ACCESSOIRES EN OPTION vendus séparément 20 SPÉCIFICATIONS 21 ASSEMBLAGE ET FONCTIONNEMENT 22 APPLICATIONS 22 COMMENT UTILISER 22 ENTRETIEN ET INSPECTION 27 DÉPANNAGE 29 LISTE DES PIÈCES 44 INSTRUCCIONES IMPORTANTES SOBRE SEGURIDAD 30 SIGNIFICADO DE LAS PALABRAS DE SEÑALIZACIÓN 30 SEGURIDAD 30 ADVERTENCIAS DE S...

Страница 3: ... safety a Keep work area clean and well lit Cluttered or dark areas invite accidents b Do not operate power tools in explosive atmospheres such as in the presence of flammable liquids gases or dust Power tools create sparks which may ignite the dust or fumes c Keep children and bystanders away while operating a power tool Distractions can cause you to lose control 2 Electrical safety a Power tool ...

Страница 4: ...and do not allow persons unfamiliar with the power tool or these instructions to operate the power tool Power tools are dangerous in the hands of untrained users e Maintain power tools Check for misalignment or binding of moving parts breakage of parts and any other condition that may affect the power tool s operation If damaged have the power tool repaired before use Many accidents are caused by p...

Страница 5: ... to read its instruction manual carefully 2 Do not use the tool for any purposes other than those specified 3 Follow the instruction manual when attaching the dust extractor system to the cordless rotary hammer and when cleaning the dust extractor system changing its filter etc 4 Use only the accessories and attachments that are specified Use only the accessories and attachments that are specified...

Страница 6: ...l Nozzle adjustment button Filter internal Fig 1 OPTIONAL ACCESSORIES sold separately Filter Replace the filter about once every 100 times the dust extractor system becomes full Code No 370520 Dust box set This product set includes a filter cover filter and dust box Code No 370518 Nozzle seal Replace this part if it becomes cracked or damaged or if it loses its elasticity Code No 370494 Brush cap ...

Страница 7: ...troke 3 15 16 100 mm Max hole drilling depth 3 11 32 85 mm Diameter of drill 11 64 25 32 4 3 20 mm Max length of drill effective length 3 15 16 100 mm or shorter Dimensions W H D 3 35 64 12 3 64 14 57 64 90 306 378 mm 3 35 64 12 3 64 16 3 16 90 306 411 mm Weight 4 0 lbs 1 8 kg 4 0 lbs 1 8 kg 7 English 000Book Dust extractor system NA indb 7 000Book Dust extractor system NA indb 7 2017 12 05 13 42 5...

Страница 8: ...battery and the drilling tool Press the latches on both sides of the dust extractor system and remove the tool body from the dust extractor system ASSEMBLY AND OPERATION APPLICATIONS Dust extractor system specialized for drilling concrete for use with the following Hitachi cordless rotary hammers DH18DBL DH18DBDL DH18DBQL DH18DBML DH36DBL DH36DBDL DH36DBQL DH36DBML DH36DPA DH36DPB DH36DPC DH36DPD ...

Страница 9: ... nozzle adjustment button is pressed the nozzle won t be locked in position even if the nozzle adjustment button lock is released 4 Release the nozzle adjustment button to lock the position of the nozzle Fig 7 5 6 Material When the nozzle adjustment button is released The nozzle becomes locked Fig 7 3 Adjust the drilling depth Fig 8 9 NOTE The maximum drilling depth when using the dust extractor s...

Страница 10: ...ce of the concrete proceed with drilling Fig 12 3 Firm contact with the concrete surface Drilling Raised off the concrete surface Fig 12 Delayed stop function The dust extractor system s internal motor stops after a delay of several seconds from when the tool s switch is released This allows dust to be extracted without leaving any dust behind 5 Emptying the dust Fig 13 14 15 If too much dust is co...

Страница 11: ...Filter internal Seal packing Fig 17 NOTE When removing the filter cover be sure that the seal packing of the dust box does not peel off 1 While keeping the dust extractor system level and upright press and hold the dust box latches and pull the dust box out of the dust extractor system Dispose of the dust inside Fig 13 14 2 1 Dust box latch Dust box Fig 13 Dust box Filter internal Fig 14 CAUTION To...

Страница 12: ...lter cover against seal packing While pressing latch Attach Fig 18 7 Replacing the nozzle seal and brush cap Fig 19 20 As the nozzle seal and brush cap wear out the dust extracting performance declines If the nozzle seal or brush cap is worn out replace it with a new one WARNING When replacing the nozzle seal or brush cap in order to prevent an unlikely accident be sure to turn off the tool s switc...

Страница 13: ... similar tool to clean off the adhered concrete dust before using the dust extractor system again Additionally clean the area around the terminal insertion port of the tool body Fig 21 Terminal insertion port of tool body MAINTENANCE AND INSPECTION WARNING When performing inspections or maintenance be sure to turn off the tool s switch and remove the dust extractor system from the tool body Terminal...

Страница 14: ... be observed Important notice on the batteries for the Hitachi cordless power tools Please always use one of our designated genuine batteries We cannot guarantee the safety and performance of our cordless power tool when used with batteries other than these designated by us or when the battery is disassembled and modified such as disassembly and replacement of cells or other internal parts NOTE Du...

Страница 15: ...the dust case and clean the dust case The filter inside the dust case is clogged Empty the dust from the dust case and clean the filter Or replace the filter with a new one The filter brush cap or nozzle seal is cracked damaged or worn out Replace it with a new one The position of the nozzle won t lock The following incorrect steps were performed 1 The nozzle was set to the desired position 2 The ...

Страница 16: ...té et toutes les instructions Tout manquement à observer ces avertissements et instructions peut engendrer des chocs électriques des incendies et ou des blessures graves Conservez tous les avertissements et toutes les instructions pour vous y référer ultérieurement Le terme outil électrique utilisé dans les avertissements se réfère aux outils électriques câblé ou aux outils à piles sans fil 1 Sécu...

Страница 17: ...les gants loin des pièces mobiles Les vêtements amples ou les cheveux longs peuvent se prendre dans les pièces mobiles g En cas de dispositifs destinés au raccordement d installations d extraction et de recueil de la poussière veiller à ce qu ils soient correctement raccordés et utilisés L utilisation d un dispositif de collecte de la poussière peut réduire les dangers associés à la poussière 4 Ut...

Страница 18: ...umérons ci dessus certains de ces produits chimiques Plomb des peintres à base de plomb Silice cristalline des briques et du ciment et autres matériaux de maçonnerie et Arsenic et chrome du bois d oeuvre traité chimiquement Le risque d exposition à ces substances varie en fonction de la fréquence d exécution de ce genre de travail Pour réduire l exposition à ces produits chimiques travailler dans ...

Страница 19: ...ompreniez leur signification avant utilisation Courant direct V Tension nominale CONSERVER CES INSTRUCTIONS ET LES METTRE A LA DISPOSITION DES AUTRES UTILISATEURS ET PROPRIETAIRES DE CET OUTIL 000Book Dust extractor system NA indb 19 000Book Dust extractor system NA indb 19 2017 12 05 13 42 59 2017 12 05 13 42 59 ...

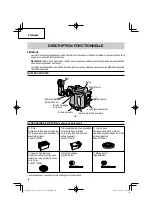
Страница 20: ... Moteur interne Bouton de réglage de la buse Filtre interne Fig 1 ACCESSOIRES EN OPTION vendus séparément Filtre Remplacer le filtre environ toutes les 100 fois que le système extracteur de poussière est plein Code N 370520 Ensemble de la boîte à poussière Cet ensemble comprend un couvercle de filtre un filtre et une boîte à poussière Code N 370518 Joint de buse Remplacer cette pièce si elle est c...

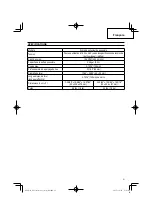
Страница 21: ...ère 0 08 gal 0 3 L Course max 3 15 16 100 mm Profondeur max de perçage de trou 3 11 32 85 mm Diamètre de foret 11 64 25 32 4 3 20 mm Longueur max de foret longueur effective 3 15 16 100 mm ou moins Dimensions L H P 3 35 64 12 3 64 14 57 64 90 306 378 mm 3 35 64 12 3 64 16 3 16 90 306 411 mm Poids 4 0 lbs 1 8 kg 4 0 lbs 1 8 kg 000Book Dust extractor system NA indb 21 000Book Dust extractor system NA...

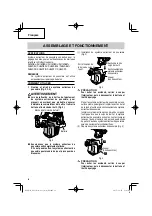
Страница 22: ... du système extracteur de poussière Fig 3 Port d insertion de la borne du corps de l outil Section de rail du corps de l outil Section saillante du système extracteur de poussière Loquet des deux côtés Fig 3 PRÉCAUTION Pour éviter les accidents veillez à couper l interrupteur puis à déconnecter la batterie et l outil de perçage Placer le système extracteur de poussière sur une surface stable puis ...

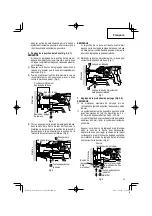
Страница 23: ...se est réduite avant d avoir appuyé sur le bouton de réglage de la buse la buse ne sera pas verrouillée dans sa position même si le bouton de réglage de la buse est relâché 4 Relâcher le bouton d ajustement de la buse pour verrouiller la position de la buse Fig 7 6 5 Matériau Lorsque le bouton d ajustement de la buse est relâché La buse est bloquée Fig 7 3 Réglage de la profondeur de perçage Fig 8...

Страница 24: ...er un contact ferme avec la surface du béton Fig 11 2 Extrémité de la buse fermement en contact avec la surface de béton Fig 11 REMARQUE Si la buse dépasse de la surface la performance d extraction de poussière se dégrade 3 En maintenant l extrémité de la buse fermement en contact avec la surface du béton procéder au perçage Fig 12 Contact ferme avec la surface de béton Perçage Décoller la surface...

Страница 25: ...terie et l outil de perçage 2 Lors du nettoyage du filtre orienter l ouverture de la boîte à poussière vers le bas et taper délicatement sur la boîte à poussière pour en faire sortir toute la poussière Fig 14 3 Si de la poussière adhère au port d entrée maillage de recouvrement ou à la zone qui l entoure nettoyer les impuretés à l aide d une brosse à poils souples Fig 15 Port d entrée du système e...

Страница 26: ...s performances d extraction de poussière déclinent Si le joint de la buse ou le capuchon de la brosse est usé le remplacer par un neuf AVERTISSEMENT Lors du remplacement du joint de la buse ou du capuchon de la brosse pour prévenir un accident peu probable s assurer d éteindre le commutateur de l outil et retirer la batterie du corps de l outil En outre retirer la mèche de l outil a Remplacement d...

Страница 27: ...que certaines pièces sont desserrées il y a un risque de blessure ou d autres accidents Si une anomalie survient avec le système extracteur de poussière consulter le centre de service après vente Hitachi agréé 2 Nettoyage de l extérieur Lorsque l outil électrique est sale l essuyer avec un chiffon sec et doux ou un chiffon imbibé d eau savonneuse Ne pas utiliser de solvant au chlore d essence ou de ...

Страница 28: ...er l interrupteur puis à déconnecter la batterie et l outil de perçage Si la buse ne retourne pas à la position complètement déployée la tirer vers l extérieur avec la main La déployer et la contracter à plusieurs reprises l aidera à récupérer PRÉCAUTION Lors de l utilisation et de l entretien d un outil électrique respecter les règlements et les normes de sécurité en vigueur dans le pays en quest...

Страница 29: ...toute la poussière puis nettoyer la boîte à poussière Le filtre à l intérieur de la boîte à poussière est obstrué Vider la boîte à poussière de toute la poussière puis nettoyer le filtre Ou remplacer le filtre par un filtre neuf Le filtre le capuchon de la brosse ou le joint de la buse est fissuré endommagé ou usé Le remplacer par un neuf La position de la buse ne se verrouille pas Les étapes suiv...

Страница 30: ... descarga eléctrica un incendio y o daños graves Guarde todas las advertencias e instrucciones para futura referencia El término herramienta eléctrica en las advertencias hace referencia a la herramienta eléctrica que funciona con la red de suministro con cable o a la herramienta eléctrica que funciona con pilas sin cable 1 Seguridad en el área de trabajo a Mantenga la zona de trabajo limpia y bie...

Страница 31: ...que están conectados y se utilizan adecuadamente La utilización de un sistema de recogida de polvo puede reducir los riesgos relacionados con el polvo 4 Utilización y mantenimiento de las herramientas eléctricas a No fuerce la herramienta eléctrica Utilice la herramienta eléctrica correcta para su aplicación La herramienta eléctrica correcta trabajará mejor y de forma más segura si se utiliza a la...

Страница 32: ...ros daños reproductores Algunos ejemplos de estas sustancias químicas son El plomo de las pinturas a base de plomo El sílice cristalino de los ladrillos y cemento y otros productos de mampostería y El arsénico y el cromo de la madera tratada químicamente El riesgo resultante de la exposición varía según la frecuencia con que se realiza este tipo de trabajo Para reducir la exposicíon a esta sustanc...

Страница 33: ...de comprender su significado antes del uso Corriente continua V Voltaje nominal GUARDE ESTAS INSTRUCCIONES Y PÓNGALAS A DISPOSICIÓN DE OTROS USUARIOS Y PROPIETARIOS DE ESTA HERRAMIENTA 000Book Dust extractor system NA indb 33 000Book Dust extractor system NA indb 33 2017 12 05 13 43 02 2017 12 05 13 43 02 ...

Страница 34: ...tor interno Botón de ajuste de la boquilla Filtro interno Fig 1 ACCESSORIOS OPCIONALES vendidos por separado Filtro Sustituya el filtro al menos una vez de cada 100 veces que el sistema extractor de polvo se llena Código N º 370520 Juego de la caja del polvo Este producto incluye una cubierta del filtro el filtro y la caja del polvo Código N º 370518 Junta de la boquilla Cambie esta pieza cuando s...

Страница 35: ...08 gal 0 3 L Carrera máx 3 15 16 100 mm Profundidad máx del taladrado de agujeros 3 11 32 85 mm Diámetro de taladrado 11 64 25 32 4 3 20 mm Longitud máxima de la broca longitud efectiva 3 15 16 100 mm o inferior Dimensiones An Al Pr 3 35 64 12 3 64 14 57 64 90 306 378 mm 3 35 64 12 3 64 16 3 16 90 306 411 mm Peso 4 0 lbs 1 8 kg 4 0 lbs 1 8 kg 000Book Dust extractor system NA indb 35 000Book Dust e...

Страница 36: ... de la herramienta Sección del riel del cuerpo de la herramienta Parte saliente del sistema extractor de polvo Pestillo ambos lados Fig 3 PRECAUCIÓN Para prevenir accidentes asegúrese de apagar el interruptor luego desconecte la batería y la herramienta de perforación Coloque el sistema extractor de polvo sobre una plataforma estable y alinee e inserte la sección del riel del cuerpo de la herramie...

Страница 37: ...ón incluso si el botón de ajuste de boquilla es liberado 4 Libere el botón de ajuste de la boquilla para bloquear la posición de la boquilla Fig 7 6 5 Material Cuando se suelta el botón de ajuste de la boquilla La boquilla se bloquea Fig 7 3 Ajuste la profundidad de taladrado Fig 8 9 NOTA La profundidad máxima de taladrado cuando se utiliza el sistema extractor de polvo es de 85 mm El sistema extr...

Страница 38: ...en contacto firme con la superficie de hormigón proceda con el taladrado Fig 12 3 Contacto firme con la superficie de hormigón Taladrado Elevado desde la superficie de hormigón Fig 12 Función de parada con retraso El motor interno del sistema extractor de polvo se detiene luego de una cierta demora de varios segundos desde que el interruptor de la herramienta es liberado Esto permite que el polvo ...

Страница 39: ...ste polvo adherido al puerto de admisión cubierta de malla o a la zona de alrededor del mismo límpielo con un cepillo suave Fig 15 Puerto de admisión del sistema extractor de polvo cubierta de la malla Fig 15 PRECAUCIÓN Para prevenir accidentes asegúrese de apagar el interruptor luego desconecte la batería y la herramienta de perforación 6 Reemplazo del filtro Fig 16 17 18 Sielfiltroenelinteriorde...

Страница 40: ...ble asegúrese de desactivar el interruptor de la herramienta y extraiga la batería del cuerpo de la herramienta Asimismo retire la broca de la herramienta a Sustitución de la junta de la boquilla Fig 19 Boquilla Muesca en la junta de la boquilla Junta de la boquilla Fig 19 PRECAUCIÓN Para prevenir accidentes asegúrese de apagar el interruptor luego desconecte la batería y la herramienta de perfora...

Страница 41: ...ricos gasolina o disolventes para pinturas ya que estos deforman los materiales plásticos 3 Manipulación del motor Tenga cuidado de no permitir que aceite agua u otros líquidos se filtren dentro del motor interno Fig 1 en la página 34 4 Limpieza del terminal Fig 21 El terminal del sistema extractor de polvo es un componente importante que suministra corriente eléctrica al motor Tras el taladrado d...

Страница 42: ...la herramienta de perforación Si la boquilla no vuelve a la posición completamente extendida tire de ella hacia fuera con la mano La extensión y contracción repetida ayudará a que se recupere PRECAUCIÓN En la operación y el mantenimiento de las herramientas eléctricas se deberán observar las normas y reglamentos vigentes en cada país Aviso importante sobre las pilas de las herramientas inalámbrica...

Страница 43: ...acíe el polvo de la caja del polvo y limpie la caja del polvo El filtro dentro de la caja del polvo está obstruido Vacíe el polvo de la caja del polvo y limpie el filtro O bien reemplace el filtro por uno nuevo El filtro la tapa del cepillo o la junta de la boquilla están agrietados dañados o desgastados Reemplácelo por uno nuevo No se bloquea la posición de la boquilla Fueron realizados los sigui...

Страница 44: ...1 117 FAN COVER 1 118 MOTOR FAN SET 1 119 RUBBER BUSHING A 4 120 RUBBER BUSHING B 1 121 SUPPORT D 2 122 CONTROLLER 1 123 BUTTON B 1 124 STOPPER 1 125 DUST BOX ASS Y 1 126 DUST BOX 1 127 FILTER 1 128 PACKING C 1 129 FILTER COVER 1 130 PACKING B 1 101 102 103 104 105 111 112 113 114 116 124 123 108 110 109 106 120 126 127 129 130 118 117 109 110 113 108 106 128 115 125 106 119 119 122 107 121 121 44...

Страница 45: ...45 000Book Dust extractor system NA indb 45 000Book Dust extractor system NA indb 45 2017 12 05 13 43 05 2017 12 05 13 43 05 ...

Страница 46: ...46 000Book Dust extractor system NA indb 46 000Book Dust extractor system NA indb 46 2017 12 05 13 43 05 2017 12 05 13 43 05 ...

Страница 47: ...47 000Book Dust extractor system NA indb 47 000Book Dust extractor system NA indb 47 2017 12 05 13 43 05 2017 12 05 13 43 05 ...

Страница 48: ...OLS toll free or HITACHI AUTHORIZED POWER TOOL SERVICE CENTER regarding COLLECTION Pour le RAMASSAGE contacter HITACHI KOKI U S A LTD au 1 800 59 TOOLS appel gratuit ou UN SERVICE APRÈS VENTE D OUTILS ÉLECTRIQUE AGRÉÉ PAR HITACHI Con respecto a la RECOLECCIÓN de baterías póngase en contacto con HITACHI KOKI U S A LTD número 1 800 59 TOOLS llamada gratis o con HITACHI AUTHORIZED POWER TOOL SERVICE ...

Отзывы: