


6
CP-X600(EDX40K3)
4. Adjustment
4-1 Before adjusting
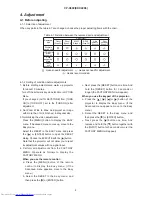
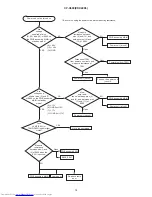
4-1-1 Selection of adjustment
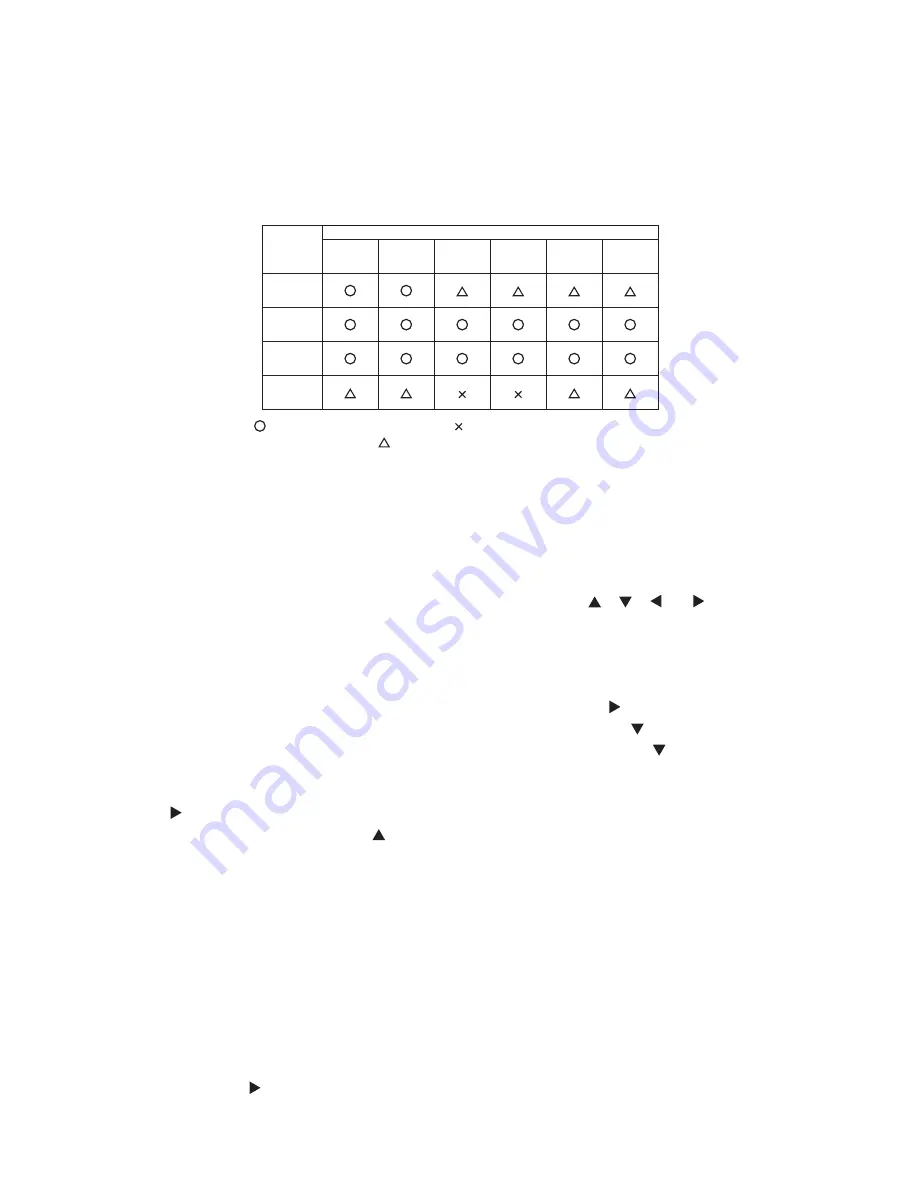
When any parts in the table 4-1 are changed, choose the proper adjusting items with the chart.
Table 4-1: Relation between the replaced part and adjustment
Replaced
part
Adjustment
Flicker
(Chap.4-2)
Ghost
(Chap.4-3)
DC OFF
(Chap.4-4)
E-POS
(Chap.4-5)
White
balance
(Chap.4-6)
Color
uniformity
(Chap.4-7)
Dichroic
optics unit
LCD/LENS
prism
assembly
PWB
assembly
Main
Lamp
unit
assembly
: means need for adjustment. : means not need for adjustment.
: means recommended.
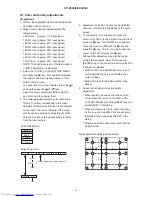
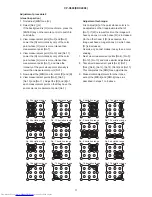
4-1-2 Setting of condition before adjustments
1. Before starting adjustments, warm up projector
for about 10 minutes.
Turn off the automatic keystone function in OPTION
Menu.
If you changed [AUTO KEYSTONE] from [TURN
ON] to [TURN OFF], set to the [TURN ON] after
adjustment.
2. Set Zoom Wide to Max. And project an image
with more than 1m (40 inches) in diagonal size.
3. Normalizing the video adjustments
Press the [MENU] button to display the EASY
menu. If Advanced menu comes up, move to the
Easy menu.
Select the RESET in the EASY menu and press
the [ ] or [ENTER] button to open the RESET
dialog. Choose the EXECUTE with the [ ] button.
Note that the projector will not allow you to reset
its adjustment values with no signal input.
4. Perform all adjustments from the FACTORY
MENU. Operate as follows to display the
FACTORY MENU.
When you use the remote control...
a. Press the [MENU] button of the remote
control to display the Easy menu. (If the
Advanced menu appears, move to the Easy
menu.)
b. Select the RESET in the Easy menu, and
then press the [ ] or [ENTER] button.
c. Next, press the [RESET] button one time. And
hold the [RESET] button for 3 seconds or
longer (the FACTORY MENU will appear).
When you use the keypad of the projector...
a. Press the [ ], [ ], [ ] or [ ] button of the
projector to display the Easy menu. (If the
Advanced menu appears, move to the Easy
menu.)
b. Select the RESET in the Easy menu, and
then press the [ ] or [ENTER] button.
c. Next, press the [ ] button one time. And
repress and hold the [ ] button together with
the [INPUT] button for 3 seconds or more (the
FACTORY MENU will appear).
Содержание CP-X600 series
Страница 33: ...33 CP X600 EDX40K3 7 Wiring diagram Wiring diagram 1 ...
Страница 34: ...34 CP X600 EDX40K3 Wiring diagram 2 ...
Страница 35: ...35 CP X600 EDX40K3 Wiring diagram 3 ...
Страница 36: ...36 CP X600 EDX40K3 Wiring diagram 4 ...
Страница 37: ...37 CP X600 EDX40K3 Wiring diagram 5 ...
Страница 38: ...38 CP X600 EDX40K3 Wiring diagram 6 ...
Страница 39: ...39 CP X600 EDX40K3 Wiring diagram 7 ...
Страница 40: ...40 CP X600 EDX40K3 Wiring diagram 8 ...
Страница 41: ...41 CP X600 EDX40K3 Wiring diagram 9 ...
Страница 42: ...42 CP X600 EDX40K3 8 Disassembly diagram ...
Страница 43: ...43 CP X600 EDX40K3 ...
Страница 67: ...CP X600 EDX40K3 1 2 3 4 5 6 6 1 2 3 4 5 D G F E C B A POWER UNIT BALLAST 1 CONFIDENTIAL ...
Страница 68: ...CP X600 EDX40K3 1 2 3 4 5 6 6 1 2 3 4 5 D G F E C B A POWER UNIT BALLAST 2 CONFIDENTIAL ...
Страница 88: ...CP X600 EDX40K3 MEMO ...
Страница 90: ...QR72691 Printed in Japan JE CP X600 YK No 0586E ...


