22
ENGLISH
OPERATING INSTRUCTIONS (continued)
P
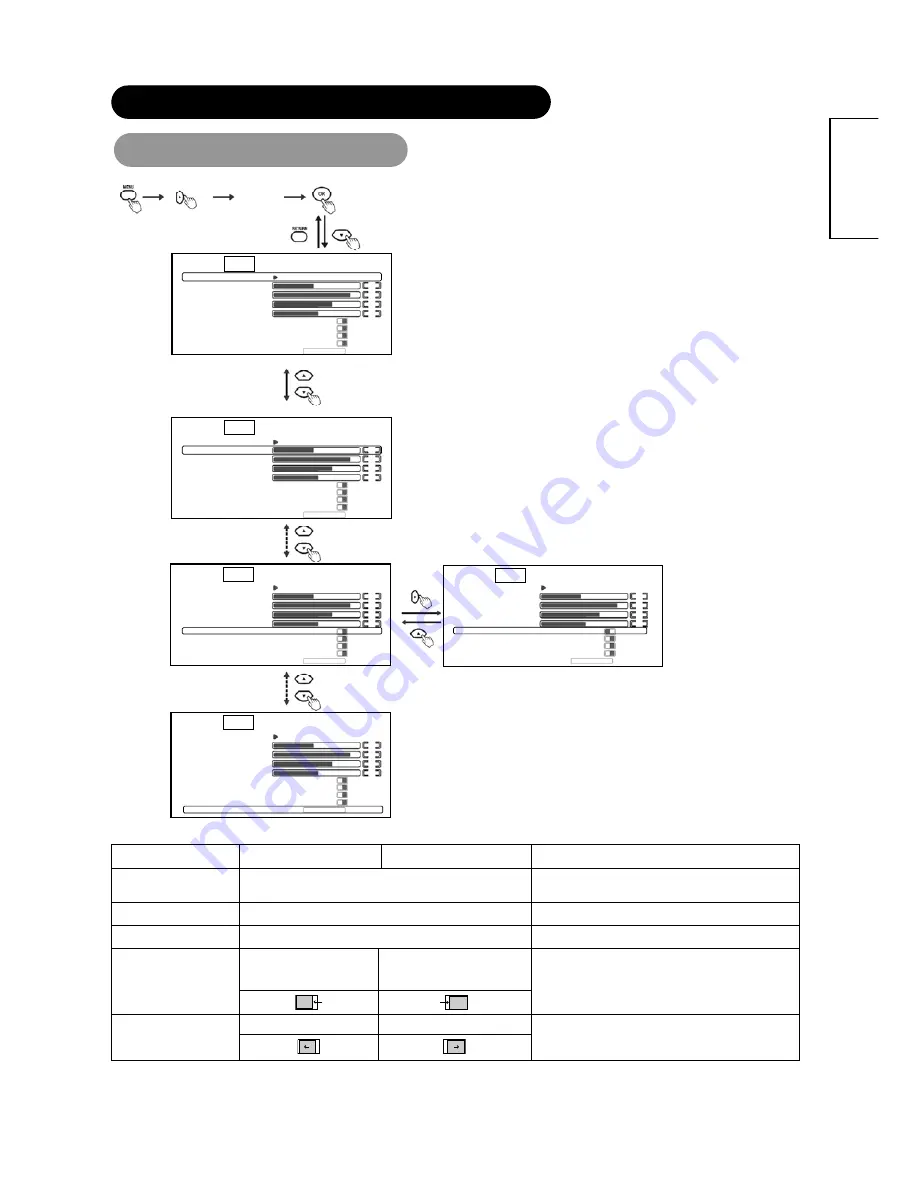
IMAGE MENU
d
Picture
Image
Audio
Function
Setup 1
Auto Adjustment
H Position
Clock Phase
Mode Display
On Off
029
050
050
Image
050
V Position
FULL
Horizontal Clock
WVGA Type
Vertical Filter
Picture Size
On
On
Off
Frequency Mode
PC
Movie
Off
Picture
Image
Audio
Function
Setup 1
Auto Adjustment
H Position
Clock Phase
Mode Display
On
Off
029
050
050
050
V Position
Full
Horizontal Clock
WVGA Type
Vertical Filter
Picture Size
On
On
Off
Frequency Mode
PC
Movie
Off
Picture
Image
Audio
Function
Setup 1
Auto Adjustment
H Position
Clock Phase
Mode Display
On Off
029
050
050
050
V Position
Full
Horizontal Clock
WVGA Type
Vertical Filter
Picture Size
On
On
Off
Frequency Mode
PC Movie
Off
Picture
Image
Audio
Function
Setup 1
Auto Adjustment
H Position
Clock Phase
Mode Display
On
Off
029
050
050
050
V Position
Full
Horizontal Clock
WVGA Type
Vertical Filter
Picture Size
On
On Off
Frequency Mode
PC
Movie
Off
Picture
Image
Audio
Function
Setup 1
Auto Adjustment
H Position
Clock Phase
Mode Display
On
Off
029
050
050
050
V Position
Full
Horizontal Clock
WVGA Type
Vertical Filter
Picture Size
On
On
Off
Frequency Mode
PC
Movie
Off
*Press
“
RETURN
”
button to return to Main Menu, then press
“
MENU
”
button to exit OSD.
Selected characters
W
X
Setup hint
Auto Adjustment
*
Press the
X
button to auto-adjust the display parameters to
optimum.
Adjust automatically for clock, phase and position.
H Position
*
Press the
W
or
X
button to adjust the display position.
Adjust the horizontal display position.
V Position
*
Press the
W
or
X
button to adjust the display position.
Adjust the vertical display position.
Reduces the dot clock
frequency (shrinks the right
side).
Increases the dot clock frequency
(expands the right side).
Horizontal Clock
Adjust for maximum character clarity.
Slows the dot clock. Phase.
Advances the dot clock Phase.
Clock Phase
*
Adjust for clear character visibility.
(* Only available in RGB input)


