--- 15 ---
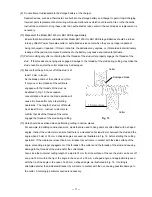
Fig. 18
8. REPAIR GUIDE
WARNING: Without fail, remove the storage battery from the main body of the tool before starting repair
or maintenance work. If the battery is left in and the switch is activated inadvertently, the
motor will start rotating unexpectedly, which could cause serious injury.
8-1. Precautions in Disassembly and Reassembly
The [Bold] numbers in the description below correspond to the item numbers in the Parts List and exploded
assembly diagram for the Model CL 10D2.
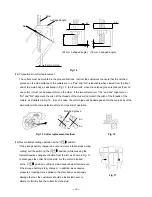
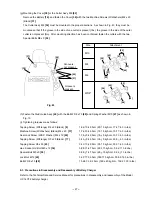
8-1-1. Preparation to disassembly (Fig. 18)
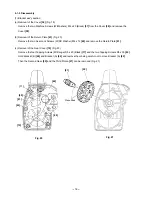
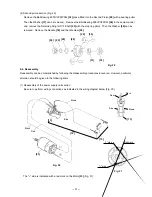
Before disassembly, set the Pushing Button [3] to the position and depress the trigger switch until Bracket
(A) [42] opens. Then release the trigger switch and remove the storage battery.
Remove the two Special Bolts M5 x 9 [50] from the two Cutter Ass'y M8 [52] with the Hex. Bar Wrench 4 mm [11]
(standard accessory). Insert the storage battery in the main body. Depress the trigger switch keeping the
Pushing Button set to the position until Bracket (A) [42] is positioned to the maximum cutting position. Then
release the trigger switch and remove the storage battery.
Fig. 19
On completion of the above preparation, be sure to
disconnect and remove the battery. Remove the
Bolt W3/8 x 75 [48], loosen the Spring Washer M10
[47], and take off the Stud Guide Ass'y [46]. (Fig. 19)
(a)
(b)
Maximum
cutting
position
position
[38]
[37]
[50]
[52]
[42]
[3]
[46]
[47]
[48]
Содержание CL 10D2
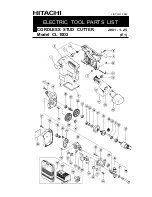
Страница 32: ...ELECTRIC TOOL PARTS LIST LIST NO CORDLESS STUD CUTTER Model CL 10D2 2001 1 25 E1 F842 ...
Страница 36: ......

