2
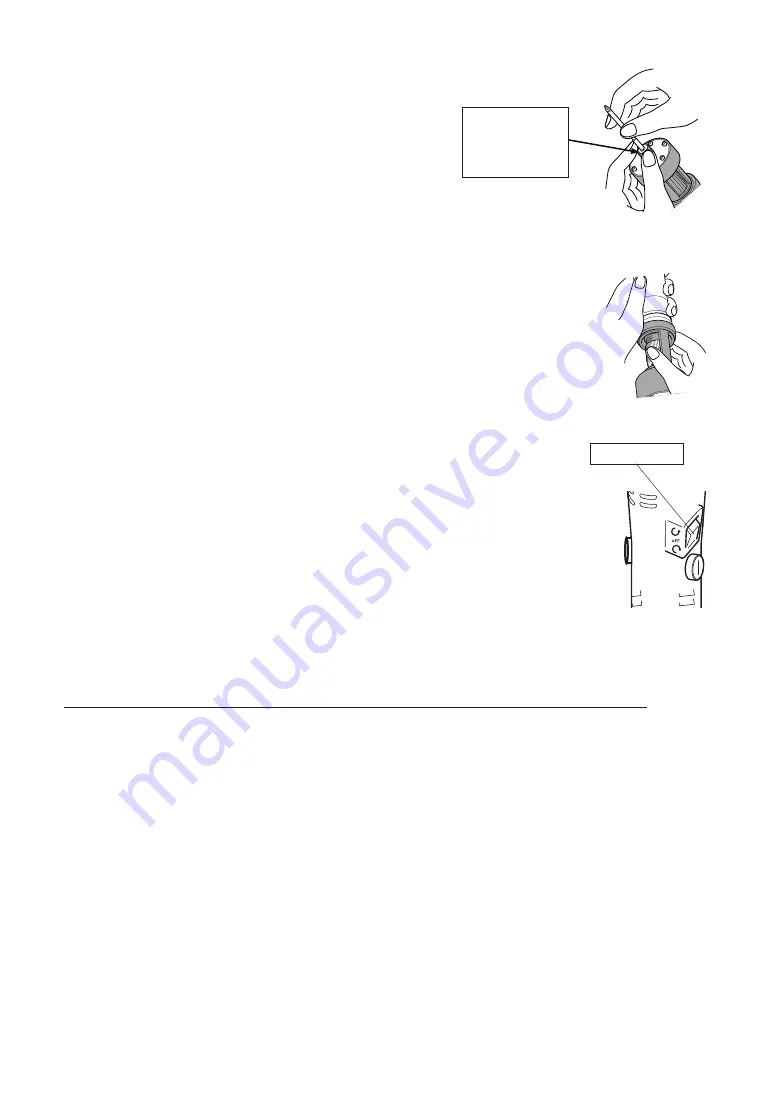
4. Insert the bit to the screwdriver.
Push down the joint shaft collar at the end of the driver upwards
and insert the bit.
Check the bit not to come loose after that.
*NOTE:
Please make sure whether the bit size# is proper for the screws to
avoid damaging the screw recess.
5. Torque Adjustment
Adjust the torque adjusting nut(T/A nut) to the appropriate Level by following to “the
Approx. Guidance of Output Torque” on this book.
The scale on the guidance is assuming same scale on the torque adjusting nut of the
screwdriver.
*NOTE:
Please make sure the exact output torque value by using Torque meter* due to the value
on the guidance is
just for your reference.
6. Connect AC plug to the power outlet.
7. Please confirm the rotation way as slide the FOR/REV switch to “FOR” or “REV” side.
As for the driver with PUSH to start will be worked when the screw is pressed by bit
inserted on the screwdriver.
8. Please tighten the screw for a trial before using indeed.
Please make sure the exact output torque value by using Torque meter* and adjust T/A nut
until achieve the target torque.
9. If in case of loosening the tightened screw, please slide the FOR/REV switch to “REV”.
The tightened screw can be loosened by the driver with several times impact.
*We recommend using HIOS Torque Meter for torque checking or setting output torque of a screwdriver.
◦
Measuring slack torque of tightened screws or torque increase ··· HDP series
◦
Making torque setting on an electric screwdriver, checking output torque of tools ··· HP series
Insert a bit
during pushing
down the joint
shaft coller.
FOR/REV Switch


