


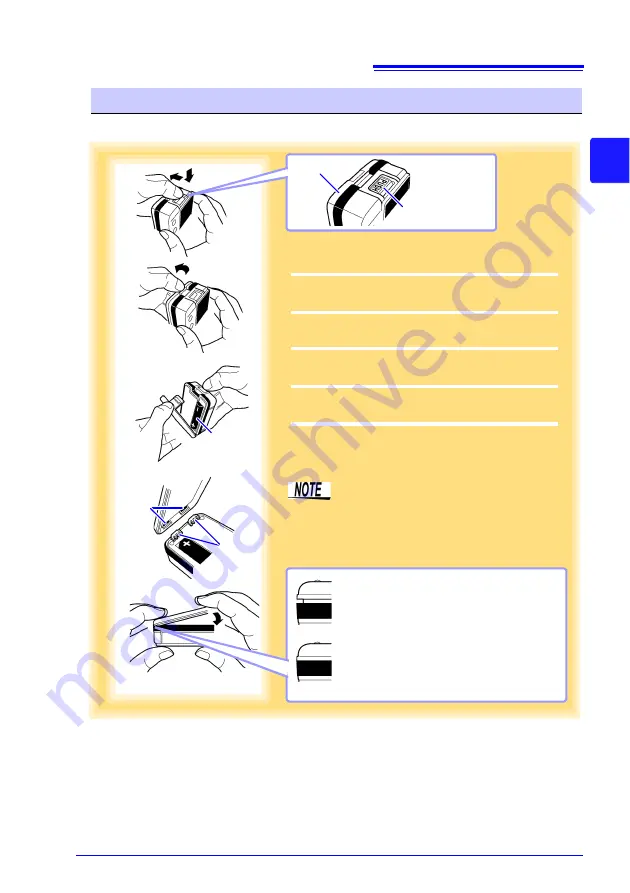
2.1 Installing (or Replacing) the Battery
19
3
2
C
h
ap
te
r 2 M
eas
u
rement
Preparations
Required Items: LR6 alkaline battery (1)
Battery Replacement
1
3
The cover will not close correctly if
there are any gaps.
Never attempt to force the battery
cover closed when not aligned
properly. Doing so could cause
damage.
NG
Battery
4
Projections
Holes
OK
Push the tab
Battery cover
2
5
1
Press the PUSH tab as shown, and pull the
battery cover back.
2
Hold the battery cover while separating it from
the logger.
3
Install the battery as shown.
4
Align the holes in the battery cover with the
projections on the back of the logger.
5
While confirming that there are no gaps, press
with your fingers to close the battery cover.
When the battery is installed, the logger turns
on.
(there is no power switch)
Note that the battery cover is designed
to seal tightly to preserve dust- and drip-
resistance.
When the holes in the battery cover are
properly aligned with the projections,
the battery cover should close smoothly.
HIOKI LR5011B980-04
Содержание LR5011
Страница 2: ...HIOKI LR5011B980 04...
Страница 6: ...Contents iv HIOKI LR5011B980 04...
Страница 66: ...4 8 Printing Recorded Data 60 HIOKI LR5011B980 04...
Страница 82: ...6 4 Extracting Data 76 HIOKI LR5011B980 04...
Страница 86: ...7 2 Changing the Connection Monitoring Method and Logger Settings Displays 80 HIOKI LR5011B980 04...
Страница 102: ...9 4 Error Displays 96 HIOKI LR5011B980 04...
Страница 108: ...Index Index 4 HIOKI LR5011B980 04...
Страница 109: ...HIOKI LR5011B980 04...
Страница 110: ...HIOKI LR5011B980 04...
Страница 111: ...HIOKI LR5011B980 04...
Страница 112: ...HIOKI LR5011B980 04...


