background image


11

B

B

o

o

d

d

y

y


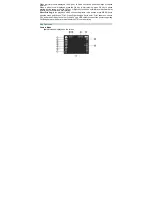
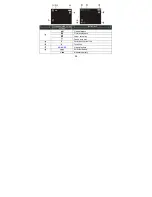
Appearance 


Содержание Hello Kitty KT7015A

Страница 1: ...DIGITAL CAMERA OWNER S MANUAL KT7015A 1 ...

Страница 2: ...rements 5 Notices 6 Install Driver 8 Start to Use 10 Install Battery 10 Charge Battery 10 Use SD Card 10 Switch on off 10 Body 11 Appearance 11 Functions of Keys 14 Standard Accessories 15 Basic Operation 15 Choose Modes 15 Use Direction Keys 15 ...

Страница 3: ...g Mode 15 Menu Settings 16 Capture 16 Recording 16 Playback 16 Direct Printing 17 Step Operation 17 Capture Mode 17 Video Mode 23 Playback Mode 25 Computer Connection 30 Software Installation and Use 33 Specifications 40 Q A 41 FCC Compliance 43 Service 44 ...

Страница 4: ...efully this user manual This camera can take digital pictures of 8 000 000 pixels and short videos no audio With the playback function you can play back the pictures and videos you have taken Connecting the camera with the printer supporting PictBridge protocol you can directly print the pictures in 6 out ...

Страница 5: ...er to obtain the best performance The lowest system requirements are as follows System Requirements Operating System Microsoft Windows 98 SE Me 2000 XP and VISTA MAC OSX 10 4 11 or below CPU CPU Intel Pentium166MHz above or equivalent Memory Above 128 MB Sound Card Graphic Card Sound card and graphic card supports DirectX8 or higher edition CD ROM Above 4 x Speed HD Over 500 MB remained space Oper...

Страница 6: ...y cannot be used for the camera 4 SD card has a write protect switch which can be used to avoid accidental data deletion Push the switch at the bottom of the card and the data in the card will be protected However when the card is under the write protect status it cannot be used for such operations as photo taking or data deletion 6 etc 5 The memory card cannot be used to save data permanently You...

Страница 7: ...s Other Notices 1 This digital camera can be used at 0 40 32 104 Never store the digital camera in a place with high temperature such as in the car under direct sunshine or in an extremely damp environment In order to prevent the condensation phenomena occurring in the digital camera when moving from cold place to warm place please seal the camera in a plastic bag and do not take it out until its ...

Страница 8: ... the function of automatic running or automatic running is closed please directly click the program autorun exe under the CD root directory 1 Click Install Driver button and complete installation according to the hints Then restart the computer 2 When you use USB to connect the camera the computer will respond according to the camera s USB setup and will identify the camera as PC Camera or removab...

Страница 9: ...ion It is not required to install the driver when using the removable disk function except for WINDOWS 98SE Before connecting the computer see the section titled Computer Connection Driver supports such operating systems as WINDOWS 98SE ME 2000 XP VISTA Set the camera as PC Mode and connect it to the computer When the following window is shown choose Yes to finish the installation 9 ...

Страница 10: ... 2 Connect the camera to the computer USB port with USB cable to charge the battery 3 During charging Busy light is on in green and will be off when the battery is fully charged Use SD Card 1 Push the SD card into the slot until it is completely inserted 2 Press its tail in slightly to eject the SD card out Switch on off 1 Switch on press Power key and the screen will light up 2 Switch off press t...

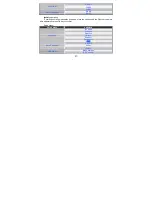
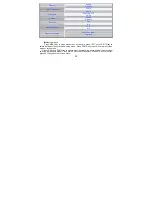
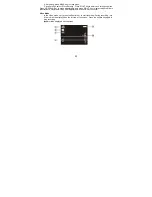
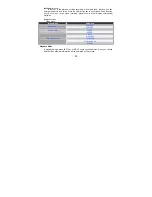
Страница 11: ...11 B Bo od dy y Appearance ...

Страница 12: ...12 ...

Страница 13: ...13 ...

Страница 14: ...us Display exit from menus OK key Confirm Play pause videos UP key Select menus upwards zoom in and adjust time Select menus upwards zoom in and adjust time DOWN key Select menus downwards zoom out and adjust time Select menus downwards zoom out enter thumbnails and adjust time LEFT key Select menus or files leftwards fast playback the last file before power off Push the direction key leftward pre...

Страница 15: ...ection keys upward downward leftward and rightward to carry out the functions of the Up Down Left and Right keys In addition the Down key can carry out the functions of OK key Indicator Light BUSY light it will light in such operating states as video recording play connecting PC and lithium battery charging Computer Connection Connecting PC Display the choose menu as the right drawing choose the d...

Страница 16: ...screen is on and the BUSY light is off in such case you can press the Shutter key to take pictures with flash After capturing press the Left direction key to Fast Playback and quickly view the last picture taken If you are not content with the picture press the Down direction key to eject the menu Press the Left or Right key to choose Yes the chosen character will be blue background Press the OK k...

Страница 17: ...d play and OK key to confirm and start playing Direct Printing In the playback mode choose the picture to be printed press MENU key to open the menu and choose Print Press Right direction key to enter Print submenu choose Yes and press OK key to confirm Within 5s use USB cable to connect the printer supporting PictBridge protocol the printer has the mark of to start printing 17 S St te ep p O Op p...

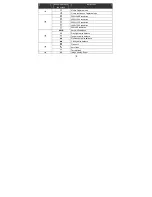
Страница 18: ...re mode 3624 2448 resolution 2592 1944 resolution 2048 1536 resolution 1600 1200 resolution 640 480 resolution A WB Auto white balance Day Light white balance Tungsten white balance Fluorescent white balance Cloudy white balance Flash off Auto flash Forced flash Image quality Super 18 ...

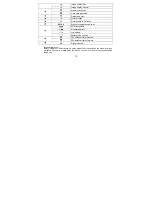
Страница 19: ...e compensation value Sufficient battery Moderate battery Low battery Battery to be used up 10s delay self timer Capture 20s delay self timer Capture 3 0 Digital zooming Use digital zoom Before Capture or video recording using digital zoom can enlarge the menu by max 4 multiples To zoom in please press the Up key To zoom out the menu please press the Down key ...

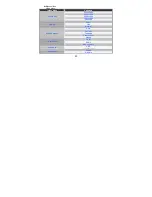
Страница 20: ... Menu Submenu 3624 2448 2592 1944 2048 1536 1600 1200 Resolution 640 480 Super Fine Quality Normal Auto Daylight Tungsten Fluorescent White Balance Cloudy Color Sepia Color Effect Monochrome Exposure 0 0 Enable Datestamp Disable 20 ...

Страница 21: ...r Exposure Compensation submenu press the Left key and the Right key to adjust after adjustment press OK key to confirm Setup menu Setup menu Submenu English Français Deutsch Italiano Espaňol Portuguese Language 中文 Disable 60Sec Auto Power off 120Sec Mass Storage USB Mode PC Camera ...

Страница 22: ...ation Press MENU key to open video menu At the time press LEFT key or RIGTH key to switch between video menu and setup menu Press DOWN key to enter the items of video menu or setup menu Press UP key and DOWN key to choose menu items and the background of the menu item selected will become green Press RIGHT key to enter submenu Press OK key to confirm press LEFT key back to previous menu ...

Страница 23: ...stments and press RIGHT key to select adjusted items Hour Minute Day Month Year After adjustments press OK key to confirm Video Mode In the Video mode only press the Shutter key to start recording During recording icon 1 below will be displayed on the left top of the screen Press the shutter key again to stop recording Information displayed on the screen 23 ...

Страница 24: ...0 resolution 320 240 resolution A WB Auto white balance Day Light white balance Tungsten white balance Fluorescent white balance Cloudy white balance Memory card used Card write protected Sufficient battery Moderate battery Low battery Battery to be used up 3 0 Digital zooming 24 ...

Страница 25: ...oom out In the video recording digital zoom will not display enlargement multiples Menu options Video menu Image Menu Submenu 640 480 Resolution 320 240 20FPS Frame Rate 15FPS Auto Daylight Tungsten Fluorescence White Balance Cloudy Playback Mode In playback mode press LEFT key or RIGHT key to choose pictures When you choose different files different information will be displayed on the screen ...

Страница 26: ...isplayed on the screen Instructions AVI Video playback Pictures playback Under auto play Pause auto play 5 Location of current file 6 Total files 00 00 05 Video play time Sufficient battery Moderate battery 26 ...

Страница 27: ... pause playing Press OK key again to continue playing Press the Left direction key or the Right direction key to play forward or backward and press OK key to confirm and start playing Zoom in pictures Choose pictures press Up direction key to enlarge them with navigation window displayed on the left bottom of the screen However the enlarged picture can be only be seen partially in the screen area ...

Страница 28: ...exit the thumbnail mode and display the file in full screen Auto Play Press Menu key to open the menu and choose Auto Play press the Right direction key to enter Auto Play submenu choose Yes press OK key to conform and start automatic play In the process of automatic play press OK key to pause again to continue playing press Menu key to stop playing Menu options Playback menu Playback Menu Submenu...

Страница 29: ...ck menu choose Set Logo submenu choose No then press OK key to confirm When the camera is switched on a second time the switch on image will be restored to be default image Print In the playback mode choose the picture to be printed press MENU key to open the menu and choose Print Press Right direction key to enter Print submenu choose Yes and press OK key to confirm Within 5s use USB cable to con...

Страница 30: ... confirm and enter the corresponding mode Mass Storage After the camera connects with the computer in Mass Storage mode then the LCD screen will be off and the BUSY light is on Removable Disk in My Computer window will appear The pictures or videos are saved in the Removable Disk Choose the desired photo video and copy drag with mouse it into the target folder of the computer PC Camera If the came...

Страница 31: ... Fig Ⅰ Fig Ⅱ 31 Fig Ⅲ ...

Страница 32: ... to exit Note If images cannot be displayed check if the camera installs the driver and confirm whether the device chosen in the window is 32 About the use of VideoImpression 2 please refer to VideoImpression 2 Installation and Use ...

Страница 33: ... carry out the installation program on the CD and the screen will display the following introduction window z If the CD driver does not automatically carry out or close such function please click autorun exe program under the root directory of the CD PhotoImpression 5 Installation and Use Install PhotoImpression5 Click Install PhotoImpression button complete the installation as per the tips After ...

Страница 34: ...esktop or open PhotoImpression 5 via Start Programs When PhotoImpression5 is opened the following window will appear Click the center of the widow with the left key of the mouse to shut the window After the window is off you can open PhotoImpression 34 ...

Страница 35: ...sing and opening photos in the Get Photo the chosen photo will be displayed in the central area of the program And then you can edit the chosen photo After PhotoImpression is open Get Photo window will appear 35 ...

Страница 36: ...For the detailed instructions of PhotoImpression please refer to Help in the program as the following figure 36 ...

Страница 37: ...37 37 ...

Страница 38: ...mpression 2 Click Install VideoImpression button and complete the installation as per the tips After installation please restart the computer Run VideoImpression 2 38 Double click the icon on the desktop or follow Start Programs to open VideoImpression 2 ...

Страница 39: ...For the detailed instructions of VideoImpression 2 please refer to Help in the program as the following figure 39 ...

Страница 40: ...c LCD Screen 2 0 TFT LCD Photo Resolutions 3264 2448 2592 1944 2048 1536 1600 1200 640 480 Video Resolutions VGA 640 480 20FPS 15fps QVGA 320 240 20FPS 15fps White Balance Auto Daylight Tungsten Fluorescence and Cloudy Exposure Auto Manual 2 0EV 2 0EV 0 5EV steps Self Timer 10s 20s delay Video AVI No audio File Format Photo JPEG Storage Media Built in flash memory 32MB SD MMC card USB Port Mini US...

Страница 41: ...eos The SD card in the camera is write protected Please take out the SD card and pull the write protected switch to release protection Pictures and videos can not be replayed and files in the computer can not found in the memory Because the SD MMC memory card is inserted into the camera the internal memory cannot be used Please switch off to take out the memory card Unclear pictures The hands are ...

Страница 42: ...please charge it Camera automatic switch off When automatic switch off is set as 60s or 120s the camera will automatically switch off without any operation within 1min or 2min according to setting Files are write protected Please cancel the protection first Files in the camera can not be deleted The SD card in the camera is write protected Please take out the SD card and pull the write protected s...

Страница 43: ...y and if not installed and used in accordance with the instructions may cause harmful interference to radio communications However there is no guarantee that interference will not occur in a particular installation If this equipment does cause harmful interference to radio or television reception which can be determined by turning the equipment off and on the user is encouraged to try to correct t...

Страница 44: ...nt damage to the unit in transit and or from possible battery leakage We are not responsible for batteries returned with the product or for the cost of replacement Distributed by Spectra Merchandising International Inc 4230 North Normandy Avenue Chicago IL 60634 U S A Please have model number ready for Customer Service call 1 800 777 5331 Printed in China 1976 2008 SANRIO CO LTD ...

Отзывы: