


16
Hardware configuration
5. Connection to power supply & remote
Make sure to disconnect the battery before
installing the HELIX P ONE MK2!
Make sure of correct polarity.
+ 12V:
Connector for the positive cable.
Connect the +12 V power cable to the positive
terminal of the battery. The positive wire from
the battery to the amplifiers power terminal
needs to have an inline fuse at a distance of
no more than 12 inches (30 cm) from the bat-
tery. The value of the fuse is calculated from
the maximum total current input of the whole
car audio system (P ONE MK2 = max. 120 A
RMS at 12 V RMS power supply). If your pow-
er wires are short (less than 1 m / 40”) then
a wire gauge of 16 mm² / AWG 6 will be suf
-
ficient. In all other cases we strongly recom
-
mend gauges of 25 - 35 mm² / AWG 4 – 2!
GND: Connector for the ground cable.
The ground wire should be connected to a
common ground reference point (this is locat-
ed where the negative terminal of the battery
is grounded to the metal body of the vehicle),
or to a prepared metal location on the vehicle
chassis, i.e. an area which has been cleaned
of all paint residues. The cable should have
the same gauge as the +12 V wire. Inade-
quate grounding causes audible interference
and malfunctions.
REM: The remote input is used to switch
on and off the P ONE MK2. It is mandato
-
ry to connect this input to the remote output
of the preconnected device that provides
the input signal to the P ONE MK2.
For ex
-
ample the remote output of a preconnected
P SIX DSP ULTIMATE. We do not recommend
controlling the remote input via the ignition
switch to avoid pop noise during turn on / off.
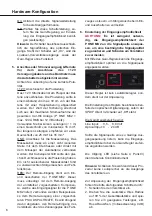
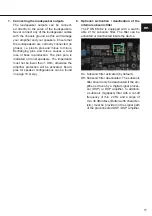
6. Adjustment of the input sensitivity
ATTENTION:
It is mandatory to prop-
erly adapt the input sensitivity of the
P ONE MK2 to the signal source in order
to achieve the best possible signal quality
and to avoid damage to the amplifier.
The input sensitivity can be optimally adapted
to the signal source using the
gain control
.
This is not a volume control, it´s only for ad
-
justing the amplifier gain. The setting of the
control also affects the digital signal input if
the
SPDIF Direct In switch
is set to “Off” po
-
sition.
The gain control range is:
Line Input: 0.5 - 8.0 Volts
Optical Input: 0 - 24 dB
If the signal source doesn´t provides enough
output voltage, the input sensitivity can be
smoothly increased via the
gain control
.
The
Clipping LED
(see page 14, point 3)
serves as monitoring tool.
Note:
Don‘t connect any loudspeakers to the
outputs of the HELIX P ONE MK2 during this
setup.
For adjustment please proceed as follows:
1. Turn on the amplifier.
2. Adjust the volume of your radio to approx.
90 % of the max. volume and playback
an appropriate test tone, e.g. pink noise
(0 dB).
3. If the
Clipping LED
already lights up, you
have to reduce the input sensitivity via the
gain control
until the LED turns off.
4. Increase the input sensitivity by turning the
gain control
clockwise until the
Clipping
LED
lights up. Now turn the control coun-
terclockwise until the
Clipping LED
turns
off again.


