


40
Rev. 05/2020
41
Rev. 05/2020
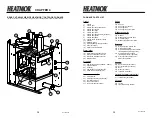
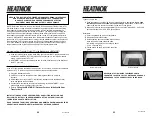
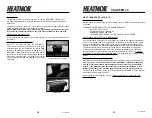
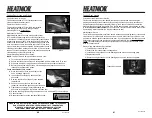
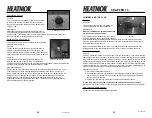
Firebox Door Hoses and Elbows
Principle of the Door Hoses
The door hoses allow HTF to circulate between the
firebox door and the water jacket.
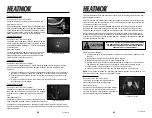
Operation of the Door Hoses
The door hoses allow HTF from the water jacket to
pass through the firebox door, through thermal
siphoning. Refer to “Firebox Door”
Maintenance / Result
Maintaining the door hoses and elbows ensures that
HTF is able to flow through the door. Build-up (calcium)
in the elbows is possible over time, which slowly reduces the HTF
flow through the door. If HTF does not flow freely through the
hoses to the firebox door, you may hear popping sounds in the
door. Once the hoses are around five years old or if they show
signs of wear, they should be replaced. Replacement of hoses or
cleaning of the elbows is always easier if the HTF is cool rather
than hot. To clean the elbows, remove the hoses and use a pipe
cleaning brush to clear out the build-up.
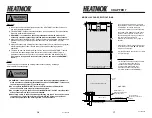
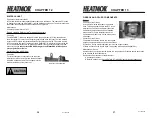
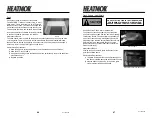
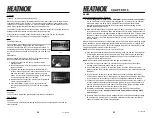
Removal and Replacement Door Hoses
NOTE:
Top Door Hose is 20in, bottom Door Hose is 18in
1) Turn off power to the air combustion blowers.
2) Ensure that the fire in the firebox is extinguished, which will allow the HTF to cool.
3) With hose clamps or vice-grips, pinch the door hoses in the middle of the hose.
4) Before removing the old door hose, cut the new pieces of door hose, one at 18
inches and the other at 20 inches.
These measurements are critical.
5) Pinch the new door hose in the middle of the
hose, creating a tight seal.
6) Loosen the hose clamps on each end of the
door hose.
7) Remove the first end of the door hose needing
replacement.
8) Push on the end of the new door hose and
repeat the steps for the opposite end of the hose.
9) Tighten the hose clamps, securely fastening the
door hose to the nipple on the furnace or firebox door.
10) Remove the vice-grips pinching the door hoses. This will allow HTF to flow through.
11) Check for leaks.
12) Repeat the steps to change additional door hoses.
ABSOLUTELY NO FIRE IN THE FIREBOX WHEN PERFORMING THIS PROCESS.
DO NOT PERFORM THIS PROCESS WHEN UNIT HTF TEMPERATURE
IS UNSAFE. ALWAYS WEAR PROPER PERSONAL PROTECTIVE
EQUIPMENT WHEN WORKING WITH HTF AND CHEMICALS.
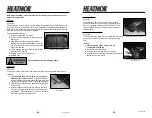
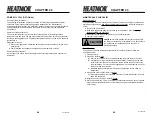
Door Hose
Elbow
Clamping hose
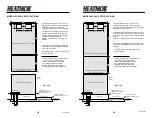
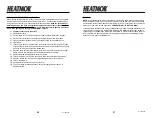
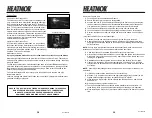
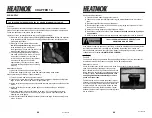
Firebox Door Handle
Principles of the Firebox Door Handle
Fastened to the firebox door, the handle provides a secure method of controlling the
opening and closing of the firebox door. By opening the firebox door, (only until the door
handle hits the second stage of the safety latch), gives a space for fresh air to enter the
firebox without the risk of a “flash back.” The firebox door handle is also designed to “stick”
to the
firebox door
handle holder
on the outer door. This procedure prevents either of the
doors closing while the Heatmor
TM
is being loaded with coal.
Maintenance / Result
To maintain the door handle, ensure the handle closes and opens fairly easily. If the handle
closes too hard, it will be hard to open and close the door. If the closure is too loose, it will
be harder to obtain a perfect seal around the door. If you do not have a firm seal, you could
potentially create an air leak resulting in further complications. Refer to “Checking for Air
Leaks” for further details or contact your local dealer. You can adjust the two bolts on the
latch for correct closure.
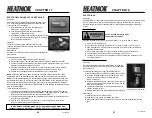
Removal and Replacement Door Handle
1) Turn off power to the blowers.
2) Ensure the fire in the firebox is extinguished.
3) Loosen and remove the nut on the bearing and the nut on the mounting plate.
4) Replace the handle
5) Replace and tighten the nut on the bearing and the nut on the mounting plate.
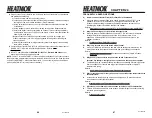
Firebox Door Handle


