


20
Rev. 05/2020
21
Rev. 05/2020
CHAPTER 8
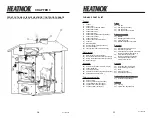
INSTALLATION OF THE HEATMOR™ FURNACE
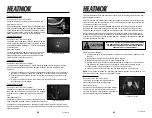
Installation should be performed by a qualified installer and will comply with all the
requirements of the authority having jurisdiction over the installation.
Principles
1) Need to have an airtight seal between the concrete base and the perimeter of the
firebox base.
2) Need to seal the perimeter of the entire HEATMOR™ so rodents are not able to find a
home inside the HEATMOR™.
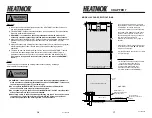
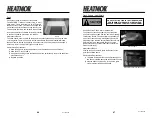
3) Need to lift the HEATMOR™ without damaging it.
Equipment Required
1) It is
not
possible to lift a HEATMOR™ with the forks of a
forklift under the HEATMOR™. It
must be lifted from
the
top
, by the lifting hook. A crane or heavy backhoe works
best, although a heavy duty farm tractor is acceptable.
A) With a farm tractor, extreme care must be taken to
prevent the HEATMOR™ from swinging and
causing damage to the HEATMOR™.
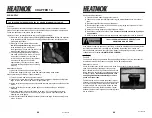
Placing the HEATMOR™ on the Concrete Base
2) Before setting the HEATMOR™ onto the concrete base, it
is a good idea to place a solid sheet of the proper
“reflective air foil” (also called bubble foil) between the
concrete and the HEATMOR™. This will absorb ridges in
the concrete and make it easier to apply caulking around
the inside perimeter of the base of the HEATMOR™. This
reflective foil will also reflect escaping heat up into the sand,
and help prevent air leaks into the firebox if cement cracks.
3) Make sure the total area of the base (where the sand is going) is on solid
concrete. Do not let the base extend past the hole in the concrete where the
lines come in.
4) After the HEATMOR™ is in place perform the following;
Caulking around the Firebox Base
A) One person should get into the HEATMOR™.
B) Apply a substantial bead of caulking around the entire inside perimeter of
the base. This will give an airtight seal so no air will seep through the sand.
This should require about three tubes of High Temperature Silicone.
Caulking around the Outside Perimeter of HEATMOR™
C) With a sharp knife, trim any excess bubble foil that
extends past the base of the HEATMOR™.
D) Apply a bead of caulking around the entire outside
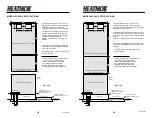
5) Remove transport plugs from relief vent on the roof of your
furnace, supply ball valve, and return pipe on the back of
your furnace. (3 different plugs)
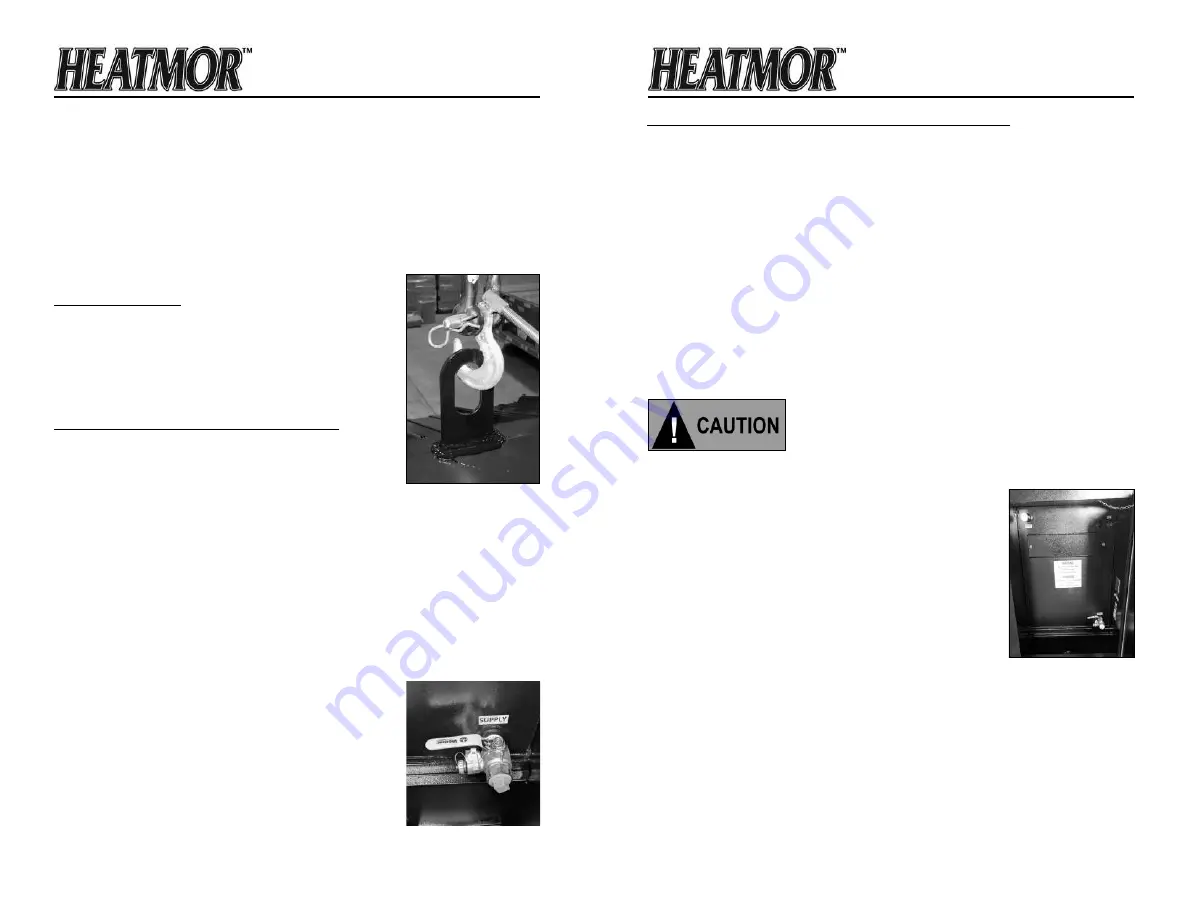
6) Close supply valve located on the back of your furnace.
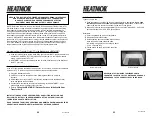
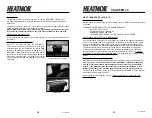
Lift Hook
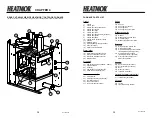
Filling the HEATMOR™ Outdoor Furnace Initially with Water
Before filling your HEATMOR™ furnace with water, make sure the water you intend to use
has been tested and approved. The unit comes prefilled with concentrated DOWFROST™
HD corrosion inhibited propylene glycol. DOWFROST™ HD MUST BE DILUTED WITH
APPROVED WATER. Heatmor highly recommends the use of Pure Water, such as:
Reverse Osmosis, Deionized, or Distilled.
*APPROVED WATER MUST MEET THE REQUIREMENTS OF:
PH LEVEL OF 7.0 TO 11.5
CHLORIDE LEVEL OF UNDER 50
HARDNESS UNDER 200 PPM
SOFTENED AND FILTERED TO LIMIT THE AMOUNT OF SOLIDS.
All plumbing connections at the back of the HEATMOR™ furnace, all electrical hookups,
and all heating appliances should be installed and tested for possible leaks. HEATMOR™
suggests the use of brass fittings when installing the unit.
When filling or adding fluid to your HEATMOR™ always be sure to maintain a minimum of
40% DOWFROST™ HD (corrosion inhibited-propylene glycol) in with your approved water.
If you have any questions regarding installation of the furnace or any aspect of installation,
contact your local dealer.
Never start a fire inside the firebox until the water
jacket is full of HTF, and sand has been added to the
base to the correct level.
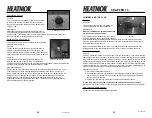
1) Close the bladder ball valve located at the front of the
HEATMOR™ furnace. This valve will ensure no air can enter
the bladder.
2) Close the bottom supply line valve at the back of the
HEATMOR™.
3) Open the top return line valve at the back of the
HEATMOR™.
4) Connect the water source to the fill/drain valve located on
the supply fitting and open it
5) Turn on the source of water.
6) The pressured water will now flow through and remove the
air out of the lines and exchangers as the water flows into
the HEATMOR™.
7) Continue adding water until water is level with the relief vent
pipe. Be careful to minimize overflow.
8) Turn off the source of water.
The HEATMOR™ is now full of water and at least 40% DOWFROST™ HD which means it
is now Heat Transfer Fluid (HTF).
9) Close the drain/fill valve and replace the safety cap.
10) Open the supply valve.
11) Open the bladder valve.
NOTE
: The circulator pumps cannot “push” much air through a system. They are designed
to move Heat Transfer Fluid (HTF) not air.
12) Start the circulating pump. Remember to properly bleed air from the pump.
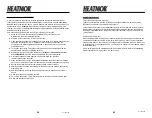
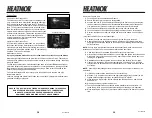
Rear of Furnace
Supply Valve (closed)


