background image

6

598-1372-01

ONE yEAR LIMITED WARRANTy

This is a “Limited Warranty” which gives you specific legal rights. You may also have other rights which vary from 
state to state or province to province.
For a period of one year from the date of purchase, any malfunction caused by factory defective parts or workmanship 
will be corrected at no charge to you.

Not Covered -

 Repair service, adjustment and calibration due to misuse, abuse or negligence, light bulbs, batteries, 

and other expendable items are not covered by this warranty. Unauthorized service or modification of the product or 
of any furnished component will void this warranty in its entirety. This warranty does not include reimbursement for 
inconvenience, installation, setup time, loss of use, unauthorized service, or return shipping charges.
This warranty covers only HeathCo LLC assembled products and is not extended to other equipment and components 
that a customer uses in conjunction with our products.
THIS WARRANTY IS EXPRESSLY IN LIEU OF ALL OTHER WARRANTIES, EXPRESS OR IMPLIED, INCLUDING 
ANY WARRANTY, REPRESENTATION OR CONDITION OF MERCHANT ABILITY OR THAT THE PRODUCTS ARE 
FIT FOR ANY PARTICULAR PURPOSE OR USE, AND SPECIFICALLY IN LIEU OF ALL SPECIAL, INDIRECT, 
INCIDENTAL, OR CONSEQUENTIAL DAMAGES.
REPAIR OR REPLACEMENT SHALL BE THE SOLE REMEDY OF THE CUSTOMER AND THERE SHALL BE NO 
LIABILITY ON THE PART OF HEATHCO LLC FOR ANY SPECIAL, INDIRECT, INCIDENTAL, OR CONSEQUENTIAL 
DAMAGES, INCLUDING BUT NOT LIMITED TO ANY LOSS OF BUSINESS OR PROFITS, WHETHER OR NOT 
FORESEEABLE. Some states or provinces do not allow the exclusion or limitation of incidental or consequential 
damages, so the above limitation or exclusion may not apply to you.

Please keep your dated sales receipt, it is required for all warranty requests.

HeathCo LLC reserves the right to discontinue products and to change specifications at any time without 
incurring any obligation to incorporate new features in products previously sold.

Содержание 6115

Страница 1: ... LED lighting Works with motors up to 1 8 hp Slide switch selectable OFF ON and AUTO modes AUTO OFF ON Thesinglepolemotionsensorwallswitchautomati cally controls indoor lighting In AUTO mode the controlautomaticallyturnsthelightonwhenmotion is detected The motion sensor keeps lights on for a set period of time after motion is last detected Installation is as easy as replacing a wall switch Some co...

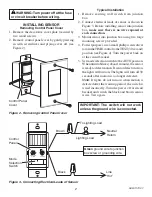
Страница 2: ...r detected Note If lights do not turn on when motion is detected after the warm up period the switch is wired incorrectly Turn the power off at circuit breaker and switch the black and brown sensor wires Test again OFF ON AUTO T I M E L I G H T Test 30 20 5 5 10 Green ground wire to junction box screw or grounding wire Brown Black Line Hot Neutral Return Lighting Load WARNING Turn power off at the...

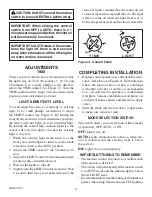
Страница 3: ... is combined with other switches or outlets on an expanded box you will need to purchase a combination wall plate Various combination wall plates are available at home centers and electrical supply stores 2 Slide the mode selection switch a couple times to make sure it moves freely Mode Selection Switch This switch allows you to select one of three modes of operation OFF AUTO or ON OFF Lights stay...

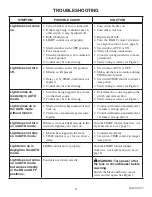
Страница 4: ...in AUTO mode 1 Switch is being triggered by air vent or other heat source 2 Control may be wired wrong 1 Determine the source triggering the switch and alter air flow 2 Verify wiring is correct see Figure 3 Light comes on in the AUTO mode without motion 1 Mode switch has been turned off and back on 2 There was a momentary power inter ruption 1 Control will function normally after 1 minute warm up ...

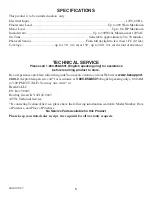
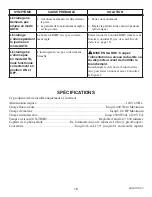
Страница 5: ...tacting Technical Service please have the following information available Model Number Date of Purchase and Place of Purchase No Service Parts Available for this Product Please keep your dated sales receipt it is required for all warranty requests SPECIFICATIONS This product is to be installed indoors only Electrical Input 120V 60 Hz Fluorescent Load Up to 400 Watts Maximum Motor Load Up to 1 8 HP...

Страница 6: ...r equipment and components that a customer uses in conjunction with our products THIS WARRANTY IS EXPRESSLY IN LIEU OF ALL OTHER WARRANTIES EXPRESS OR IMPLIED INCLUDING ANYWARRANTY REPRESENTATION OR CONDITION OF MERCHANT ABILITY ORTHATTHE PRODUCTS ARE FIT FOR ANY PARTICULAR PURPOSE OR USE AND SPECIFICALLY IN LIEU OF ALL SPECIAL INDIRECT INCIDENTAL OR CONSEQUENTIAL DAMAGES REPAIR OR REPLACEMENT SHA...

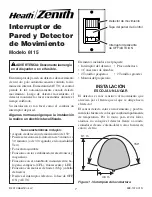
Страница 7: ...res de hasta 1 8 hp caballo de fuerza Deslice el interruptor selector a la fase de OFF ON y AUTO El interruptor de pared con detector de movimiento de un solo polo automáticamente controla la ilu minación interior En modalidad AUTO el control prende la luz automáticamente cuando detecta movimiento Luego de detectar movimiento el detector mantiene las luces encendidas durante el tiempo calibrado Su...

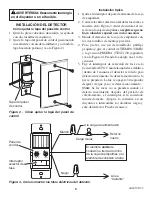
Страница 8: ...miento Nota Si las luces no se prenden cuando se detecta movimiento después del período de calentamiento el interruptor está conectado incorrectamente Apague la corriente en un disyuntor e intercambie los alambres negro y café del detector Pruebe de nuevo OFF ON AUTO T I M E L I G H T Test 30 20 5 5 10 Marrón Negro ADVERTENCIA Desconectelaenergía en el disyuntor o en el fusible INSTALACIÓN DEL DET...

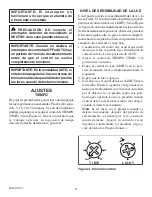
Страница 9: ...tornilladorphillipspequeño parafijarelcontroldelaLuz LIGHT VealaFigura 4 Sigiraelcontrolcompletamentehacialaderecha laflechadeterminalaposición eldetectorprenderá la luz aún en pleno día Si gira el control completa mente hacia la izquierda el detector prenderá la luz cuando la luz existente es muy baja 1 Cuando la luz del cuarto esté al nivel que usted desea que la luz se prenda fije el interrupto...

Страница 10: ... lapso del control de TIEMPO TIME 3 Ponga el control deTIEMPO TIME en un lapso de tiempo más corto 4 Verifique que la conexión esté correcta vea la Figura 3 INSTALACIÓN COMPLETA 1 Recoloquelatapadelpaneldecontroleinstalela placa ornamental de pared Vea la Figura 2 En lasinstalacionesdondesecombineelinterruptor detector de movimiento con otros interruptores o enchufes en una caja extendida se neces...

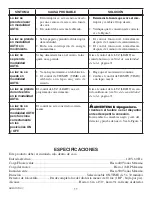
Страница 11: ...lmente después de 1 minuto de calentamiento 2 El control funcionará normalmente después de 1 minuto de calentamiento La luz no se prende modalidad AUTO Si hay demasiada luz en el cuarto la luz quizá no se prenda Gire el control de la LUZ LIGHT en sentido horario vea Nivel de sensibilidad de la luz página 9 La luz no se queda en modalidad AUTO 1 Ya no hay movimiento en la habitación 2 El control de...

Страница 12: ...nes del producto o de cualquier componente que se provee invalidarán esta garantía en su totalidad Esta garantía no incluye reembolso por inconveniencia instalación tiempo de instalación perdida de uso servicio no autorizado o costos de transporte de retorno Esta garantía cubre solamente los productos ensamblados por HeathCo LLC y no se extiende a otros equipos o componentes que el consumidor usa ...

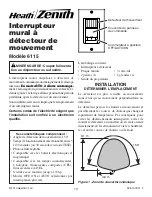
Страница 13: ...s à halogène fluorescentes compactes CFL fluorescentes et à DEL S utilise avec moteurs jusqu à 1 8 hp Modes OFF ON et AUTO sélectionnés par interrupteur à glissière L interrupteur mural unipolaire à détecteur de mouvementcommandeautomatiquementl éclairage intérieur En mode AUTO il allume automatique mentl éclairagelorsqu unmouvementestdécelé Ce derniergardel éclairageallumépendantunepériode prédéf...

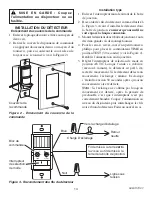
Страница 14: ... aucun mouvement n ait été détecté Note Si l éclairage ne s allume pas lorsqu un mouvement est détecté après la période de préchauffe c est que l interrupteur n est pas correctement branché Coupez l alimentation au niveau du disjoncteur puis interchangez les fils noir et brun du détecteur Faites un nouvel essai OFF ON AUTO T I M E L I G H T Test 30 20 5 5 10 Fil de mise à la terre vert à la vis ou...

Страница 15: ...s allume régler l interrupteur de sélection en mode AUTO 2 Réglez la commande TIME à la position 5 minutes 3 RéglerlacommandeLIGHTàlapositionnoirceur minimale à la position sombre maximale com plètement dans le sens contraire des aiguilles 4 Attendre que l éclairage s éteigne 5 Tourner légèrement la commande LIGHT dans le sens des aiguilles Attendre 2 secondes puis passer la main devant le détecte...

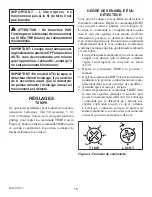
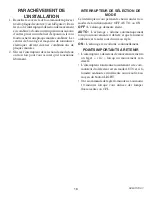
Страница 16: ...NTERRUPTEUR DE SÉLECTION DE MODE Cet interrupteur vous permet de choisir un des trois modes de fonctionnement OFF AUTO ou ON OFF L éclairage demeure éteint AUTO L éclairage s allume automatiquement lorsqu un mouvement est détecté et que la lumière ambiante est en dessous du niveau réglé ON L éclairage reste allumé continuellement POINTS IMPORTANTS À RETENIR L interrupteur à détecteur de mouvement ...

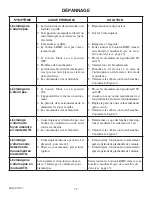
Страница 17: ...tionnement de la minuterie n est pas écoulée 4 La commande est mal branchée 1 PlacezlecommutateurenpositionAUTO ou OFF 2 Assurez vous qu aucun mouvement n est fait pendant la période de fonctionnement 3 Réglez la période à une valeur inférieure plus courte 4 Vérifiez si les câbles sont bien branchés Consultez la Figure 3 L éclairage s allume de façon aléatoire en mode AUTO 1 L interrupteur est déc...

Страница 18: ...ctédans la pièce 2 La période de fonctionnement réglée est trop courte 1 Faites un mouvement 2 Réglez la période à une valeur supérieure plus longue L éclairage s allume pendant la journée en mode AUTO Le bouton LIGHT n est pas correcte ment réglé Faites tourner le bouton LIGHT dans le sens horaire consultez Degré de sensibilité du détecteur page 15 L éclairage ne s allume pas en mode AUTO mais fo...

Страница 19: ...DIRECTS OU SECONDAIRES LE REMPLACEMENT OU LA RÉPARATION CONSTITUENT LE SEUL RECOURS DU CLIENT ET HeathCo LLC NE POURRA ÊTRE TENUE RESPONSABLE DE TOUS DOMMAGES SPÉCIAUX DIRECTS INDIRECTS OU SECONDAIRES YCOMPRIS SANSS YLIMITER LESPERTESCOMMERCIALESETPERTESDEPROFIT QU ELLES SOIENTPRÉVISIBLESOUNON Certainesprovincesn autorisentpasl exclusionoulalimitationdesdommagesindirects ou secondaires et la limit...

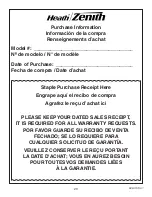
Страница 20: ...cibo de venta fechado se lo requiere para cualquier solicitud de garantía Veuillez conserver le reçu portant la date d achat vous en aurez besoin pour toutes vos demandes liées à la garantie Purchase Information Información de la compra Renseignements d achat Model _ ____________________________________ Nº de modelo N de modèle Date of Purchase _ ____________________________ Fecha de compra Date d...

Отзывы: