background image

Doc No. XG-0042   Rev No. 042808


4

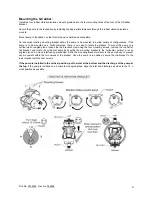
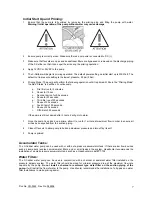
Mounting the X-Caliber: 

Install the four rubber vibration isolation mounts provided into the four mounting holes of the foot of the X-Caliber   
bracket. 
 
Secure the pump to the foundation by installing the appropriate fasteners through the rubber vibration isolation 
mounts. 
 
Mount pump to foundation so that control panel is visible and accessible. 
 
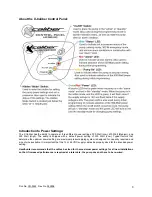
An innovative rotating mounting bracket allows the pump to be mounted in a wide variety of configurations. If the 
pump is to be mounted on a horizontal plane, there is no need to rotate the bracket. To mount the pump to a 
vertical wall or angled plane; loosen the top bracket by removing the four mounting screws, remove the top half of 
the bracket, and rotate the cylindrical pump body within the mounting bracket to the horizontal, vertical, or even 
angled planes. A unique interlocking mechanism within the mounting bracket will secure the pump body to prevent 
any movement within the two halves of the bracket. Once the pump is in position, secure the top bracket to the 
lower bracket with the four screws. 


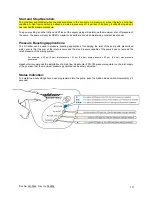
If the pump is installed in the vertical position, put the inlet at the bottom and the discharge of the pump at 
the top. 
If the pump is installed on a horizontal or angled plane, align the inlet and discharge as close to the 12’ o 
clock position as possible


Содержание X-CALIBER XR-124

Страница 1: ...Doc No XG 0042 Rev No 042808...

Страница 2: ...ectrical Installation p6 Initial Start up p7 Use of Accumulator Tanks p7 About the Control Panel p8 How to Change Pump Settings p9 Start and Stop Operation p10 Pressure Boosting Applications p10 Pump...

Страница 3: ...freshwater applications Technical Data Operating Conditions Maximum Pressure 67 psi 4 5 bar Maximum System Pressure 110 psi 7 5 bar Maximum Inlet Pressure 36 psi 2 5 Bar Maximum Flow Rate 10 GPM 38 L...

Страница 4: ...ng all 316 Stainless Steel wetted components and is designed for salt or fresh water applications Both the XR 124 and the XRS 124 pumps are suitable for rainwater and drinking water applications Consu...

Страница 5: ...acket To mount the pump to a vertical wall or angled plane loosen the top bracket by removing the four mounting screws remove the top half of the bracket and rotate the cylindrical pump body within th...

Страница 6: ...ual uphill or horizontal run to the inlet of the pump to prevent the formation of air pockets 7 Ensure inlet and discharge piping connected to the pump is well supported This will prevent undue stress...

Страница 7: ...gth of the wiring run and operating voltage It is important that the wire be sized correctly for optimum performance of the pump Headhunter recommends that the cables be sized for the maximum power se...

Страница 8: ...ourth trial of 90 seconds h Pause of 20 seconds i Fifth trial of 90 seconds If the pump is still not primed after 5 trials it will go into alarm 7 Once the pump has picked up a prime allow it to run f...

Страница 9: ...300 Watt Low Typical factors that determine the optimum power setting are maximum pressure piping system is designed for capacity required and size of wire available It is important that the 12 or 24...

Страница 10: ...Doc No XG 0042 Rev No 042808 9 How to change pump settings...

Страница 11: ...ant input power Pressure Boosting Applications The X Caliber can be used in pressure boosting applications If supplying the inlet of the pump with pressurized water ensure that the sum of the inlet pr...

Страница 12: ...y water tank or a leak in the suction piping Under and Over Voltage Alarm The X Caliber will recognize if it should operate on 12VDC or 24VDC on initial power up The green Power LED will flash once if...

Страница 13: ...ooding protection push and hold the on off switch for 20 seconds while the pump is running Release the on off switch when the yellow LED stops flashing and returns to a steady yellow illumination Main...

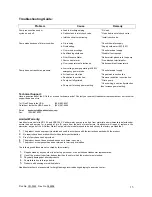
Страница 14: ...echnical support department via Toll Free Phone in the USA 800 662 8557 Outside or inside the USA Phone 954 581 6996 Email headmaster headhunterinc com Fax 954 587 0403 Limited Warranty Headhunter war...

Страница 15: ...of EC Directives 97 23 ECC EC Machinery Directive 98 37 Low Voltage Directive 73 23 ECC Directive of Electromagnetic Compatibility 89 336 ECC Directive 93 68 ECC Noise Level Directive 2000 14 ECC X C...

Страница 16: ......

Отзывы: