background image

User's Guide

4-8

A CD drive letter should be present regardless of the presence of a CD disc in the drive. After the CD 
is properly inserted, data can be accessed just like with hard disk drives. except that nothing can be 
written to or changed on the CD. Using the proper software, a CD-RW drive or DVD+CD-RW drive 
can allow CD-RW discs to be used like a hard drive with writing, deleting, and editing capabilities.

Vibration is normal for all high-speed optical drives due to unbalanced CDs or CD Print. To decrease 
vibration, use the Notebook PC on an even surface and do not place labels on the CD.

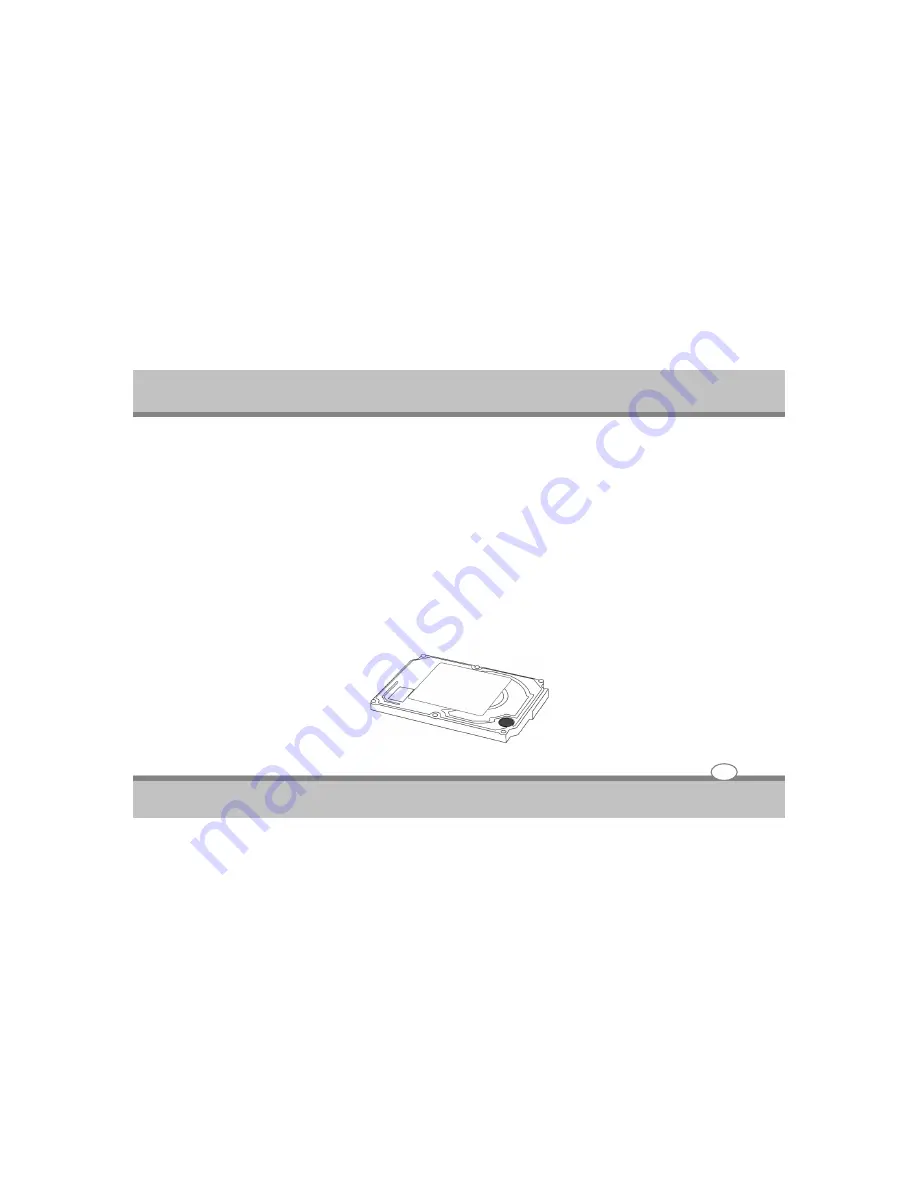
Hard Disk Drive

Hard disk drives have higher capacities and operate at much  faster speeds than floppy disk drives and 
optical drives. The Notebook PC comes with a replaceable 2.5" (6.3cm) wide and approximately .374" 
(.95cm)  high  SATA  hard  disk  drive.  Current  hard  drives  support  S.M.A.R.T.  (Self  Monitoring  and 
Reporting Technology)  to  detect  hard  disk  errors  or  failures  before  they  happen.  When  replacing  or 
upgrading the hard drive, always visit an HCL authorized service center  for this Notebook PC.

Using the Notebook PC

Содержание Notebook PC

Страница 1: ...Notebook PC User s Guide ...

Страница 2: ......

Страница 3: ...te When keys are joined by a plus sign press the first key and while keeping the first key down press the remaining keys finally release all the keys When necessary keys are also shown in graphics Any title command setup item or button that you can see on the screen is shown in boldface Tips and information for special situations Important information that must be followed for safe operation Tips ...

Страница 4: ...Overview Introducing the Notebook PC Chapter 1 Knowing the Parts Chapter 2 Getting Started Chapter 3 Using the Notebook PC Troubleshooting Chapter 4 Chapter 5 1 1 2 1 3 1 4 1 5 1 ...

Страница 5: ...on DO NOT press or touch the display panel DO NOT place on uneven or unstable work surfaces DO NOT use your notebook computer under harsh conditions DO NOT expose to direct sunlight DO NOT use or store in extreme temperatures DO NOT subject the computer to magnetic fields DO NOT place or drop objects on the computer and DO NOT apply heavy pressure on it ...

Страница 6: ... NOT slam your notebook shut and never pick up or hold your notebook by the display DO NOT expose to dust and or corrosive chemicals DO NOT tamper with the batteries Keep them away from children DO NOT place near fire or other sources of heat DO NOT expose the computer to rain or moisture Avoid sudden changes in temperature or humidity by keeping it away fromA C and heating vents ...

Страница 7: ...anel Operating Environment Since users are likely to maintain the same posture for a long period of time when using the computer they will be exhausted more easily if compared with other users engaged in other general operations This section will illustrate the suggested posture and the operating environment for the use of the computer Health Management Take a 2 to 3 minute break every 30 minutes ...

Страница 8: ...just the chair until you can lean your back closely on the chair and sit down with your back stretched Relax with no strength put onto your shoulders and bend your knees comfortably Put your wrist comfortably to keep it parallel to the desk Your eyes will feel tired easily if you cannot see the screen clearly Pay attention to the following tips and adjust the screen constantly to ensure its clear ...

Страница 9: ...nd operation please read carefully the section FortheCorrectUseofthisProductandYourSafety toensurethecorrectoperation CoverYour Notebook PC You can purchase an optional carrying case to protect it from dirt water shock and scratches Note The Notebook surface is easily dulled if not properly cared for Be careful not to rub or scrap the Notebook PC surfaceswhentransportingyourNotebookPC CoverYour Ba...

Страница 10: ...o on When cleaning do not use liquid or sprayed detergent for cleaning Instead use moisture sheet or a cloth for cleaning Use your Notebook where the socket outlet is nearby and easily accessible Please keep the notebook computer away from humidity Lay the notebook computer on a reliable surface when installing Adrop or fall may cause injury The openings on the enclosure are for air convection hen...

Страница 11: ... damage by transient over voltage Never pour any liquid into openings as this may cause fire or electrical shock Never open the body of notebook computer For safety reason the notebook computer should only be opened by qualified service personnel Do not leave this notebook computer in an environment unconditioned Storage temperature above 60ºC 140ºF may damage the notebook computer To avoid any da...

Страница 12: ... PC or diskettes throughairportmagneticdetectorsorexposethemtomagnetic wands CleaningYour Computer When it is necessary to clean the plastic case and keyboard use a soft lint free cloth slightly dampened with a mild detergent solution or use the contents of any commercially available computer cleaning kit Never use alcohol petroleum based solvents or harsh detergents to clean the notebook Also nev...

Страница 13: ...ation on using your notebook PC Important When opening do not force the display panel down to the table or else the hinges may break Never lift the notebookPCbythedisplaypanel User s Guide Introducing the Notebook PC 1 7 1 Install the battery pack 2 Connect the AC Power Adapter 3 Open the Display Panel 4 Turn ON the Notebook PC ...

Страница 14: ...nside of the system The following sections describe inside features User s Guide Knowing the Parts Knowing the Parts Chapter 2 2 1 3 Color Wide Screen LCD Display 4 Power Button 5 Keyboard 6 Touchpad Click Buttons 8 LED Status Indicators 9 TouchPad 7 Built in Stereo Speakers 1 Webcam 2 Integrated Microphones ...

Страница 15: ...GA resolution panel The features of the Color LCD Display are summarized as follows TFTcolor LCD with Widescreen 14 1 1280x800 Wide XGA resolution panels Capable of displaying 16M colors 32 bit true color 4 Power Button The power switch allows powering ON and OFF the Notebook PC and recovering from Standby In windows Vista this button can also be used to safely turn OFF the Notebook PC The power s...

Страница 16: ...s Indicators The Status indicator lights correspond to specific operating modes These modes are Power on Suspend status battery AC adapter status hard drive activity HDD Num Lock Caps Lock and Wireless LAN activity Description of the status appears in the latter part of this chapter 9 Touchpad The Touchpad with its buttons is a pointing device that provides the same Function as a desktop mouse The...

Страница 17: ...activity 1 Power Indicator Lets you know that power to the system is turned on This LED is positioned so that you can see the power state whether the LCD panel is opened or closed Glows in orange when the system is powered on Blinks in orange when the system is in Standby mode User s Guide Knowing the Parts 2 4 6 Wireless LAN Bluetooth 1 Power Indicator 3 Drive Access 4 Num Lock 5 Caps Lock 2 Batt...

Страница 18: ...the keyboard is activated When activated the embedded numeric keypad will be enabled 5 Caps Lock When LED glows in orange indicates that the Caps Lock key on the keyboard is activated When activated all alphabet keys typed in will be in uppercase or capital letters 6 Wireless LAN Bluetooth Activity Indicator When LED glows in orange indicates that the Wireless LAN Function is activated When LED bl...

Страница 19: ...SB 2 0 and PCI Express instead of the slower parallel bus used in the PC card slot Not compatible with previous PCMCIAcards 2 VGAPort The 15 pin D sub monitor port supports a standard VGA compatible device such as a monitor or projector to allow viewing on a larger external display User s Guide Knowing the Parts 2 6 2 VGA Port 3 Air Outlet Vent 6 4 in 1 Card Slot 5 e SATA USB combo port 4 LAN RJ 4...

Страница 20: ...ur 4 LAN RJ 45 Port RJ 45 LAN Port is an internal 10 100 ethernet or 10 100 1000Mbps ethernet LAN module depends on selected model connects your computer to other computers networks through a local area network LAN 5 e SATA USB Combo Port The e SATA USB combo port allows you to connect an external device such as an external hard disk drive or optical drive 6 4 in 1 card slot The built in card read...

Страница 21: ...or is being accessed by the operating system 3 Emergency Tray Release The emergency tray release allows you to open the optical drive tray without powering on your notebook 4 Microphone Jack Lets you plug in a stereo head phone powered speakers or earphone set with 1 8 phono plug for personal listening 3 Emergency Tray Release 7 Optical Drive Eject Button 4 Microphone jack 1 Headphone Jack 5 USB P...

Страница 22: ...Mbit sec USB 2 0 USB allows many devices to run simultaneously on a single computer with peripherals such as USB keyboards and some newer monitors acting as additional plug in sites or hubs USB supports hot swapping of devices so that most peripherals can be connected or disconnected without restarting the computer 6 Optical Disk Drive Allows you to load and start programs from a compact disc CD o...

Страница 23: ...Lithium ion battery pack is automatically charged when connected to an AC power source and maintains power to the Notebook PC when AC power is not connected Battery time varies by usage and by the specifications for this Notebook PC The battery pack cannot be disassembled and must be 6 Fan Outlet 1 Battery Pack 4 Rating Label 6 Air vent 6 Air vent 5 Hard Disk Compartment cover 7 CPU Memory Wireles...

Страница 24: ...th unlock status then push the Battery Release Latch to the right end to remove the battery pack 4 Rating Label The label shows the model number and other information about your notebook 5 Hard Disk Compartment Cover This is where the hard disk drive is located The hard disk drive stores all the system data The hard disk drive can be upgraded to a larger capacity Visit an HCLauthorized service cen...

Страница 25: ...nsists of CPU Memory Wireless LAN optional assembled by default For Additional memory up gradation Visit an HCL authorized service center for information on memory upgrades for your Notebook PC This Notebook PC features a socketed processor design to allow upgrading to faster processors in the future Visit HCL authorized service center for information on upgrades Warning End userremovaloftheMemory...

Страница 26: ...n Lock Lets you attach a Kensington security system or a compatible lock to physically secure your notebook computer The Kensington lock port allows the Notebook PC to be secured using Kensington compatible Notebook PC security products These security products usually include a metal cable and User s Guide Knowing the Parts 2 13 ...

Страница 27: ...se the supplied power adapter Caution Maybecomewarmtohotwheninuse Besurenottocovertheadapterandkeepitawayfromyourbody 2 Modem RJ 11 Port The RJ 11 modem port is smaller than the RJ 45 LAN port and supports a standard telephone cable The internal modem supports up to 56Kbps transfers The built in connector allows convenient use without additional adapters Important The built in modem does not suppo...

Страница 28: ...mber of extra features and function controls on the built in keyboard including Windows system hot keys Note Other Keyboards If your keyboard is damaged or you just want to make a change you can use any standard USBkeyboard Thesystemwilldetectandenableitautomatically Howeverspecialfunctions AP Keybuttons uniquetothesystem sregularkeyboardmaynotwork Knowing the Parts 1 Function Keys 2 Control Keys ...

Страница 29: ...owing the Parts Fn F1 System Sleep button Fn F2 To Enable Disable the WLAN function Fn F3 To Toggle display between Inbuilt LCD and External Monitor Fn F4 Decrease the brightness of inbuilt LCD display Fn F5 Increase the brightness of inbuilt LCD display Fn F6 To mute Unmute the volume Fn F7 To Decrease the Speaker volume Fn F8 To Increase the Speaker volume Fn F9 To Play Pause the media files Fn ...

Страница 30: ...For example Press Ctrl C means to hold down the Ctrl key and type the letter C Key combinations work especially to the application you are running 3 5 Windows keys Use the following two keys to facilitate your work Start Menu key Displays the Start menu Shortcut Application key Provides quick access to shortcut menus This key acts like a right mouse button User s Guide Knowing the Parts 2 17 ...

Страница 31: ... the provided Indian standard AC power cord to a different standard Most hotels will provide universal outlets to support different power cords as well as voltages It is always best to ask an experienced traveller about AC outlet voltages when bringing power adapters to another country With the AC power cord connected to the AC DC adapter connect the AC power cord to an AC outlet preferably with s...

Страница 32: ...book PC with a faultyAC DC adapter Note This Notebook PC may come with a three prong plug You must use a grounded AC outlet to ensure safe operationoftheNotebookPC Warning The power adapter may become warm to hot when in use be sure not to cover the adapter and keep it away fromyourbody Using Battery Power The Notebook PC is designed to work with a removable battery pack The battery pack consists ...

Страница 33: ...led use the following procedures to install the battery pack This notebook provides the most convenient way to install the battery pack into your computer With the extended nose directed toward the compartment insert and push the battery pack Important Neverattempttoremove thebatterypack whiletheNotebookPCis turnedON asthis may result intheloss of workingdata 3 3 To Install the battery Pack ...

Страница 34: ...ayoccurtotheNotebookPC Removing the Battery Pack To remove the battery pack slide the lock latch to the end of right side to unlock the battery lock latch 1 and slide the battery release latch to the end of right side to release the battery latch 2 then take out the battery pack with your finger To remove the battery pack User s Guide Getting Started 3 4 2 1 ...

Страница 35: ...s any abnormal operation or damage to the battery pack caused by impact turnOFFtheNotebookPC andcontact anauthorisedservicecenter Note How to maintain the battery pack To achieve optimal battery performance you may need to do a battery calibrationata3 monthinterval Todothis Fullychargethebattery Fullydischargethebatteryinidlemodetillitshutdown Fullychargethebatteryagain Note After charging the ind...

Страница 36: ...o set or modify the system configuration press F2 upon boot up to enter the BIOS Setup Important To protect the hard disk drive always wait at least 5 seconds after turning OFF your Notebook PC before turningitbackON Note Before bootup the display panel flashes when the power is turned ON This is part of the Notebook PC s test routineandisnotaproblemwiththedisplay 3 6 ...

Страница 37: ...a battery when not using AC power and a plug when usingAC power Double click on the icon for more information and settings Note If you ignore the low battery warning eventually the Notebook PC enters suspend mode Windows default usesSTR Warning Suspend to RAM STR does not last long when the battery power is depleted Suspend to Disk STD is not the same as power OFF STD requires a small amount of po...

Страница 38: ...kes a few hours to fully charge the battery when the Notebook PC is turned OFF and may take twice the time when the Notebook PC is turned on The battery charge light turns OFF when the battery pack is charged Note Thebatterystopschargingifthetemperatureistoohighorthebatteryvoltageistoohigh Power Options The power switch turns ON and OFF the Notebook PC or putting the Notebook PC into sleep or hibe...

Страница 39: ...ses will provide a dialog box to allow restart To restart the system manually click Windows Start button and select Turn off computer and then choose Restart Powering Off In Windows Vista power OFF the Notebook PC by clicking Windows Start button and select Turn Off and then choose Turn Off or Shut Down User s Guide 3 9 Getting Started ...

Страница 40: ...y Shutdown In case your operating system cannot properly turn OFF or restart there is a additional way to shutdown your Notebook PC Hold the power button over 4 seconds TIP Use a straightened paper clip to press the shutdown button Important Do not use emergency shutdown while data is being written doing so can result in loss or destruction of your data 3 10 ...

Страница 41: ...rd drive after 1 minute of inactivity for example Windows Power Options The power management control panel in Windows Vista known as Power Schemes is designed to provide the user with an easy to use interface The Power Schemes tab can be found in the Power Options Properties panel that is accessible via the control panel window Schemes are easy to understand based on notebook usage scenarios and c...

Страница 42: ...unction stores your current data and status in RAM while many components are turned OFF Because RAM is volatile it requires power to keep refresh the data Click the Start button and the arrowhead next to the lock icon to see this option NOTE The power indicator will blink in this mode Hibernate is the same as Suspend to Disk STD and stores your current data and status on the hard disk drive By doi...

Страница 43: ...only This Notebook PC comes with a driver CD s that provides drivers and applications to enable hardware features extend functionality help manage your Notebook PC or add functionality not provided by the native operating system This driver CD contains all drivers utilities and software for all supported operating systems including those that have been pre installed The driver CD does not include ...

Страница 44: ...le click on the Mouse icon The options let you control the size and color of the cursor cursor speed the accepted double click speed and selection button orientation The touchpad works as a mouse pointing device replacement that is used under Windows based operating system If you want to utilize the added features of the touchpad you may want to try installing its own device driver that comes with...

Страница 45: ...r by simply tapping on the surface once A light quick tap always works best To execute an item click the left button twice or do a quick double tap on the surface 3 To simulate holding the mouse button down dragging an icon or selection use the tap and drag gesture This feels much like a double click except that the finger remains on the pad after the second tap Tap lift tap hold and move The simu...

Страница 46: ... or grease Do not touch the touchpad if your fingers are dirty or wet Do not rest heavy objects on the touchpad or the touchpad buttons Do not scratch the touchpad with your finger nails or any hard object Note The touchpad responds to movement not to force There is no need to tap the surface too hard Tapping too harddoesnotincreasetheresponsivenessofthetouchpad Thetouchpadrespondsbesttolightpress...

Страница 47: ... expansion card This new interface is faster by using a serial bus supporting USB 2 0 and PCI Express instead of the slower parallel bus used in the PC card slot Not compatible with previous PCMCIAcards Inserting an Express Card 1 Locate the ExpressCard slot cover on the left side of the computer 2 Insert the ExpressCard with the 26 pin socket into the ExpressCard slot The face label of the card s...

Страница 48: ...d The ExpressCard slot does not have an eject button Press the ExpressCard inwards and release to eject the ExpressCard Carefully pull the ejected ExpressCard out of the socket Note UsewindowssafelyremovehardwareoptionwhileexternaldevicesremovedfromyourPC Push In ...

Страница 49: ...on programs To insert and remove a disc on the drive 1 Make sure the computer is turned on Insert the Optical disk into the drive slot with the label side facing up The optical disk will be automatically slide in the optical drive 2 To remove the disc press the eject button found on the left bottom side of the optical drive 3 The Optical disc will pop out slightly User s Guide 4 7 Using the Notebo...

Страница 50: ...tical drives due to unbalanced CDs or CD Print To decrease vibration use the Notebook PC on an even surface and do not place labels on the CD Hard Disk Drive Hard disk drives have higher capacities and operate at much faster speeds than floppy disk drives and optical drives The Notebook PC comes with a replaceable 2 5 6 3cm wide and approximately 374 95cm high SATA hard disk drive Current hard dri...

Страница 51: ...retailers of this Notebook PC to ensure maximum compatibility and reliability Memory RAM Additional memory will increase application performance by decreasing hard disk access The BIOS automatically detects the amount of memory in the system and configures CMOS accordingly There is no hardware or software including BIOS setup required after the memory is installed The memory compartment provides e...

Страница 52: ...BASE TX speed your network cable must be category 5 or better not category 3 with twisted pair wiring If you plan on running the interface at 100Mbps or 1000Mbps it must be connected to a 100 or 1000 BASE TX respectively speed of onboard LAN controller depends on selected models The software default is to use the fastest setting so no user intervention is required Using the Notebook PC 4 10 ...

Страница 53: ...ngs Once the driver is setup the modem is ready to use Note When you are connected to an online service do not place the Notebook PC in suspend or sleep mode or else youwilldisconnectthemodemconnections Warning Only use analog telephone outlets The built in modem does not support the voltage used in digital phone systems Do not connect the RJ 11 to digital phone systems found in many commercial bu...

Страница 54: ...User s Guide Example of the Notebook PC connected to a telephone jack for use with the built in modem Using the Notebook PC 4 12 Using the Notebook PC ...

Страница 55: ...ward compatible with the earlier IEEE 802 11 standards allowing seamless interfacing of wireless LAN standards The optional built in wireless LAN is a client adapter that supports Infrastructure andAd hoc modes giving you flexibility on your existing or future wireless network configurations for distances up to 40 meters between the client and the access point But this depends upon the environment...

Страница 56: ...ke sure the module s are OFF if you are using the computer aboard aircraft Use the Fn F2 key combination to toggle power to the WLAN module and check the indicator to see if the moduleispoweredonornot or useaeroplanehotkeytoswitchoffWirelessandBluetoothsimultaneously Connecting to a Wireless Network Make sure the Wireless LAN module is turned on 1 Click the taskbar wireless icon and then click Con...

Страница 57: ...so use the Network and Sharing Center control panel in Windows NetworkandInternet toconnecttoanyavailablewirelessnetworks 4 Click a network and then click Connect 5 If you do not see a network you want to connect to click Set up a connection or network a list of options will appear allowing manual searching and creating a new network ...

Страница 58: ...onnection status see below 7 To disconnect from the wireless network you can click the taskbar wireless icon and then select Connect or disconnect to access the network menu and click Disconnect or right click the icon and then click Disconnect from Using the Notebook PC ...

Страница 59: ... The Windows Mobility Center control panel provides an easy point of access for information on battery status power plans used and wireless device status etc To access the Windows Mobility Center 1 Click Start and click Control Panel or point to Settings and click Control Panel 2 Double click Windows Mobility Center Mobile PC 3 Click the button toTurn wireless off on or click the icon to access th...

Страница 60: ...0Mbps megabits per second compared to USB 1 1 devices which transfer at speeds of 12Mbps So you could know that USB 2 0 can transfer data between the computer and its peripherals 40 times faster than USB 1 1 However USB 2 0 is fully backward compatible you will be able to use a USB 1 1 device in a USB 2 0 compliant system Removing USB Device 1 Double click the removable device icon on the right bo...

Страница 61: ...e slot is similar to ExpressCard You only need to pay more attention whenever insert the flash memory card into the slot with the correct side Only one correct side can be accepted for the 4 in 1 card slots If you cannot insert the card into the 4 in 1 slot or you had inserted the card but it is not recognized by the computer please remove the card and turn the card upside down and insert it again...

Страница 62: ...being connected Although you can connect the external Monitor without power off the computer and the external monitor however it is harmful to both devices and it shortens the life of these devices 2 Connect the connector cable of the monitor to the VGA port of your computer Secure the cable connection with the screws provided 3 Connect the monitor power cable and plug it into a properly grounded ...

Страница 63: ...l monitor or projector and shut off the LCD display you can use the Fn F3 hot key to switch display type between LCD and external monitor Keep pressing the hot key until you get the display to external monitor only User s Guide 4 21 Using the Notebook PC ...

Страница 64: ...io port Microphone Headphone that you want to use to the target device 2 Plug the jack into the port on the right side of the system Note Ifyouuseexternalspeakersandexperiencethesounddistortionorfeedback pleaselowerthevolume Some factors is caused by too close locating the microphone and speakers from each other moving away the externalaudiooptionfromtheunitmayalsohelp User s Guide 4 22 Using the ...

Страница 65: ...see if themoduleispoweredonornot or press aeroplane key to switch off Bluetooth device Bluetooth Wireless Connection on selected models Notebook PCs with Bluetooth technology eliminates the need for cables for connecting Bluetooth enabled devices Examples of Bluetooth enabled devices may be Notebook PCs Desktop PCs mobile phones and PDAs Note If your Notebook PC did not come with built in Bluetoot...

Страница 66: ...hine to this machine 5 Accept the sent file Note While receiving file select receive a file from tray icon before selecting this you shouldn t send file from other machine PC Camera Module on selected models The 2 0M pixel camera module is UVC USB Video Class and uses the OS inbuilt driver and application to capture pictures Windows XP And in Windows Vista OS use the freeware utility provided alon...

Страница 67: ...n at the most inconvenient time possible so you should preview this section just in case If after you ve tried everything and the system still won t cooperate try turning it off for a few minutes and then reboot You will lose any unsaved data but it may start working again Then call your service representative Basic Hints and Tips Many of the following may seem obvious but they are often the solut...

Страница 68: ...ernal devices are removed Check to see the power cord is properly plugged to the wall outlet and to the computer Check to see the power indicator of the computer is on Check to see if your keyboard is operational by pressing and holding any key Check for any incorrect or loose cable connections Make sure the latches on the connectors latch securely on to the receptor end Be sure you have not perfo...

Страница 69: ...e to hand Don t forget to note the serial numbers if you are storing them out of their original cases e g in a CD wallet Run maintenance programs on your hard disk and OS as often as you can You may schedule these programs to run at times when you are not using your computer You can use those that are provided free with your OS or buy the more powerful dedicated programs to do so Write down your p...

Страница 70: ... all e mail attachments Note You should also beware of files from people you know as the virus may have infected an address book and been automatically forwarded without the person s knowledge Keep a Bootable CD ROM DVD ROM USB storage device this CD DVD USB device provides basic information which allows you to startup your computer handy You may refer to your OS s documentation for instructions o...

Страница 71: ...more system components or software programs If possible go back and undo the change you just made and see if the problem still occurs Don t over complicate things The less you have to deal with then the easier the source of the problem may be found Example if your computer has many devices plugged into its ports and a number of programs running then it will be difficult to determine the cause of a...

Страница 72: ...d USB device external device that is drawing a lot of power The battery has not been fully discharged before being recharged Make sure the battery is fully discharged and recharge it completely before reusing Power Options have been disabled Go to the Control Panel in Windows and re enable the options A peripheral device USB device ExpressCard is consuming a lot of power Turn off remove the unused...

Страница 73: ...avel bag or any such container Putting a notebook which is powered on in a travel bag may cause the Vent Fan intakes to be blocked If you forget the password you may have to discharge the battery of the CMOS Contact your service representative for help Warning If you choose to set a boot password NEVER forget your password The consequences of this could be serious Ifyoucannotrememberyourbootpasswo...

Страница 74: ... Power Options menu and enable the features you prefer Make sure you have enabled Hibernate mode from the control panel The modules are off Check the LED indicator and or function key indicator to see if the WLAN Bluetooth module is on or off If the LED indicator is off then press the Fn F2 WLAN Fn Esc Bluetooth key combination s in order to enable the modules or Make sure you have installed the d...

Отзывы: