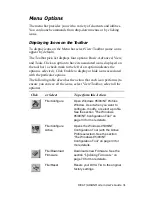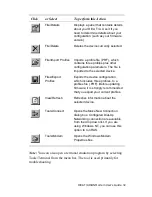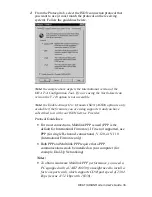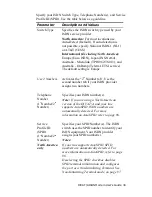
background image

DIVA T/A ISDN Modem User’s Guide  27


4

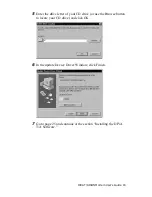
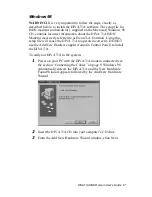
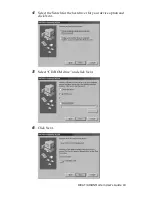
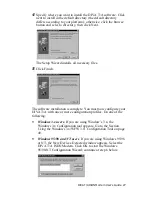
Specify where you want to install the DIVA T/A software. Click
next to install in the default directory (the default directory
differs according to your platform); otherwise, click the browse
button and select a directory, then click Next.


The Setup Wizard installs all necessary files.


5

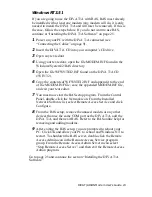
Click Finish.


The software installation is complete. You must now configure your
DIVA T/A with one or more configuration profiles. Do one of the
following:


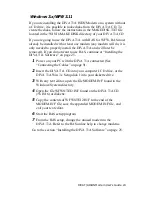
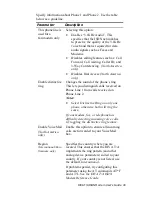
Windows 3.x users. If you are using Window’s 3.x, the
Windows 3.x Configuration tool appears. Go to the Section
Using the Windows 3.x/WFW 3.11 Configuration Tool on page
49.


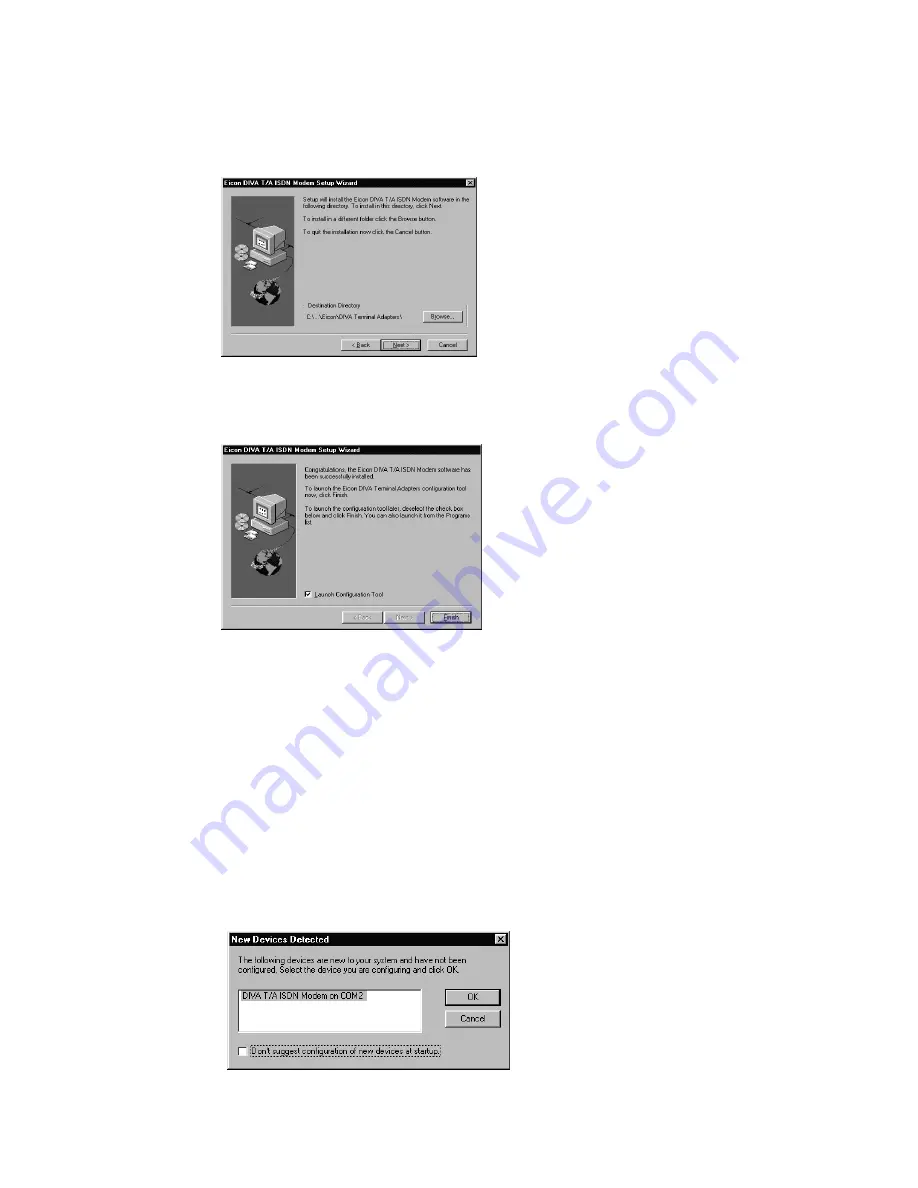
Windows 95/98 and NT users. If you are using Windows 95/98
or NT, the New Devices Detected window appears. Select the
DIVA T/A ISDN Modem. Click OK to start the Windows
95/98/NT Configuration Wizard; continue at step 6 below.


Содержание DIVA T/A ISDN

Страница 1: ...DIVA T A ISDN Modem User s Guide...

Страница 2: ...ovements and or changes in the products and or programs described in this publication at any time A Product Comment Form is provided at the back of this publication If the form has been removed addres...

Страница 3: ...e DIVA T A Firmware 70 Updating Firmware under Windows 3 x WFW 3 11 70 Updating Firmware under Windows NT and 95 98 70 Updating Firmware under DOS and OS 2 71 Updating the DIVA T A INF file Windows 3...

Страница 4: ...SDN LEDs 106 Common Problems 109 Dumping the DIVA T A Memory 113 DIVA T A Firmware Specifications 114 DIVA T A Hardware Specifications 116 Customer Service 117 Eicon Technology on the World Wide Web 1...

Страница 5: ...ually any delays you can access online services or browse the World Wide Web to download high resolution graphics video clips interactive games music etc Work at Home Access The DIVA T A provides the...

Страница 6: ...the DIVA T A to any computer PC or notebook equipped with a serial port You can easily configure it using the Setup Wizard under all versions of Windows using a VT100 interface under DOS and OS 2 and...

Страница 7: ...company See the section Ordering your ISDN Line Using EZ ISDN IOC on page 8 for more information Terminal Emulation Program Required for non Windows users only VT100 compatible terminal emulation prog...

Страница 8: ...If you select this option make sure to get Additional Call ACO ACO is required for Call Bumping also known as Dynamic Bandwidth Allocation DBA and Call Waiting to work correctly IOC S1 includes ACO h...

Страница 9: ...e Termination on page 104 for more information 3 This step is optional Connect cables see and in the figure below from analog devices telephone fax machine modem etc to the jacks labeled PHONE on the...

Страница 10: ...r Connecting the Cables After connecting the power and the ISDN cable to the DIVA T A wait at least 10 seconds for the DIVA T A to initialize and then check the D and LINK LEDs If they are both glowin...

Страница 11: ...uire the following information from your ISDN service provider before you continue with the DIVA T A installation ISDN number s Your ISDN service provider should have provided you with one and maybe e...

Страница 12: ...ny has to turn this feature on As you lose functionality we do not recommend this operation mode Go to the section What s Next on page 12 and continue What s Next After you have finished connecting th...

Страница 13: ...are using version 1 2 If you are running a previous version you must upgrade to Dial Up Networking 1 2 before you begin installing the DIVA T A Dial Up Networking 1 2 is located on the DIVA T A CD und...

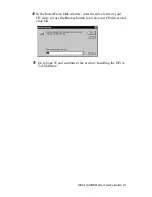
Страница 14: ...s Guide 14 4 In the Install From Disk window enter the drive letter of your CD drive or use the Browse button to locate your CD drive and click OK 5 Go to page 25 and continue at the section Installi...

Страница 15: ...ing version 1 2 If you are running a previous version you must upgrade to Dial Up Networking 1 2 before you begin installing the DIVA T A Dial Up Networking 1 2 is located on the DIVA T A CD under the...

Страница 16: ...16 5 Enter the drive letter of your CD drive or use the Browse button to locate your CD drive and click OK 6 In the update Device Driver Window click Finish 7 Go to page 25 and continue at the section...

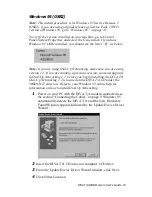
Страница 17: ...External Using this setup file will cause the DIVA T A to operate incorrectly DO NOT use the Add New Hardware applet found in Control Panel to install the DIVA T A To add your DIVA T A to the system...

Страница 18: ...DIVA T A ISDN Modem User s Guide 18 4 Select the Search for the best driver for your device option and click Next 5 Select CD ROM drive and click Next 6 Click Next...

Страница 19: ...DIVA T A ISDN Modem User s Guide 19 7 Click Finish and go to page 25 and continue at the section Installing the DIVA T A Software...

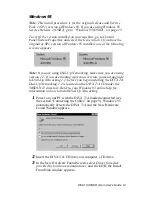
Страница 20: ...ng be installed with at least one modem any modem will do it is only needed to install the DIVA T A and can later be removed 1 Power on your PC with the DIVA T A ISDN Modem connected see Connecting th...

Страница 21: ...modem driver If you let Windows NT select the modem driver you will not be able to communicate with the DIVA T A You will then have to delete the Windows NT installed modem and begin the install proce...

Страница 22: ...Modem list has changed Click Yes to configure Dial Up Networking 10 From the Remote Access Setup window remove any unused devices that use the same COM port as the DIVA T A and then click Add 11 In t...

Страница 23: ...ppend it to the end of the MODEM INF file save the appended MODEM INF file and exit your text editor 7 You must now start the RAS setup program From the Control Panel double click the Network icon Fro...

Страница 24: ...AS continue at Installing the DIVA T A Software on page 25 1 Power on your PC with the DIVA T A connected See Connecting the Cables on page 9 2 Insert the DIVA T A CD into your computer s CD drive or...

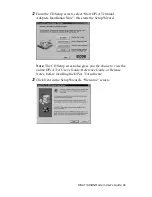
Страница 25: ...T A on line documentation the Eicon DIVA Terminal Adapters Program which includes the Configuration Wizard Windows 95 98 and NT only the Windows Configuration Tool Windows 3 x WFW 3 11 the DIVA T A U...

Страница 26: ...Terminal Adapters Installation Now this starts the Setup Wizard Note The CD Setup screen also gives you the choice to view the online DIVA T A User s Guide Reference Guide or Release Notes before ins...

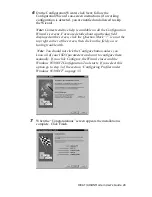
Страница 27: ...h The software installation is complete You must now configure your DIVA T A with one or more configuration profiles Do one of the following Windows 3 x users If you are using Window s 3 x the Windows...

Страница 28: ...layed on the screen click the Question Mark icon at the top right corner of the screen then click on the field you re having trouble with Note You should not click the Configure button unless you know...

Страница 29: ...30 for more details The installation under Windows 95 98 NT is complete and your DIVA T A is ready to use If you want to configure additional profiles or configure advanced ISDN parameters for the pr...

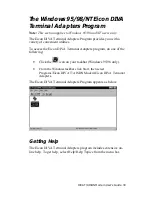
Страница 30: ...ities To access the Eicon DIVA Terminal Adapters program do one of the following Click the icon on your taskbar Windows 95 98 only From the Windows taskbar click Start then select Programs Eicon DIVA...

Страница 31: ...th the particular options The following table describes the action that each icon performs to ensure you can see all the icons select View Toolbar select all the options Click or Select To perform thi...

Страница 32: ...iles Export Profiles Exports the device configuration which includes three profiles to a profiles file PRF Before updating firmware it is strongly recommended that you export your current profiles Vie...

Страница 33: ...the trouble of reconfiguring all your ISDN parameters each time you switch applications Note When you use the Configuration Wizard to configure a profile you cannot set Phone Line and Advanced ISDN p...

Страница 34: ...Data Over Voice DOV This information is optional Using Context Sensitive Help Context sensitive help is available on all the Configuration Tool s screens For more details about a particular field cli...

Страница 35: ...indow appears 3 From the Profiles window select a profile from the Profiles list three default names appear Profile 0 Profile 1 Profile 2 Click Configure Note If you want to change the default name of...

Страница 36: ...are you are using supports it and you have subscribed to it with your ISDN Service Provider Protocol Guidelines For most connections Multilink PPP is used PPP is the default for International Firmware...

Страница 37: ...ort incoming calls with Windows NT RAS Server you must enable the parameter Allow clear text authentication in the RAS Server setup Refer to the RAS online help for information on how to configure thi...

Страница 38: ...second number tab if your ISDN provider assigns two numbers Telephone Number 1 st Number 2 nd Number Specifies your ISDN number s Note If you are using a North American version of the DIVA T A and yo...

Страница 39: ...node has an X 25 address Your service provider assigns this value at subscription time 6 If your DIVA T A is equipped with analog device ports select the Phone Lines tab otherwise go to step 7 Note Th...

Страница 40: ...lets you distinguish calls received on Phone Line 1 from calls received on Phone Line 2 Notes Select Distinctive Ring on only one phone otherwise both will ring the same If your modem fax or telephone...

Страница 41: ...ported on the switch you are connecting to Request Reverse Charging Determines who is charged by the X 25 network for the call Select No to pay for the call locally or select Yes to charge the remote...

Страница 42: ...OUT RESTRICTION Host replies with a Call Accept packet that can contain up to 128 bytes of data The connection is established and data transfer can occur WITH RESTRICTION Host replies with a Call Clea...

Страница 43: ...umber from your system administrator or network subscription Others Lets you request additional facilities that are not listed in the Common Facilities group box Specifies the code for additional faci...

Страница 44: ...8 Kbps speed when both B channels are in use to the connection When the additional bandwidth is no longer required one or both B channels are dropped leaving the D channel connection in place Note Be...

Страница 45: ...60 seconds 1st B channel Delay before opening Specify the amount of time in seconds the throughput on your D channel must exceed the Opening Threshold before the 1st B channel is added to the AO DI c...

Страница 46: ...nection If the throughput drops below 70 during the 5 seconds the 2nd B channel will not be added to the connection Opening Threshold Specify the threshold percentage that the throughput on your 1st B...

Страница 47: ...escription and Values DBA Dynamic Bandwidth Allocation Note Only applicable if your ISDN connection protocol is Multilink PPP Note Only available on models equipped with analog device ports When activ...

Страница 48: ...ick Update Time when you turn it back on This ensures that the correct date and time are set 10Click OK or Apply to save the selections made in steps 1 9 The Profiles window opens 11If you want the pr...

Страница 49: ...ling and communication information Note AO DI is not supported on the Windows 3 x WFW 3 11 configuration tool To configure AO DI you should use the AO DI AT commands as described in the Reference Guid...

Страница 50: ...ing the DIVA T A Firmware on page 70 Update Time The DIVA T A supports Caller ID North America only If you have a phone with call display and are receiving calls with the incorrect time or date click...

Страница 51: ...factory profile which requires only your ISDN information to establish a Multilink PPP connection After configuring the profiles you must specify which profile is to be the default profile The defaul...

Страница 52: ...ile Note You can change a profile name by clicking Rename Profile then typing the new name 3 The Profile Configuration Tool appears Note The screen above depicts the North American version of the conf...

Страница 53: ...types available TPH1962 Microlink and Euro ISDN Onramp indicate the appropriate type Connect using this protocol Specifies the ISDN connection protocol you want to use it must match the protocol on t...

Страница 54: ...n of the DIVA T A and your line supports AutoSPID ISDN numbers are automatically detected For more information on AutoSPID refer to page 96 Enable 2 nd Number Permits the DIVA T A to use 2 nd Number i...

Страница 55: ...rsion of the software the Region field does not appear on your screen Configure the parameters as required Parameter Description This phone line is used for a fax modem only Enabling this option cause...

Страница 56: ...ng feature Region International Euro firmware only Specifies the country where you are located This ensures that the DIVA T A implements the ring pattern and other analog device parameters suited to y...

Страница 57: ...traffic monitor for Multilink PPP Connections When activated this function monitors the send and receive traffic volume and opens or closes your second B channel as the traffic volume warrants Activa...

Страница 58: ...brought back up for your current connection Default DBA Enabled ISDN Cost Reduction Timers Note Only applicable if your ISDN connection protocol is Multilink PPP Note You must activate BACP BOD befor...

Страница 59: ...ls are data calls made over a BRI line using Voice Bearer Capability For DOV to work the remote device to which you are connecting must support incoming DOV calls 8 Click OK to close the Advanced wind...

Страница 60: ...onfigure AO DI you should use the AO DI AT commands as described in the Reference Guide Activating the VT100 Configuration Tool To activate the VT100 Configuration tool 1 Start the VT100 compatible te...

Страница 61: ...ch profile to open current stored 0 1 2 or factory Loads the current profile Navigating in the VT100 Configuration Tool Screen The following table describes the function keys that let you navigate the...

Страница 62: ...ommunications stack be installed on your computer Note To obtain maximum Multilink PPP performance you need a PC equipped with a UART 16650 you might need to install a fast com port card which support...

Страница 63: ...or AT T 5ESS International Excluding North America firmware Europe Euro ISDN Japan INS Net64 and Australia TPH1962 Note Australia has two switch types available TPH1962 Microlink and Euro ISDN Onramp...

Страница 64: ...t up in Non Initializing Terminal mode For more on Non Initializing Terminal mode refer to page 97 7 After configuring the ISDN parameters press Escape to exit the ISDN Parameters menu 8 From the Main...

Страница 65: ...xes and Modems Disables calling features such as Call Forward Call waiting Caller ID and 3 Way Conferencing North America only Disables Dial Access North America only Enable distinctive ring Phone 1 a...

Страница 66: ...the AT commands AT F and AT L The DIVA T A ISDN Modem Reference Guide documents these commands 9 After configuring the parameters press Esc to exit the Phone Line menu 10 From the Main menu select Ad...

Страница 67: ...hich you are connecting must support incoming DOV calls Enable DBA Dynamic Bandwidth Allocation Note Only applicable if your ISDN connection protocol is Multilink PPP Note Only available on models equ...

Страница 68: ...eduction Timers you could incur unnecessary expense as your second B channel might open and close frequently costing you the first interval amount each time the second B channel connects Default BACP...

Страница 69: ...or date use Update Time to reset the date and calendar If you power off the DIVA T A click Update Time when you turn it back on This ensures that the correct date and time are set on the DIVA T A 11...

Страница 70: ...d specify the appropriate path 4 Confirm the request 5 Verify the configuration of your DIVA T A Updating Firmware under Windows NT and 95 98 Note When you download new firmware DIVA T A will ask you...

Страница 71: ...rs before updating use the AT command AT V or AT MENU with any terminal emulation program to view the current settings To update your DIVA T A 1 Start a terminal emulation software application capable...

Страница 72: ...Windows 3 x or Windows System32 RAS directory for Windows NT 3 51 and remove all sections relating to the DIVA T A ISDN Modem 3 Open the updated file WFWNTEI2 INF 4 Copy the contents of WFWNTEI2 INF a...

Страница 73: ...LAN or access the Internet Before attempting this make sure that your PC is equipped with remote access client software such as Dial Up Networking Shiva PPP client or Microsoft RAS client software Onl...

Страница 74: ...a terminal window will pop up that prompts for your user name and password Using V 120 on Windows NT 4 0 The following example demonstrates how to use V 120 on Windows NT 4 0 to connect using SecurID...

Страница 75: ...hiva s DialIn replacement software for Windows 95 98 and Windows NT 4 0 Dial Up Networking These patches are either available from your system administrator or at Shiva s ftp site ftp ftp shiva com so...

Страница 76: ...make your connection there is one more step to complete You have to add the command n after the phone number entry where n is your token as shown below If you have trouble logging into a SecurID serve...

Страница 77: ...and BACP BOD is enabled on both your DIVA T A and the remote ISDN device you have the option of entering only one number BACP will try to discover the second number and connect to it If you know the t...

Страница 78: ...PP connection using AO DI you also need to enter your X 25 DTE Address For example to make a Multilink PPP connection to the numbers 1 514 555 2345 and 1 514 555 2346 with an X 25 DTE Address 21411112...

Страница 79: ...a code parameter on the Properties tab of Dial Up Networking Manually enter the Country Code Area Code and PBX Prefix if required for both numbers If both B channels connect to the same number the num...

Страница 80: ...Double click the Dial Up Networking icon 2 Double click Make New Connection The Make New Connection Wizard opens Select the Eicon DIVA T A ISDN Modem from the Select a modem field and then click Next...

Страница 81: ...you successfully establish the connection you can communicate with the remote host If you do not establish the connection verify your Server Type and TCP IP settings and alter them as required Window...

Страница 82: ...DIVA T A ISDN Modem User s Guide 82 3 The Phonebook Entry Wizard opens Click Next 4 Check each applicable statement then click Next 5 Enter the phone number you want to call then click Next...

Страница 83: ...k Dial 8 Enter your user name and password then click OK 9 If you successfully establish the connection you can communicate with the remote host If you do not establish the connection verify your conf...

Страница 84: ...r s Guide 84 Windows NT 3 51 Note The following example assumes you are using RAS 1 In the Remote Access Service group double click Remote Access 2 Click Add 3 Enter the name and phone number you want...

Страница 85: ...5 Enter your user name and password then click OK 6 If you successfully establish the connection you can communicate with the remote host If you do not establish the connection verify your configurati...

Страница 86: ...S client you must configure the V 120 rate adaption protocol on both the DIVA T A workstation and on the remote device RAS Server ISDN adapter If you are using the Shiva PPP protocol stack or similar...

Страница 87: ...DIVA T A ISDN Modem User s Guide 87 4 Select the Tools menu and choose Port Setup Select the DIVA T A as the modem then click OK 5 Click Options...

Страница 88: ...and or IP are enabled then click OK 7 Click Connect 8 If you successfully establish the connection you can communicate with the remote host If you do not establish the connection verify your configur...

Страница 89: ...Enter the following command C SHIVA CONNECT 3 From the Tools menu choose Port Setup and select the COM port 4 Select Modems Enter Eicon DIVA T A ISDN Modem in the Modem Name field and set the speed t...

Страница 90: ...sword and the phone number you want to dial then click Connect 8 If you successfully establish the connection you can communicate with the remote host If you do not establish the connection verify you...

Страница 91: ...DIVA T A ISDN Modem User s Guide 91 OS 2 1 Double click Programs then double click Internet Modems 2 Double click Dial Other Internet Providers 3 Click Add Entry...

Страница 92: ...ssword and the Phone Number you want to dial 5 Click Connect Info then enter your Domain Name server your Host Name and your Server Name 6 Click Modem Info Select a Modem from the drop down list and t...

Страница 93: ...3 7 Click Dial to place your call 8 If you successfully establish the connection you can communicate with the remote host If you do not establish the connection verify your configuration and TCP IP se...

Страница 94: ...edure instructs you to enter a dial up number enter the number of your Internet Service Provider ISP Once you are successfully connected to your ISP go to your desktop and click the icon representing...

Страница 95: ...e mail data fax and voice Incoming e mail fax or voice messages are automatically posted to the Inbox of the Windows e mail systems Additionally the complete host mode BBS functions are available for...

Страница 96: ...DN parameters AutoSPID works in the following manner If there are no SPIDs configured or if current SPIDs are incorrectly configured then AutoSPID attempts to determine and then assign SPIDs and DNs t...

Страница 97: ...erate without SPIDs You can use NIT only if your ISDN provider supports it To configure the DIVA T A for Non Initializing Terminal mode deselect the SPID checkbox in the Windows Configuration Tool or...

Страница 98: ...P without AO DI support In the case of Multilink PPP one analog device can still be used if Dynamic Bandwidth Allocation DBA is enabled For example while a MLPPP data connection is in progress one of...

Страница 99: ...of your telephones rings As soon as the phone rings the MLPPP connection automatically drops one of the B channels reducing the data connection from 128 kbps to 64 kbps and the voice call is then conn...

Страница 100: ...ce Call Forwarding is accessed by dialing a simple code e g 72 Not all ISDN Service Providers use the same dial codes Ask your ISDN Service Provider for the codes relevant to you If your ISDN service...

Страница 101: ...leave a voice message VoiceMail supports Visual Message Waiting Visual Message Waiting prompts you with a flashing light or audible signal whenever there is a new message in your voice mail box This f...

Страница 102: ...want to use If this is the case you can supply the DIVA T A default values and no further configuration is necessary If your ISDN provider supports user supplied Feature Key values supply them with t...

Страница 103: ...all Drop AT K5 n ENTER where n is the value provided by your ISDN provider for Message Waiting Indicator 5 Save the new settings so that they are available every time you start the DIVA T A Type the f...

Страница 104: ...A follow the appropriate procedure below 75 meters or more If the connection spans 75 meters 250 feet or more set the DIVA T A 100 switch to the On position Set the NT1 to provide 100 of resistance C...

Страница 105: ...o resistance Consult the manuals provided with the other ISDN devices and NT1 for more detailed instructions Note Some NT1s do not support connections over 75 meters 250 feet Check your documentation...

Страница 106: ...or the first time Is this a consistent problem that you can duplicate LED Status Indicators on the DIVA T A The LED status indicators on the DIVA T A display the state of the ISDN switch D channel con...

Страница 107: ...ontinuous flashing AT status commands can be used to identify the problem Note Check your SPID Most often problems result from incorrectly entered SPIDs Steady The ISDN physical interface is initializ...

Страница 108: ...LEDs TX RX LED LED Indicator Description Off There is no data being transferred on the serial port On intermittent Data is being transferred on the serial port DTE LED LED Indicator Description Off T...

Страница 109: ...ing with the DIVA T A Depending on the server type the DIVA T A might support SecurID For more information see SecurID Connectivity on page 74 The Windows Configuration Tool does not detect the DIVA T...

Страница 110: ...rts a maximum speed of 115 200 Either change the speed of your modem to 115 200 bps or install a fast com port card Under Windows 95 98 you can determine your PC s maximum com port speed by selecting...

Страница 111: ...uting the AT command If the problem persists lower the COM port line speed Callers cannot access your VoiceMail If you have a voice mailbox on your line and callers sometimes get a busy signal rather...

Страница 112: ...port the message waiting indicator light To check if the DIVA T A you are using supports this feature follow these steps 1 Start the terminal emulation program for example Telix HyperTerminal or Hyper...

Страница 113: ...f the Fault LED is off reset the box then go to step 2 If the Fault LED is on reset the PC then go to step 2 2 Type AT Z and press Enter 3 Type at dump this command is case sensitive and press Enter T...

Страница 114: ...w or A law Encoding Internal Ring Generation DTMF and Pulse Dialing Caller ID Delivery Calling Features Call Forward Call Waiting Caller ID and 3 Way Conference Async to Sync Conversion Single and mul...

Страница 115: ...on the DIVA T A Management and Configuration SPID Wizard Windows Configuration Tool VT 100 Terminal Emulation AT Commands Firmware upgrades using XModem Download or the Windows Configuration Tool Plu...

Страница 116: ...onfiguration 4 KB non volatile memory for storing configuration profiles Physical Dimensions Weight 1 5H x 6 0D x 8 5W inches 4 0H x 15 4D x 21 7W cm 1 3 lbs 0 59 kg Environmental Requirements Operati...

Страница 117: ...and Quebec call our Montreal office at 514 745 5577 and ask for Customer Services or send a fax marked Attn Customer Services to 514 745 5502 In Europe Russia Iceland Africa and the Middle East conta...

Страница 118: ...y and if not installed and used in accordance with the instructions may cause harmful interference to radio communications However there is no guarantee that interference will not occur in a particula...

Страница 119: ...uirements Industry Canada does not guarantee the equipment will operate to the user s satisfaction Before installing this equipment users should ensure that it is permissible to be connected to the fa...

Страница 120: ...ent exceed SELV levels All interconnection points and ports are SELV This equipment draws power from an external power supply which has been separately approved It does not draw power from the ISDN ne...

Страница 121: ...eriod should be delivered to Eicon Technology with proof of purchase If the delivery is by mail you agree to insure the Product or assume the risk of loss or damage in transit You also agree to prepay...

Страница 122: ...on Difficult Easy Performance Poor Excellent Workmanship Poor Excellent DIVA T A ISDN Modem User s Guide Accuracy Low High Organization Confusing Clear Readability Difficult Easy Presentation Poor Exc...

Отзывы: