Chapter 2 Monitor
- –
3-32
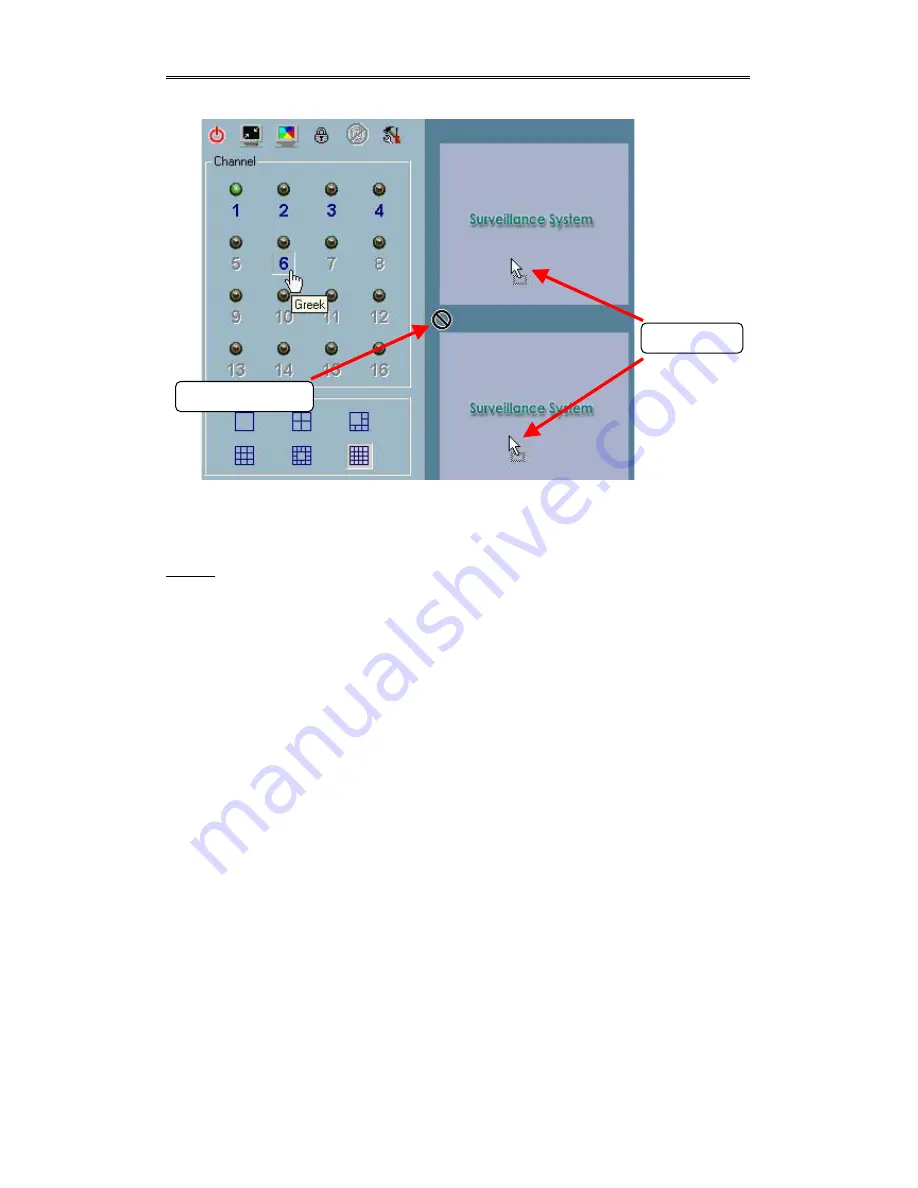
Figure 3-17 Drag the Channel to the Displaying Frame
Step 3
: Move the mouse cursor to the area in which the selection can be dropped (in
this case, it should be the video area), and then release the mouse button. In each
layout, each channel is corresponding to one and only one displaying frame in the
video area, as shown in Figure 3-18. Therefore, the drag and drop from the channel
number to the displaying frame can be treated as “exchange of channels in the
displaying frames”. That means whatever video is on the newly selected channel
will replace the one on the current display frame. You can apply this criterion to
exchange the channels in different displaying frames. Let us assume the video of
Channel 1 is shown at display Frame X and the video of Channel 2 is shown at
display Frame Y. The channels associated with the dedicated display frames will be
switched when you drag and drop the video from display Frame X to display Frame
Y and vice versa. Also, you can move the channel from its original display frame to
a vacant display frame. All these functions can be performed by a single mouse
operation “drag and drop”. This makes it very convenient to customize the video
display layout for monitoring.
Note: Monitor will automatically associate newly added channel to empty frame of
each layout. So you will find that the channel is automaticaly shown in layout after
closing Camera Configuration dialog. But if you have manually changed the
association in one layout, the automation for that layout would be disabled. There is
Not droppable area
Droppable area
Содержание Net-Vision HNC700PT
Страница 1: ......
Страница 29: ...Chapter 2 Monitor 3 28 Figure 3 14 Account to Access Network Drive settings...


