background image

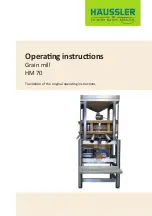
Operating instructions

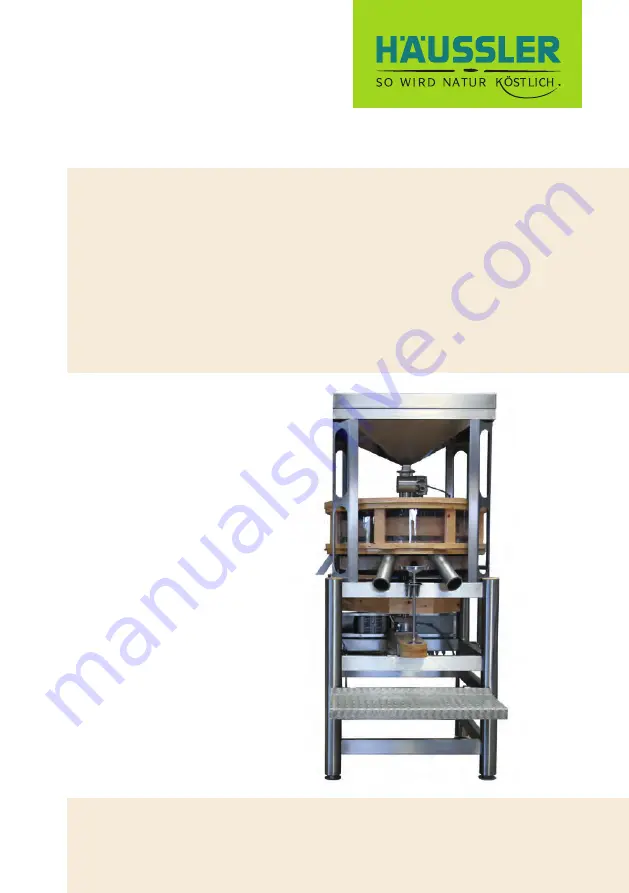
HM 70

Grain mill 

Translation of the original operating instructions

Содержание HM 70

Страница 1: ...Operating instructions HM 70 Grain mill Translation of the original operating instructions...

Страница 2: ...eel 14 Switching on the machine 15 Maximum optimum fineness 16 Switching off the equipment 16 Functional diagram 17 6 Cleaning 18 Cleaning the millstones 19 7 Maintenance 21 Oiling the thread 21 Lubri...

Страница 3: ...off the equipment 47 Function diagram 48 Manual shutdown of the sifting device when the grain mill is running 49 15 Cleaning 50 16 Maintenance 51 Checking and setting the tension of the drive belt 51...

Страница 4: ...baking grilling and pasta making H ussler stands for uncompromising quality Made in Germany Decades of experience and thousands of devices delivered worldwide speak for themselves H ussler stands for...

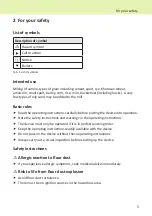
Страница 5: ...ion f f Note the safety instructions and warnings in the operating instructions f f The device must only be operated if it is in perfect working order f f Keep the operating instructions readily avail...

Страница 6: ...eavy take care during transport f f Prior to lifting check that the weight can be borne safely f f Prior to lifting the mill or any of its components secure the load against crashing down f f The devi...

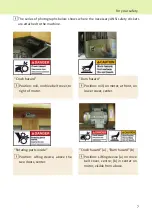
Страница 7: ...ion mill on drive belt cover to right of motor Burn hazard Position mill on motor at front on lower cover center Rotating parts inside Position sifting device above the two doors center Crush hazard a...

Страница 8: ...asy to clean The millstones are clearly visible behind glass making the mill a real eye catcher even in areas that are frequented by customers The quantity of grain fed into the mill can be precisely...

Страница 9: ...ight 197 cm Depth 103 cm Weight 1150 6 kg Motor output 5 5 kW Power supply 480 V 60 Hz Stone revolutions min 240 Funnel content approx 108 kg Stone diameter 70 cm Output fine wholegrain approx 70 kg h...

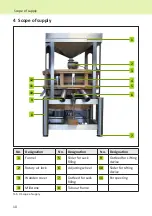
Страница 10: ...o Designation 1 Funnel 5 Slider for sack filling 9 Outfeed for sifting device 2 Rotary air lock 6 Adjusting wheel 10 Slider for sifting device 3 Wooden cover 7 Outfeed for sack filling 11 Perspex ring...

Страница 11: ...n setting up the mill take care to ensure that it is perpendicular and in true alignment You may need to use a spirit level to check this If you wish to use the mill with a sifting device refer to pag...

Страница 12: ...y WARNING Pulling in and severing by rotating parts Injuries to hands and forearms f f Do not start up the device without the guard and housing parts f f Do not reach into the rotary air lock and do n...

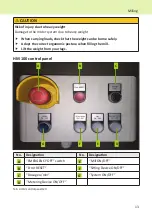
Страница 13: ...borne safely f f Adopt the correct ergonomic posture when filling the mill f f Lift the weight from your legs HM 100 control panel A B C D G F E No Designation No Designation A EMERGENCY OFF switch E...

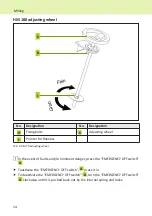
Страница 14: ...b 5 HM 70 adjusting wheel In the event of faults and or imminent danger press the EMERGENCY OFF switch A f f Toactivate the EMERGENCY OFF switch A press it in f f To deactivate the EMERGENCY OFF switc...

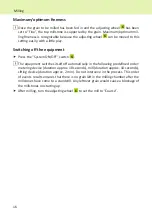
Страница 15: ...ere is one Follow the operating instruc tions for the sifting device if you are using one f f Press the Mill ON OFF switch E Wait for the machine to reach full speed The controller disables metering s...

Страница 16: ...ystem ON OFF switch G The equipment switches itself off automatically in the following predefined order metering device duration approx 18 seconds mill duration approx 18 seconds sifting device durati...

Страница 17: ...Functional diagram The switch on and shutdown cycles are illustrated in the schematic functional dia gram below Switch on sequence Shutdown sequence 17 Milling...

Страница 18: ...cals can damage the mill f f Do not use pointed or sharp objects to clean the device f f Do not use abrasive chemicals to clean the device Cleanliness is a mandatory requirement for hygienic mill prod...

Страница 19: ...a short handled brush a vacuum cleaner or similar to clean the grain infeed and the flour area of flour and dust residue f f Use a long handled or short handled brush to clean the perspex You may also...

Страница 20: ...ully unscrew the connecting bolt once the runner stone has released 5 Lift off f f Lift off the runner stone 6 Clean f f Use a long handled or short handled brush to clean the stones Use a wire brush...

Страница 21: ...rt up the device without the guard and housing parts f f Do not reach into the rotary air lock and do not take hold of the drive belts during operation CAUTION Risk of cutting due to sharp edges Injur...

Страница 22: ...ve cover f f Unscrew the bolts and set the protective cover down on the motor Check the tension of the drive belt f f Take hold of a drive belt with one hand and turn it through 90 degrees To turn the...

Страница 23: ...pter on page 15 Fault Cause Solution Mill is shutting down during milling Motor is overheating because The fan blades are soiled The motor is soiled The drive belt tensi on is too low The mains voltag...

Страница 24: ...s too moist f f Mill dry rice Dry rice is very coarse and hard and will absorb the soiling f f Remove the cover and perspex ring as described in the Cleaning chapter f f Use a wire brush to remo ve th...

Страница 25: ...off the millstone f f Wipe the moisture from the affected parts with vinegar water f f Allow to dry completely f f Ensure that the air in the room is dry f f Do not mill grain with a residual moisture...

Страница 26: ...9 Disposal Used equipment contains valuable materials that can be recycled and put back into circulation f f Therefore you should suitable collection systems to dispose of used equipment 26 Disposal...

Страница 27: ...perating instructions with you to your specialist dealer Circuit diagrams WARNING Danger to life from mains voltage 480 V 60 Hz Electric shock f f Always disconnect the device from the power supply be...

Страница 28: ...28 For specialist personnel Circuit diagrams and parts lists...

Страница 29: ...29 For specialist personnel Circuit diagrams and parts lists...

Страница 30: ...30 For specialist personnel Circuit diagrams and parts lists...

Страница 31: ...31 For specialist personnel Circuit diagrams and parts lists...

Страница 32: ...32 For specialist personnel Circuit diagrams and parts lists...

Страница 33: ...33 For specialist personnel Circuit diagrams and parts lists...

Страница 34: ...34 For specialist personnel Circuit diagrams and parts lists...

Страница 35: ...35 For specialist personnel Circuit diagrams and parts lists...

Страница 36: ...Parts list 22 21 17 14 16 19 20 12 13 11 4 2 7 1 3 8 6 10 5 9 18 15 36 For specialist personnel Circuit diagrams and parts lists...

Страница 37: ...9 Large flour box 10 Base frame 11 Medium flour box 12 Medium flour box 13 Small flour box 14 Flour sifting device 15 Electric control box 16 Motor 17 Flour outfeed for sack tray 18 Flour outfeed for...

Страница 38: ...ithout boxes 176 kg Weight with boxes approx 215 kg Product ref 303353 Sack tray The sack tray enables flour sacks to be placed directly underneath the flour ejectors Weight 11 kg Product ref 303361 S...

Страница 39: ...ll switches off automatically This leaves you free to concentrate on other things as you do not have to constantly think about the fill level You are also protecting the equipment because the mill wil...

Страница 40: ...n The flour sifting device separates freshly milled wholegrain flour into 3 sections various fine flours semolina and bran depending on the sifting method selected The flour sifting device can be conn...

Страница 41: ...eight without boxes approx 180 kg Weight with boxes approx 218 kg Motor output 6 6 kW Power supply 480 V 60 Hz Max capacity of the flour boxes Large flour box approx 175 L Mediumflour box approx 101 L...

Страница 42: ...he mill parts appears in Tab 3 S10 Setting up the device CAUTION Crushing of limbs when setting up the mill Injuries to limbs f f The device is heavy take care during transport f f Prior to lifting ch...

Страница 43: ...olid and even surface You may need to use a spirit level to check this f f Set the mill down on the base frame 2 Platform f f Lift the platform for assembly on the mill Use a lift truck to do this for...

Страница 44: ...to screw the right hand steps to the mount 8 Align the steps f f Unscrew the adjustable feet at the end of the steps until they are resting secure ly on the ground 9 Attach the sack tray f f Work in...

Страница 45: ...e tight If necessary correct the position of the sifting device as you do this Cleaning the device for the first time f f Prior to first use wipe all parts with a damp cloth and allow to dry Connectin...

Страница 46: ...hout the guard and housing parts f f Do not take hold of the drive belts during operation f f Always switch off the device before commencing maintenance work or troubleshooting Switching on the machin...

Страница 47: ...ughput rate f f Set the adjusting wheel 6 to the required milling fineness while the grain is being fed into the mill f f Turn the fixing bolts H to secure the adjusting wheel 6 Switching off the equi...

Страница 48: ...Function diagram The switch on and shutdown cycles are illustrated in the schematic functional dia gram below Switch on sequence Shutdown sequence 48 Sifting...

Страница 49: ...10 f f Allow the sifting device to run until the sifting element is empty The sifting process takes approx two minutes f f Switch off the sifting device f f Open the safety doors 7 and sweep the rema...

Страница 50: ...oms seek medical advice immediately WARNING Pulling in and severing by rotating parts Injuries to hands and forearms f f Do not start up the device without the guard and housing parts f f Do not take...

Страница 51: ...d housing parts f f Do not reach take hold of the drive belts during operation CAUTION Risk of cutting due to sharp edges Injuries to fingers and hands f f Wear protective gloves during maintenance Ch...

Страница 52: ...protective cover with the drive belt housing f f Screw the protective cover back into place Replacing the sifting elements Disconnect the power supply f f Switch off the device f f Switch off the mai...

Страница 53: ...roubleshooting Thus far we are not aware of any faults affecting the sifting device Should further problems occur please call our service team on the following num ber 49 73 71 93 77 13 53 Troubleshoo...

Страница 54: ...18 Disposal Used equipment contains valuable materials that can be recycled and put back into circulation f f Therefore you should suitable collection systems to dispose of used devices 54 Disposal...

Страница 55: ...19 Accessories Sifting elements Sifting elements with mesh of varying lengths 55 Accessories...

Страница 56: ...20 EC Declaration of Conformity 56 EC Declaration of Conformity...

Страница 57: ...of charge if it can be demonstrated that they are due to material or machining defects occur ring during manufacture they are reported to us immediately they are discovered are reported to us within t...

Страница 58: ...Baking Village This is the name we have affectionately given to our exhibition and sales space where you can browse and experience the products of your choice first hand The H ussler family and our s...

Страница 59: ...gular baking pasta and curing demonstrations Demonstrations for groups and clubs on request How to get to the Baking Village Karlsruhe Stuttgart Ulm Ravensburg Basel Lindau Bregenz Friedrichshafen Sto...

Страница 60: ...Karl Heinz H ussler GmbH Nussbaumweg 1 88499 Heiligkreuztal Germany Phone 49 73 71 93 77 0 Fax 49 73 71 93 77 40 e mail info backdorf de Publication date January 17 2017...

Отзывы: