background image

34

4000599070 

E11.16 

USA / GB

HA120PX

C

- Maintenance

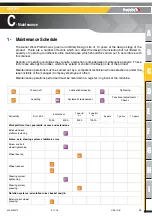
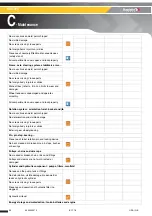
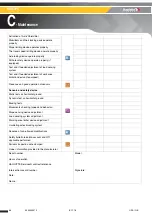
No deterioration and visible damage

No screws missing / loose parts

Presence and fastening of external wire guide

Anchor points for handling fixed, undamaged and 
signalized (if equipped)

No foreign body in joints or slides

No abnormal gap in joints and slides

Frame, axle, steering system, stabilizers arms ...

No cracks, broken weld, paint chipped

No foreign body in joints or slides

No abnormal gap in joints and slides

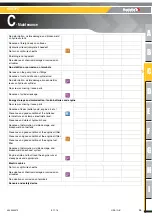
Condition of tires/tyres (wear, cutting, damage ...)

Anchor points for handling fixed, undamaged and 
signalized (if equipped)

Wheel reducer

Rotation systems : orientation turret, basket and jib

No cracks, broken weld, paint chipped

No foreign body in joints or slides

Lateral gap of extensible structure seems 
acceptable (test on slewing system)

Slewing device screw and bolt presence and 
tightenning (if equipped)

Pin, pin stop; bearing ...

Presence of the turret pin and its locking device

No abrasion, damage or oxidation of pin, pin stop, 
bushes and bearing

No radial gap  > 0,5mm on the pin

No bent, cracked or broken pins, pin stops, bushes 
or bearings

Position and state of bushes and bearing

Pulleys, chains and wire rope

No wear more than  2%

No radial gap  > 0,5 mm on the pulleys on the pin

Adjustment and maintenance performed correctly

Cylinder and hydraulic component : pump, filters, manifold

Содержание HA120PX

Страница 1: ...Maintenance book HA120PX 4000599070 E11 16 USA GB Maintenance book HA120PX ...

Страница 2: ...2 4000599070 E11 16 USA GB HA120PX ...

Страница 3: ...s and markings locations HA120PX 21 C MAINTENANCE 1 Maintenance Schedule 25 2 Inspection program 27 3 Daily inspection 28 4 Periodic inspection 32 5 Reinforced inspection 37 6 Major inspection 39 7 Maintenance sheets 41 7 1 Placingthemachineinmaintenanceconfiguration 41 7 2 Placinginoperatingconfiguration 41 7 3 Generalpoints 42 7 3 1 Recommendations on the conditions of maintenance 42 7 3 2 Mecha...

Страница 4: ...75 2 Troubleshooting 76 E ELECTRIC CIRCUIT 1 Wiring diagram Main components 79 2 Fuses 82 3 Relays and terminals 83 4 Connectors 85 5 Diagnosis assistance indicators 87 6 Locations and functions of the main safety features 88 7 Buzzers 89 8 Indicators 89 F HYDRAULIC CIRCUIT 1 Hydraulic diagram Main components 91 2 Solenoid valves 92 2 1 Driveunit 95 2 2 Steeringunit 97 2 3 Unit TOR 98 2 4 Proporti...

Страница 5: ...our machine s service life to ensure the optimum use of your HAULOTTE product When contacting our After Sales Service ensure that you provide the machine model and serial number When ordering any consumables or spare parts please use this manual and the Haulotte Essential catalogue to receive your genuine HAULOTTE spare parts your only guarantee of parts interchangeability and correct machine oper...

Страница 6: ... and to make improvements or modifications to the machine without modifying this manual Certain options can modify the machine s operating characteristics and its associated safety If your machine was originally delivered with options fitted replacing a safety component associated with a particular options not require any particular precautions other than those associated with the installation its...

Страница 7: ...ne operation If regular maintenance is not carried out this may Void the warranty Cause machine malfunction Reduce machine reliability and shorten its service life Jeopardize operator safety To ensure that the regular maintenance requirements are fully satisfied contact HAULOTTE Services HAULOTTE Services technicians are specially trained to carry out extensive repairs interventions or adjustments...

Страница 8: ...l damage Prohibition relating to work safety and quality Reminder No identified risk but a reminder of the need for common sense good practice or pre action prerequisites Cross reference to another part of the manual see section or sheet Cross reference to another manual see manual Cross reference to repairs contact HAULOTTE Services Maintenance sheet Time required for intervention Recommended too...

Страница 9: ...ussia and the Ukraine only The decals must be kept in good condition Additional decals can be ordered from HAULOTTE Services Decals Color Description Red Potentially fatal danger Orange Risk of serious injury Yellow Risk of material damage and or minor injury Other Additional technical information Green Maintenance operation or information Decals Color Description Red Prohibitions Danger Yellow Wa...

Страница 10: ... rental company In the event of operation or use which does not comply with the instructions or recommendations in the maintenance book warranty claims will not be accepted The machine utilisation period must be recorded by reading the engine hour meter whenever an intervention is made The engine hour meter must be maintained in good working order to guarantee maximum working life and to justify m...

Страница 11: ...her equipment in direct contact with fuel or lubricants Wearing parts pads bearings tires tyres connections etc These parts are by definition subject to deterioration during the period of operation Wearing parts will therefore not be covered by the warranty agreement 2 4 WARRANTY CONDITIONS To benefit from the warranty the owner or rental company must inform the nearest HAULOTTE subsidiary or the ...

Страница 12: ...hired or resold equipment Owner or hirer Qualified HAULOTTE Services technician Operator s manual Pre operation inspection Before operation or when the operator changes Operator Operator Operator s manual Periodical preventive maintenance At the specified intervals 250 hours or 1 year Owner or hirer On site technician or qualified HAULOTTE Services technician Maintenance book Periodical visit 2 ti...

Страница 13: ...ing situations Do not work in an explosive or flammable atmosphere spark flame etc Do not touch the hot parts of the hydraulic power source engine filters etc Do not bridge the battery terminals with metallic objects Do not service the battery in proximity of spark open flame lit cigarettes Never expose the batteries or electrical components to water pressure cleaner rain Never disable the safety ...

Страница 14: ...14 4000599070 E11 16 USA GB HA120PX A Safety precautions Notes ...

Страница 15: ...A B C D E F G H I 15 4000599070 E11 16 USA GB HA120PX B Recommendations Recommendations 1 Lubrication diagram Diagram 5 3 2 2 2 2 4 3 4 1 1 ...

Страница 16: ...010660 2 Gear box oil Can 20 l 5 3 gal US 2420801370 2 Gear box oil Barrel 209 l 55 2 gal US 2420801380 3 Hydraulic oil Standard Barrel 209 l 55 2 gal US 2420801310 3 Hydraulic oil Winter option 2505002640 4 Biological hydraulic oil Barrel 209 l 55 2 gal US 2820304310 5 Extreme pressure lithium grease 2820304320 6 Lead free grease Aerosol 0 4 l 0 1 gal US 2820304330 6 Lead free grease Can 5 l 1 32...

Страница 17: ...system 2427003170 Diesel pre filter 2324000620 Diesel filter 2427003140 Diesel filter 2427003150 Engine oil filter 2175131000 Engine oil filter 2324000610 Filter pack 1 1 1 hydraulic filter cartridge 1 air filter 1 diesel pre filter 1 diesel filter 1 engine oil filter KIT250H LDW1 Filter pack 2 2 1 hydraulic filter cartridge 1 air filter 1 diesel pre filter 1 diesel filter 1 engine oil filter KKIT...

Страница 18: ...ng to EN590 European fuel oil according to BS2869 class 2 American gas oil according to ASTMD975 07b Japanese gas oil according to NATO F54 HATZ 41C DEUTZ 2011 2012 PERKINS 403 804 1104 LOMBARDINI LDW 1404 KUBOTA D1105 W1 Other fuels Biofuels According to EN14214 EU and ASTM D6751 07a USA biofuels are allowed on some engines and under certain conditions For more information please contact HAULOTTE...

Страница 19: ...A B C D E F G H I 19 4000599070 E11 16 USA GB HA120PX B Recommendations 2 2 MOTOR OILS In order to ensure that the engine will run properly it is recommended to use the following oils Viscosity table ...

Страница 20: ...oils may be used if they comply with the following requirements Ambient operating temperature between 15 C 9 F and 40 C 104 F HEES type biodegradable oil only according to standards ISO 15380 and VDMA 24568 Necessary characteristics Environmental conditions ISO Viscosity grade Ambient temperature between 15 C 9 F and 40 C 104 F HV 46 Ambient temperature between 35 C 31 F and 35 C 95 F HV 32 Ambien...

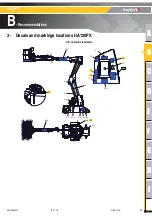
Страница 21: ...D E F G H I 21 4000599070 E11 16 USA GB HA120PX B Recommendations 3 Decals and markings locations HA120PX CE and AS standards A3 A5 A4 R4 R3 A10 R9 R9 A12 A11 A8 A32 R14 R1 R17 J3 J4 R54 R6 J2 O1 R7 A2 J29 J6 ...

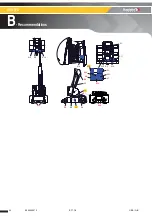
Страница 22: ...22 4000599070 E11 16 USA GB HA120PX B Recommendations A16 A16 A6 R4 R3 J3 R7 J1 A9 R9 R9 R5 A15 R17 A15 A74 R16 J10 R8 R1 A7 R20 R53 R15 A1 R16 ...

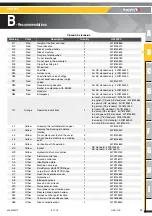
Страница 23: ...rd 3078143460 In danish CE standard 3078144940 In portuguese CE standard 3078145830 In finish CE standard 30781745540 In swedish CE standard 3078145940 In dutch CE standard 3078143470 J1 Yellow Greasing the turntable rotation gear 1 3078143570 J2 Yellow Remove the blocking pin before rotating 1 3078143530 J3 Yellow Do not place your foot on the cover 2 3078143640 J4 Yellow Do not use the machine a...

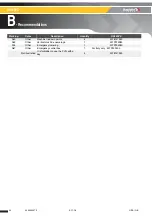
Страница 24: ...oints 4 3078147930 A32 Other Vertical machine name logo 1 307P224980 A74 Other Emergency lowering 1 307P224950 A87 Other Emergency control box 1 For Italy only 307P232500 Not illustrated It is forbidden to use the PVG with a key 4 3078147930 Marking Color Description Quantity HA120PX ...

Страница 25: ...e product Maintenance operations must be carried out by a competent technician whose selection is under the responsibility of the manager Company employee or other Maintenance operations performed must be recorded in a register log book of the machine To drain off Lubrication Greasing Tightening Levelling Systematic replacement Functional adjustments Checks Periodicity First 50 h 6 months or 1 yea...

Страница 26: ...pe The strain of chains Chains replacement Wear pads and devices of guidance Wear pads Cylinder and hydraulic component pump filters manifold Hydraulic oil Hydraulic oil filter Adjusting the hydraulic pressure Energy storage and motorisation talns batteries and engine Engine oil filter and replacement Engine air filter Engine fuel filter Batteries acid level ...

Страница 27: ...een by the company manager This register or machine log book and the list of competent repair persons must be made available to the Government Work Inspector and company safety committee at any time According to applicable regulatory requirements If there are no local requirements then inspection must be performed at least once a year When Responsible Stakeholder What Before sale Owner or renter C...

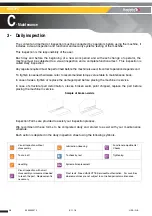
Страница 28: ...intenance book In case of leaks tighten or replace the damaged part before placing the machine in service In case of structural part deformation cracks broken weld paint chipped replace the part before placing the machine in service Sample of broken welds Inspection Forms are provided to assist your inspection process We recommend these forms to be completed daily and stored to assist with your ma...

Страница 29: ...clean and legible Operation of start stop device Operation of E stop button device Operation of enable switch Operation of horn from platform control box Operation of movement from platform control box Test warning alarm lights and buzzer No abnormal noise and jerky movements from platform control box Joysticks and movement switches return to neutral Work Platform Floor guardrails access and exten...

Страница 30: ...tation system orientation turret basket and jib No cracks broken weld paint chipped No deterioration and visible damage No screws missing loose parts No foreign body in joints or slides Exterior gear wheel greasing Pin pin stop bearing Presence of turret rotation pin and locking device No bent cracked or broken pins pin stops bushes or bearings Pulleys chains and wire rope No cracked or broken cha...

Страница 31: ... all cables No oxidation or corrosion on terminals Sensors and safety device Stabilizers operate correctly and lock securely in position Slope limiting device operates properly Axle locking device operate properly Pothole safety device operate properly if equipped Test of load sensing system visual warning at control box Check that the safety devices operates correctly Emergency stop Enable switch...

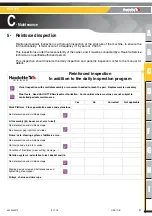
Страница 32: ...e or in addition use the detailed program below This inspection is the responsibility of the owner and must be conducted by a qualified technician To ensure user safe use and improve the life of machines HAULOTTE recommended performing this inspection every HAULOTTE months This inspection should include the daily inspection Intervention to be made after Extensive dismantling and reassembly Repairs...

Страница 33: ...er s plate Control box Operation of emergency lowering device Work Platform Floor guardrails access and extensions No cracks broken weld paint chipped No deterioration and visible damage Harness anchor points are not cracked or damaged with the decal attached and legible No screws missing loose parts Entry bar gate closes automatically and is not prevented from closing Locking in closed position o...

Страница 34: ...d if equipped Wheel reducer Rotation systems orientation turret basket and jib No cracks broken weld paint chipped No foreign body in joints or slides Lateral gap of extensible structure seems acceptable test on slewing system Slewing device screw and bolt presence and tightenning if equipped Pin pin stop bearing Presence of the turret pin and its locking device No abrasion damage or oxidation of ...

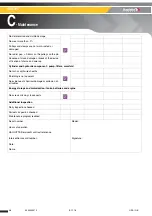
Страница 35: ...and motorisation tanks batteries and engine No screw or missing loose parts Absence of leaks battery acid engine oil etc Presence and good condition of the batteries terminations and clamps electrolyte level Presence and state of hydraulic hose Absence of deformation visible damage and broken weld on fuel tank Presence and good condition of the engine oil filter Presence and good condition of the ...

Страница 36: ...quipped Presence and good operation of sensors Sensors and safety device Static tests on horizontal ground Dynamic test on horizontal ground Braking tests Movements checking speed and behavior Slope sensing device adjustment Load sensing system adjustment Working area limiter device adjustment Oscillating axles blocking system Absence of non allowed modifications Safety bulletin take into account ...

Страница 37: ...ection with small disassembly or movement needed to reach the part Replacement is necessary Proof tests Need HAULOTTE Services authorization For countries where machines are not subject to controlled periodic maintenance Yes No Corrected Not applicable Work Platform Floor guardrails access and extensions No deterioration and visible damage Lift assembly jib boom mast arm turret No deterioration an...

Страница 38: ... Cylinder and hydraulic component pump filters manifold No torn or split wire sheaths Shielding is not apparent No evidence of chemical damage or corrosion on all cables Energy storage and motorisation tanks batteries and engine No screws missing loose parts Additional inspection Daily inspection checked Periodic inspection checked Maintenance program realized Serial number Hours of operation HAUL...

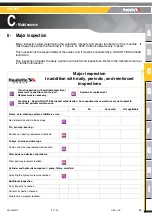
Страница 39: ...spections Visual inspection with small disassembly or movement needed to reach the part Replacement is necessary Systematic replacement Proof tests Need HAULOTTE Services authorization For countries where machines are not subject to controlled periodic maintenance Yes No Corrected Not applicable Frame axle steering system stabilizers arms No deterioration and visible damage Pin pin stop bearing Bu...

Страница 40: ...40 4000599070 E11 16 USA GB HA120PX C Maintenance Serial number Hours of operation HAULOTTE Services contract reference Intervention record number Date Name Model Signature ...

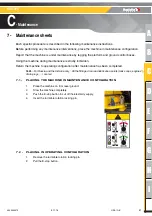
Страница 41: ...uring maintenance is strictly forbidden Return the machine to operating configuration after maintenance has been completed N B For Russia and the Ukraine only All the fillings drain and lubrication points tanks caps engines drain plugs are red 7 1 PLACING THE MACHINE IN MAINTENANCE CONFIGURATION 7 2 PLACING IN OPERATING CONFIGURATION 1 Remove the turntable rotation locking pin 2 Pull the E stop bu...

Страница 42: ...replaced must be replaced with bolts of identical specification Type Length Diameter Class Tighten to the torque indicated when reassembling If there are no specific requirements apply the normalized tightening torques Section C 3 Maintenance sheets E007 7 3 2 2 Pins and bearings Except maintenance schedule check pins and bearings in the following cases Abnormal noise during the movements of the s...

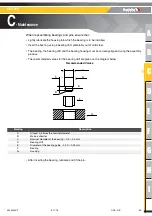
Страница 43: ...ing the bearing drift and the bearing housing must be correctly aligned during the assembly process The recommended values for the bearing drift are given on the diagram below Recommended Values After inserting the bearing lubricate and fit the pin Marking Description A At least 0 5 times the nominal diameter B Make a chamfer C Nominal diameter of the bearing 0 2 0 3 mm D Bearing drift E Diameter ...

Страница 44: ...lutants and potential damage Clean the bearing with a suitable solvent Replace the bearing in the following cases Presence of abrasions in the bearing housing and or inside the bearing itself Presence of abrasion wear oxidation deformations of the balls or rollers and the ring rollers Reassembly of the bearing pivot Clean the bearing housing or pin in order to remove all the foreign objects abrasi...

Страница 45: ...of the front wheels and the reference mark on the ground If the distance is between 0 2 m 0 ft8 in and 1 5 m 4 ft11 in the test validates correct operation Otherwise contact HAULOTTE Services to repair the system Second test On ramp On non slipping loading ramp maximum slope 20 Draw a line on the slope to create a stopping reference Climb on the ramp at microspeed Release the joystick when the fro...

Страница 46: ...ommendations Section B 1 Lubrication diagram List of ingredients or contact HAULOTTE Services Do not mix two oils with different characteristics If necessary drain and clean the whole system Check the cleanliness of the oil filter cartridge no metal shavings rubber plastic If necessary drain and clean the whole system Respect the following step during filling The machine must be completely stowed ...

Страница 47: ... Identify and memorise the hose path of the hose to be replaced Use an oil collection pan to avoid polluting the environment After hose removal plug the the hose ends and components the ports from which the hose was removed to avoid polluting the hydraulic system Check the cleanliness of the hoses and hydraulic components no metal cutting rubber plastic If necessary drain and clean the whole syste...

Страница 48: ... the ground If the difference between two measurements does not exceed 4 cm the test validates correct operation If the difference between two measurements exceeds 4 cm contact HAULOTTE Services or carry out the additional tests described below Control cylinder by cylinder Position a load equal to the rated capacity on the cage or platform Perform the movement of the concern cylinder to half of it...

Страница 49: ...ectric 7 3 4 1 Replacing damaged cables Locate the faulty wire s and its their points of connection to ensure continuity of machine operation after the wire is replaced Note the cable path to facilitate reassembly Respect the order configuration of origin during the reassembly ...

Страница 50: ...50 4000599070 E11 16 USA GB HA120PX C Maintenance Notes ...

Страница 51: ...lection pan Place barriers around the perimeter of the work area 1 Turn the wheel to obtain the following configuration 2 Plug 1 is on a horizontal line 3 Plug 2 is on a vertical line 4 Loosen and remove plug 1 5 Check the oil level 6 Top up the oil level to the hole if necessary 7 Refit and tighten plug 1 1 Turn the wheel until plug 2 is directed downwards 2 Loosen and remove plugs 1 and 2 3 Let ...

Страница 52: ...52 4000599070 E11 16 USA GB Control Oil change Wheel reducer E002 15 mn Notes ...

Страница 53: ...g in operating configuration Standard tool kit Protective goggles Gloves Place barriers around the perimeter of the work area Clogging must be checked when hot When cold oil viscosity may simulate filter clogging Do not touch the hot parts of the hydraulic power source engine filters etc 1 When the clogging indicator 2 comes on replace the cartridge 1 2 Loosen and remove the base nut 3 3 Loosen an...

Страница 54: ...54 4000599070 E11 16 USA GB Replacement Hydraulic filter cartridge E003 15 min Notes ...

Страница 55: ...ing configuration 3 3 2 Placing in operating configuration Standard tool kit Protective goggles Gloves Place barriers around the perimeter of the work area Touch the exterior of the filling hole with the pump spout before starting pouring to avoid any risk of static electricity causing sparks Make sure you are standing up wind to avoid being splashed by the fuel Do not smoke 1 Loosen and remove th...

Страница 56: ...56 4000599070 E11 16 USA GB Filling up Oil change Fuel tank E004 15 mn Notes ...

Страница 57: ...f greasing as indicated in the program Standard tool kit Steel shims Protective goggles Gloves Place barriers around the perimeter of the work area The illustrations in this paragraph do not necessarily correspond to the range of products designated in the manual 1 Check for the presence of all the locating bolts 2 Check that the accessible screws are not loosened If necessary tighten the screws R...

Страница 58: ...aN m 158 lbf ft HA260PX HA80JRT 21 5 daN m 158 lbf ft HA32RTJ PRO HA100RTJ PRO 21 5 daN m 158 lbf ft HA41RTJ PRO HA130RTJ PRO 21 5 daN m 158 lbf ft H14TX HB40 8 7 daN m 64 lbf ft H16TPX HB44J 8 7 daN m 64 lbf ft H21TX HB62 21 5 daN m 158 lbf ft H23TPX HB68J 32 daN m 236 lbf ft H25TPX HB76J 21 5 daN m 158 lbf ft H28TJ HB86TJ 21 5 daN m 158 lbf ft HT43RTJ PRO HT132RTJ PRO 21 5 daN m 158 lbf ft STAR ...

Страница 59: ...e in the following conditions On flat ground Set up barriers to define the test area No load in the platform From the ground control box align the turret at 90 to the chassis Lift the boom approximatively 30 from the ground Completely retract the boom Jib in horizontal position if fitted From the magnetic comparator note the clearance J1 between chassis or turret and the slew ring Clearance betwee...

Страница 60: ...correct operation Otherwise contact HAULOTTE Services to repair the system 6 Clearance check 7 Additional operation 1 Place the machine in its operating configuration 3 3 2 Placing in operating configuration 2 Rotate the slew ring by one complete turn Consult the After Sales Service HAULOTTE Services A tight spot or grinding sound during rotation or the presence of metal particles escaping from th...

Страница 61: ...ny of the following conditions exist Presence of cracks damage deformation or other faults on the hub Damage to the tire Cut or hole 3 cm 2 in in the rubber side wall Blister or pronounced lump on the external and lateral wall Damaged wheel stud Damage or wear on the side wall to the extent that the reinforcing wire is visible Nonlinear wear of the ground contact surface greater than 10 Standard t...

Страница 62: ...wheel nuts on the wheel to be removed 2 Raise the machine using a jack or a hoist 3 Remove the wheel nuts 4 Remove the wheel 5 Install the new wheel 6 Lower the machine to the ground 7 Tighten the wheel nuts to the recommended torque For safety reasons always use original HAULOTTE spare parts that are specific to this machine Refer to the spare parts catalog ...

Страница 63: ...HA61JRT Drive wheel 320 236 Steer wheel 320 236 HA260PX HA80JRT Drive wheel 320 236 Steer wheel 320 236 HA32RTJ PRO HA100RTJ PRO Drive wheel 650 479 Steer wheel 650 479 HA41RTJ PRO HA130RTJ PRO Drive wheel 570 420 Steer wheel 570 420 H14TX HB40 Drive wheel 320 236 Steer wheel 320 236 H16TPX HB44J Drive wheel 320 236 Steer wheel 320 236 H21TX HB62 Drive wheel 320 236 Steer wheel 320 236 H23TPX HB68...

Страница 64: ...64 4000599070 E11 16 USA GB Replacement Tightening Wheel E006 15 min Notes ...

Страница 65: ...x3 630 790 464 66 582 67 890 990 656 43 730 19 1070 1180 789 19 870 32 M27x3 930 1150 685 93 848 2 1300 1400 958 83 1032 59 1560 1730 1150 6 1275 98 M30x3 5 1260 1570 929 33 1157 97 1770 1960 1305 49 1445 62 2200 2350 1622 64 1733 27 Nominal diameter Torque in N m lbf ft Class 8 8 Class 10 9 Class 12 9 M8x1 24 29 17 7 21 39 33 37 24 34 27 29 40 44 29 5 32 45 M10x1 25 46 57 33 93 42 04 64 71 47 2 5...

Страница 66: ...66 4000599070 E11 16 USA GB Tightening Screws bolts and nuts E007 15 min Notes ...

Страница 67: ...chine in maintenance configuration 3 Control N B Packers of different thicknesses can be used for adjustment 4 Replacement Replace the friction pads 5 Additional operation 1 Place the machine in its operating configuration 3 3 2 Placing in operating configuration Standard tool kit Protective goggles Gloves Place barriers around the perimeter of the work area Check the telescoping friction pad wear...

Страница 68: ...68 4000599070 E11 16 USA GB Control Lubrication Replacement Pulleys and wear pads E013 15 mn Notes ...

Страница 69: ...n the caps located on the top of the battery The level of electrolyte in the battery must be approx 0 01 m 0 ft39 in above the plates 4 Filling up Standard tool kit Protective goggles Gloves Place barriers around the perimeter of the work area The battery manufacturer s safety instructions must be followed Loosen the caps located on the top of the battery If the level of electrolyte is below the l...

Страница 70: ... batteries with distilled water to the minimum electrolyte level if any of the elements are below this minimum level Work in a clean and well ventilated area away from naked flames Open the bay Use the machine s on board charger The charger has a charge rate compatible to the battery capacity During charging The machine s electric system is automatically deactivated while the external power supply...

Страница 71: ...e machine in its operating configuration 3 3 2 Placing in operating configuration To keep your batteries in good condition test the density of each element once a month using a batttery hydrometer according to the temperature indicated in the curves below Battery charge status according to density and temperature ...

Страница 72: ...72 4000599070 E11 16 USA GB Control Filling up Battery charge Battery E018 10 min Notes ...

Страница 73: ...ne in maintenance configuration 3 Replacement 4 Torque Plug torque 55 Nm Power supply lug torque 5 Nm 5 Additional operation 1 Place the machine in its operating configuration 3 3 2 Placing in operating configuration Standard tool kit Gloves Spanner 1 Place barriers around the perimeter of the work area 1 Remove the power supply lugs from the plugs 1 2 Unscrew the plugs 2 using a spanner 1 3 Chang...

Страница 74: ...74 4000599070 E11 16 USA GB Changing glow plugs Glow plugs E030 30 mn Notes ...

Страница 75: ...oil Sufficient hydraulic oil in the tank Batteries are charging Control box E stop push buttons are pulled out The control box selector key is set to platform or ground control box Control box relays are engaged Fuse status Ground control box solenoid valve status If the malfunction persists consult the troubleshooting table to identify the problem IF you cannot identify the problem contact HAULOT...

Страница 76: ...weight Do not exceed the authorised limit Section G 1 Main characteristics Enable Switch s pedal is not activated Keep pressure on the pedal during movement Button or joystick corresoponding to the faulty movement Replace the knob or joystick Tilt or slope exceeding the authorised limit Lower the arm and boom Do not exceed the authorised limit Section G 1 Main characteristics No high speed Platfor...

Страница 77: ...ised limit Section G 1 Main characteristics Hydraulic oil temperature too high Allow to cool down No driving Earthing fault or open circuit on a travel solenoid valve Look for the faulty solenoid valve Contact HAULOTTE Services Faulty joystick Replace the joystick Fault on YV25 or YV21A or YV21B Look for the faulty solenoid valve Contact HAULOTTE Services Turntable controls do not work ground cont...

Страница 78: ...78 4000599070 E11 16 USA GB HA120PX D Diagnosis assistance Notes ...

Страница 79: ...3 A Turntable movement control circuit fuse FU6 3 A Platform movement control circuit fuse FU7 20 A Solenoid valve power supply circuit fuse FU8 5 A Permanent power supply circuit fuse FU9 20 A Accessory power supply circuit fuse FU10 3 A LS valve circuit fuse FU11 250 A Emergency pump circuit fuse FU13 Cooler option circuit fuse G2 Alternator HA1 Buzzer HA2 Buzzer Platform control box Overload HA...

Страница 80: ...Platform jib SA7a Lifting SA7b Lowering SA8 Turntable telescope Ground control box SA8a Retraction S8b Extension SA9 Platform box or platform telescope Platform control box SA9a Retraction S9b Extension SA11 Speed selection SA13 Boom raising Ground control box SA13a Lifting S13b Lowering SA14 Arm raises Ground control box SA14a Lifting S14b Lowering SA15 Turntable rotation Ground control box SA15a...

Страница 81: ...pe extension solenoid valve YV11 Telescope retraction solenoid valve YV12 Arm lowering solenoid valve YV14A Turntable rotation left solenoid valve YV14B Turntable rotation right solenoid valve YV17 Boom lifting solenoid valve YV19A YV19B Platform rotation control solenoid valve YV20 Jib lowering control solenoid valve YV21A YV21B Forwards reverse travel solenoid valve YV22A Front right hand steeri...

Страница 82: ...e heating control circuit fuse FU4 30 A Turntable platform box power supply circuit fuse FU5 3 A Turntable movement control circuit fuse FU6 3 A Platform movement control circuit fuse FU7 20 A Solenoid valve power supply circuit fuse FU8 5 A Permanent power supply circuit fuse FU9 20 A Accessory power supply circuit fuse FU10 3 A Circuit fuse YV1 FU3 FU1 FU4 FU5 FU9 FU10 FU8 FU6 FU7 ...

Страница 83: ...A B C D E F G H I 83 4000599070 E11 16 USA GB HA120PX E Electric circuit 3 Relays and terminals Locations Locations KA32 KT2 KA2 KP1 101 105 120 103 118 240 102 215 KA37 226 KA46 224 201 0 119 KA43 909 ...

Страница 84: ...t cut off relay Option KA46 MS and HS driving power supply relay KAK Horn relay located on the side of the cabinet KMG General power supply relay located on the side of the cabinet KP1 Engine power supply relay KT2 Accelerator relay 0 Battery 101 Battery 102 Emergency stop circuit 103 Starter 118 Engine speed 119 Engine pre heating 120 General 215 Emergency stop circuit 240 General power supply af...

Страница 85: ...11 9 Jib lowering proportional solenoid valve YV20 11 Differential lock YV24 12 Safety solenoid valve YV2 13 High speed drive control solenoid valve YV25 14 Turntable buzzer HA4 15 Chassis solenoid valves YV9 Medium speed and high speed YV13 High speed Forwards and reverse drive YV21A YV21B Left hand and right hand steering YV22A YV22B 18 Horn relay KAK 19 Boom lifting solenoid valve YV15B 20 Plat...

Страница 86: ...ol SA4A SA4B Platform turntable compensation control SA5A SA5B SA17A SA17B Platform jib control SA7A SA7B Platform telescope control SA9A SA9B Orientation joystick setpoint SM31 and null position Lifting joystick setpoint SM2 and null position 31 Right turning proportional solenoid valve YV14A 34 Left platform rotation proportional solenoid valve YV19B 35 Right platform rotation proportional solen...

Страница 87: ...YV19A YV19B Left right platform rotation control solenoid valve YV20 Jib lowering solenoid valve YV21A YV21B Forwards reverse travel solenoid valve YV22A Front right hand steering control solenoid valve YV22B Front left hand steering control solenoid valve YV23 Boom lowering solenoid valve YV24 Differential locking control solenoid valve YV25 High speed travel proportional solenoid valve YV9 Mediu...

Страница 88: ...s Locations Description of the components HA120PX Marking Description SQ1 Tilt sensor SQ2 Jib movements cut off SQ3 Boom movements cut off SQ4 Arm movements cut off SQ5 SQ6 Overload SQ20 Left hand rotation cut off SQ21 Right hand rotation cut off SB6 Enable Switch pedal SQ5 SQ6 SQ20 SQ21 SQ2 SQ3 SQ4 SQ1 SB6 ...

Страница 89: ...oad HA4 Buzzer Ground control box Tilt sensor Overload Temperature Driving buzzer option Movement buzzer option Marking Description HL1 Battery charging indicator HL2 Air filter clogging indicator HL3 Engine overheating indicator HL4 Engine oil pressure light HL5 Beacon light option HL6 Spotlight option HL7 Power ON indicator HL9 Fault indicator HL13 Overload HL20 Turntable pre heating indicator H...

Страница 90: ...90 4000599070 E11 16 USA GB HA120PX E Electric circuit Notes ...

Страница 91: ...A B C D E F G H I 91 4000599070 E11 16 USA GB HA120PX F Hydraulic circuit Hydraulic circuit 1 Hydraulic diagram Main components N B See end of manual ...

Страница 92: ...92 4000599070 E11 16 USA GB HA120PX F Hydraulic circuit 2 Solenoid valves Locations YV8 YV10 YV11 YV12 YV14 YV17 YV19 YV20 YV23 YV40 YV41 YV42 YV1 YV2 YV9 YV13 YV21 YV22 YV24 YV25 YV30 ...

Страница 93: ...solenoid valve YV14A Turntable rotation right solenoid valve YV14B Turntable rotation left solenoid valve YV17 Boom lifting solenoid valve YV19A YV19B Platform rotation control solenoid valve YV20 YV40 Jib lifting lowering control solenoid valve YV21A YV21B Forwards reverse travel solenoid valve YV22A Front right hand steering control solenoid valve YV22B Front left hand steering control solenoid ...

Страница 94: ...94 4000599070 E11 16 USA GB HA120PX F Hydraulic circuit Marking Description 1 Proportional unit 2 Drive unit 3 Unit TOR 4 Steering unit ...

Страница 95: ...A B C D E F G H I 95 4000599070 E11 16 USA GB HA120PX F Hydraulic circuit 2 1 DRIVE UNIT Diagram extract ...

Страница 96: ...ve 9 Flow divider 12 Plug 13 Flow divider YV8 Switching to high speed YV9 Differential release YV10 Medium and high speed selector switch YV11 Brake release YV12 Medium and high speed selector switch YV13 Switching to high speed YV17 Medium and high speed selector switch YV23 Medium and high speed selector switch YV9 YV17 YV11 YV12 YV8 YV23 YV13 YV10 ...

Страница 97: ...A GB HA120PX F Hydraulic circuit 2 2 STEERING UNIT Steering unit detail Diagram extract Marking Description 1 Unit 2 Plug 3 Shuttle valve YV21 Solenoid valve YV21A YV21B Coil YV22 Solenoid valve YV22A YV22B Coil 6 Valve YV22A YV22B YV21A YV21B ...

Страница 98: ...98 4000599070 E11 16 USA GB HA120PX F Hydraulic circuit 2 3 UNIT TOR TOR block details Diagram extract Marking Description A Turntable rotation B Compensation C Jib arm D Cage rotation A B C D ...

Страница 99: ...cription 1 Anti impact relief valve 2 YV1 LS control solenoid valve 3 Valve 4 Manual control 5 Distribution range 6 Slide 7 YV2 Boom telescoping PVG YV2a Extension YV2b Retraction 8 YV3 Boom lifting PVG 9 YV4 Arm lifting PVG 10 YV5 Proportional solenoid valve for turntable rotation 11 Driving YV6 Driving PVG 1 2 3 4 5 6 7 8 9 10 11 ...

Страница 100: ...100 4000599070 E11 16 USA GB HA120PX F Hydraulic circuit Proportional unit Diagram extract ...

Страница 101: ...tion register keeps a record of maintenance and repair work carried out inside or outside the maintenance programme N B In the case of a HAULOTTE Services intervention the qualified technician must indicate the HAULOTTE Services intervention number Date Type of intervention Number of hours Intervenor HAULOTTE Services intervention number ...

Страница 102: ...102 4000599070 E11 16 USA GB HA120PX G Intervention register Date Type of intervention Number of hours Intervenor HAULOTTE Services intervention number ...

Страница 103: ...A B C D E F G H I 103 4000599070 E11 16 USA GB HA120PX G Intervention register Date Type of intervention Number of hours Intervenor HAULOTTE Services intervention number ...

Страница 104: ...104 4000599070 E11 16 USA GB HA120PX G Intervention register Date Type of intervention Number of hours Intervenor HAULOTTE Services intervention number ...

Страница 105: ...A B C D E F G H I 105 4000599070 E11 16 USA GB HA120PX G Intervention register Date Type of intervention Number of hours Intervenor HAULOTTE Services intervention number ...

Страница 106: ...106 4000599070 E11 16 USA GB HA120PX G Intervention register Date Type of intervention Number of hours Intervenor HAULOTTE Services intervention number ...

Страница 107: ...1 4000599070_USA_GB_e11 16 Electrical diagram HA120PX 1 HA120PX 1 1 FOLIO 1 7 ...

Страница 108: ...2 Electrical diagram HA120PX 1 2 FOLIO 2 7 ...

Страница 109: ...3 Electrical diagram HA120PX 1 3 FOLIO 3 7 ...

Страница 110: ...4 Electrical diagram HA120PX 1 4 FOLIO 4 7 ...

Страница 111: ...5 Electrical diagram HA120PX 1 5 FOLIO 5 7 ...

Страница 112: ...6 Electrical diagram HA120PX 1 6 FOLIO 6 7 ...

Страница 113: ...7 Electrical diagram HA120PX 1 7 FOLIO 7 7 ...

Страница 114: ...8 Electrical diagram HA120PX ...

Страница 115: ...R SLAVE 100 50 C210 9 0 6 0 C 1 0 0 7 2 1 0 b 2 1 0 b 9 0 6 0 C 5 1 5 TELESCOPAGE TELESCOP 60 50 C1770 COMPENSATION 4 1 2 1 2 M4 1 2 G M3 1 2 G M2 1 2 G M1 1 2 G M6 1 2 G M7 1 2 G M8 1 2 G YV24 T 3 4 G P 1 2 G YV25 YV21 YV9 YV13 PV MV GV YV30 1 4 G 1 4 G 1 4 G 1 4 G ROTATION PANIER BASKET ROTATION ORIENTATION TOURELLE TURRET ROTATION PENDULAIRE JIB TELESCOPAGE TELESCOP LEVAGE FLECHE BOOM LIFTING L...

Страница 116: ...2 HYDRAULIC DIAGRAM HA120PX ...

Отзывы: