


21
IND100210-2
INB100042-2 (Rev 14)
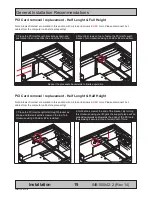
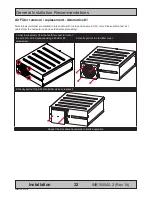
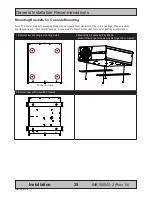
General Installation Recommendations
Installation
DVD/CD Drive removal / replacement
Note: Areas of interest are marked in this section with circles and arrows in
RED
color. Please disconnect ALL
cables from the computer unit and DVD/CD drive before proceeding!
1: Unscrew 1 screw on the DVD/CD bracket.
Turn anti-clockwise using your fingers.
2: Gently pull out the DVD/CD bracket away. Remember
it’s orientation and placement.
3: Unscrew 1 screw on the back of the DVD/CD drive.
Turn anti-clockwise using fingers.
4: Gently push with your fingers on the back of the
DVD/CD drive, while using your other hand to pull it out.
5: Unscrew 2 screws on the right side of the DVD/CD drive. Turn anti-clockwise using a Pozidriv #2 screwdriver.
Repeat the procedure backwards to finalize operation.
Содержание HT C01 Series
Страница 6: ...6 INB100042 2 Rev 14 This page left intentionally blank ...
Страница 7: ...7 INB100042 2 Rev 14 General ...
Страница 10: ...10 IND100077 81 INB100042 2 Rev 14 General Exploded View Basic Construction General illustration ...
Страница 13: ...13 INB100042 2 Rev 14 Installation ...
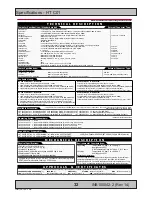
Страница 31: ...31 INB100042 2 Rev 14 Specifications ...
Страница 33: ...33 INB100042 2 Rev 14 Technical Drawings ...
Страница 35: ...Technical Drawings HT C01 35 INB100042 2 Rev 14 IND100132 149 DC Model ...
Страница 36: ...36 INB100036 3 Rev 4 This page left intentionally blank ...
Страница 37: ...37 INB100042 2 Rev 14 Technical Drawings Accessories ...
Страница 41: ...41 INB100042 2 Rev 14 Appendixes ...
Страница 49: ...49 IND100077 24 INB100042 2 Rev 14 Appendix Notes ...
Страница 51: ...51 INB100024 2 Rev 9 This page left intentionally blank ...
Страница 52: ...www hatteland display com ...


