


Section 3 – Operating The HJ500P
HJ500P
Hasler
®, Inc. 04/2004
Page-15
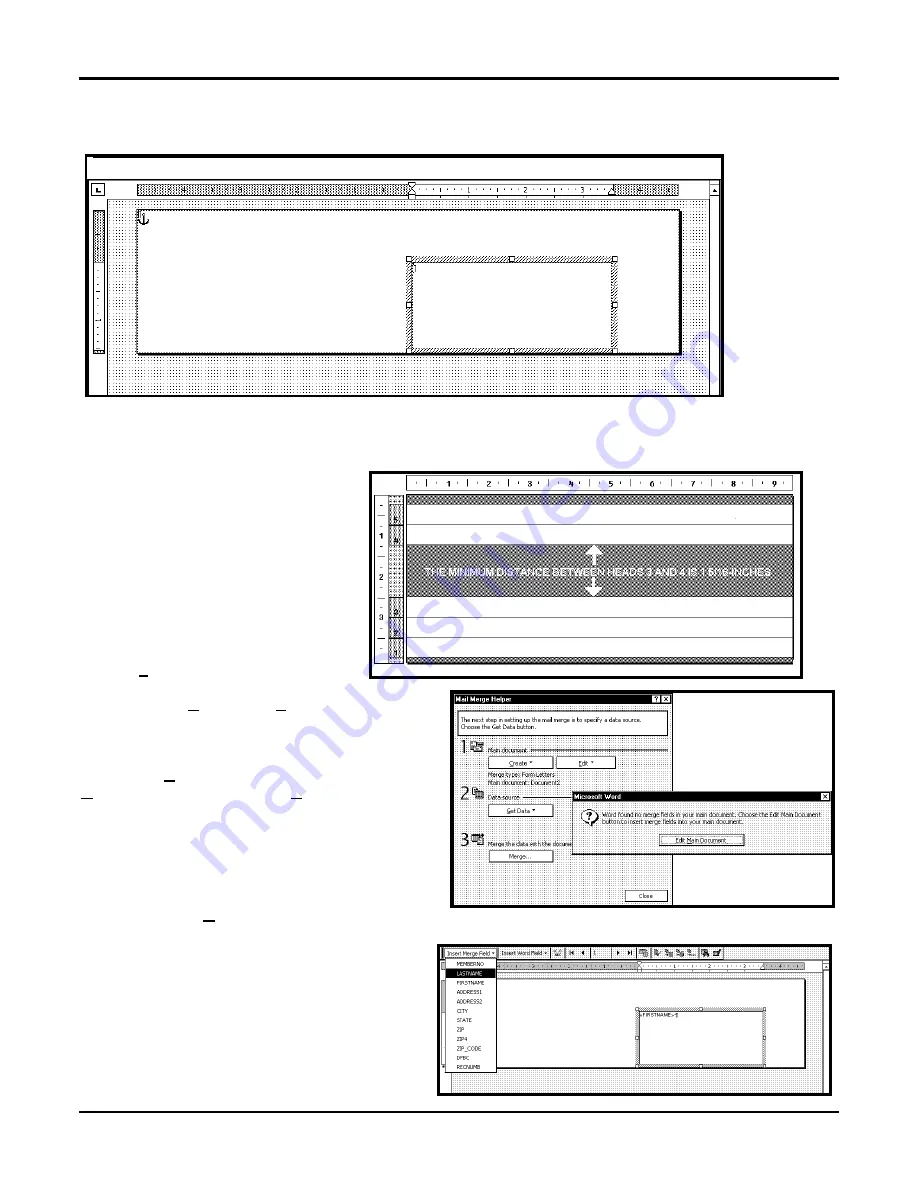
When you have completed the steps above the layout should look like the one below.
NOTE:
When setting up a layout for the HJ500P, be aware that the printheads are aligned in two banks and
these banks face each other. The minimum distance between printheads 1, 2, and 3 and printheads 4 and 5 is 1-
5/16-inch. This in effect permits you to
print the return address on heads 4 and 5
with an indicia and the variable address
on heads 1, 2, and 3. When printing in
this manner it is a good idea to use the
overlay feature for the fixed information.
The actual head layout on a #10
envelope appears at the right.
Click on
Tools
and then
Mail Merge
.
The “Mail Merge Helper “ window will
open. Click On
Create
, then
Envelopes
. The
“Microsoft Word” window will open.
Click on the
Active Window
button, then click on the
Get Data
button. Next click on
Open data
source.
Locate the data file you intend to use. In our
example we are using a Microsoft Excel file. Select
the file and the “Microsoft Excel” window opens
select entire spreadsheet and click
OK
.
Next click on
Edit Main Document
and then click on
Close
.
Use the Mail Merge Tool Bar and click on Insert
Merge Field and begin to build the layout by
inserting the address fields.
Содержание HJ500P
Страница 4: ......
Страница 6: ......
Страница 8: ......
Страница 12: ...Section 1 Getting Acquainted HJ500P Page 4 04 2004 Hasler Inc Notes...
Страница 28: ...Section 3 Operating The HJ500P HJ500P Page 20 03 2004 Hasler Inc Notes...
Страница 34: ...Section 4 Maintenance HJ500P Page 26 03 2004 Hasler Inc Notes...
Страница 38: ......
Страница 40: ...Form 51019 03 2004...