page 38
DriveCore Install DA Series Operation Manual
Using Dante
Any multi-transport combination NOT specifically listed in the previous section is not allowed in Soundweb London systems (without being forced to use analog
interconnects between transports). For example, Dante + AVB + CobraNet is NOT allowed, because the AVB and CobraNet networks would each be synced to different
clocks—their own.
Mastership is negotiated between all the devices on the network, and changes to the network will trigger the negotiation to be re-started. There are various rules for
determining which device on the network becomes clock master:
• If there is only one device connected to CobraNet/AVB then that is master.
• If there are multiple devices connected to CobraNet/AVB, then they compare master priorities.
• If there are multiple devices on CobraNet/AVB with the same highest priority, then their MAC addresses are compared to decide which is master.
• If there are no devices connected to CobraNet/AVB, then they first compare master priorities. Next, if the priorities are the same, they compare MAC addresses.
Dante LED indicators
These are found on the Dante ports on the back panel of the device and indicate the following:
•
Green LEDs
– The green LED will light solid to indicate a network link is established and flash to indicate link activity.
•
Orange LEDs
– The orange LED indicates network connection speed (off = 10/100Mbps, on = 1 Gbps).
Routing Dante
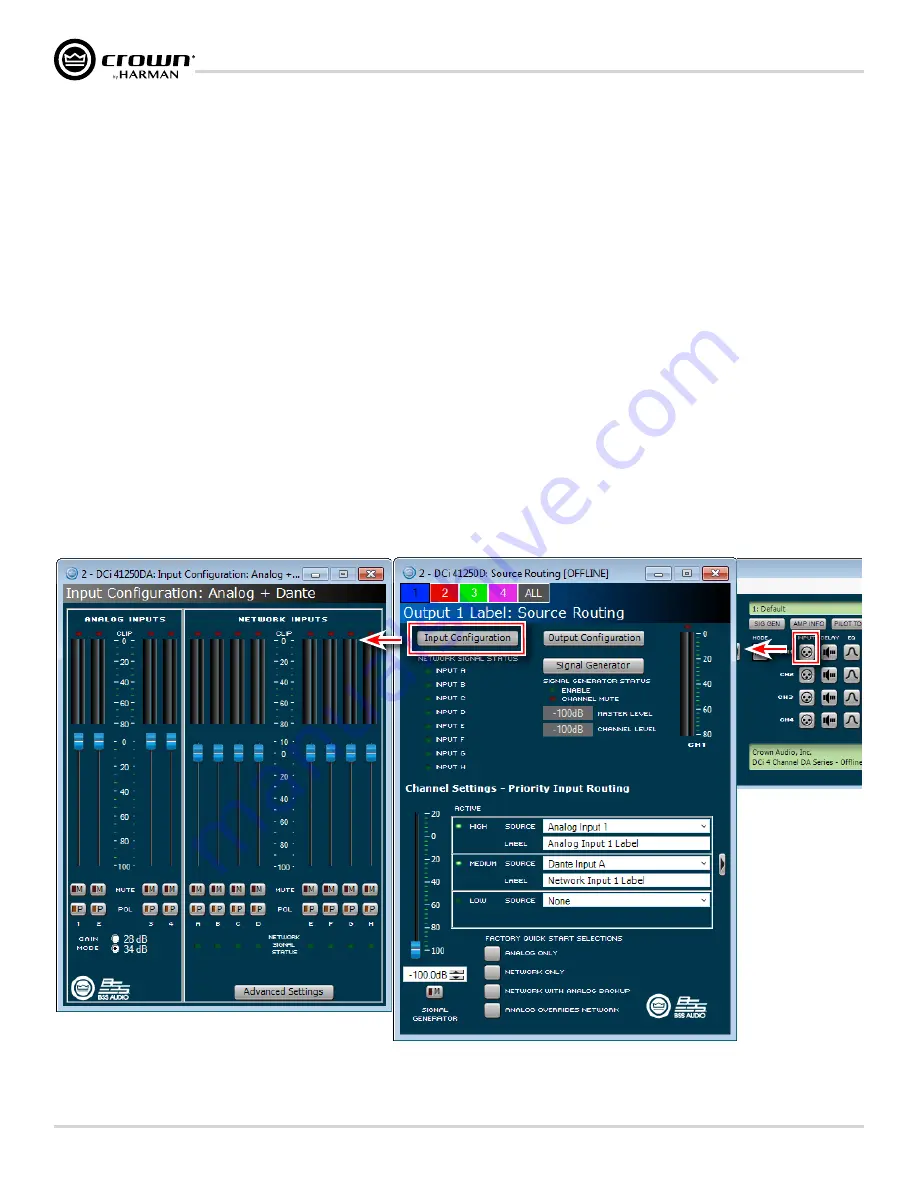
The DCi DA amplifiers can use both analog and/or Dante inputs. All Dante routing must be initially configured using Audinate's Dante Controller software, which can be
downloaded from
https://www.audinate.com/products/software/dante-controller
. Once Dante audio has been configured using Dante Controller, Dante input channels must
also be routed using the Source dropdown menus in the Source Routing panel, which can be accessed by double-clicking a channel's
Input
icon (see
that, by default, the Dante channels will be routed as the "medium priority" source.
Dante input levels can be adjusted in the DCi DA amplifier from the Input Configuration panel, which can be accessed by clicking the
Input Configuration
button from
the Source Routing panel (see
). From the Input Configuration panel, the amplifier input levels can be adjusted to accommodate different signal levels from
the sources. The meters on this panel display both peak and rms levels. Network Signal Status lights below each Dante input channel provide confirmation of Dante signal
presence.
Figure 44:
Input Configuration panel


