background image

2

Performa

 Winch 

20 STP

Installation and Maintenance Manual

Index

Introduction 

3

Technical characteristics 

3

Weight 

3

Maximum working load 

3

Outline 

3

Installation 

4

Installation procedure 

6

Positioning the self-tailing arm 

7

Maintenance 

7

Washing 

7

Maintenance table 

7

Disassembly procedure 

7

Exploded view with maintenance products 

10


Assembly 

11

Harken

®

 limited worldwide warranty 

12

Ordering spare parts  

12

Exploded view 

13

Parts list 

15

Содержание Performa 20 STP

Страница 1: ...Performa Winch 20 STP Installation and Maintenance Manual MRPW 03...

Страница 2: ...ximum working load 3 Outline 3 Installation 4 Installation procedure 6 Positioning the self tailing arm 7 Maintenance 7 Washing 7 Maintenance table 7 Disassembly procedure 7 Exploded view with mainten...

Страница 3: ...tion or reassembly of its winches In case of doubt the Harken Tech Service is at your disposal at techservice harken it This Manual is available only in English If you do not fully understand the Engl...

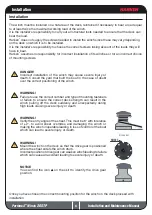
Страница 4: ...that built the boat in the case of doubt over the correct positioning of the winch WARNING Failure to use the correct number and type of mounting fasteners or failure to ensure the correct deck streng...

Страница 5: ...the exploded view at the end of this Manual Torque to apply when assembling Install the winch on the deck in the position you have chosen keeping in mind the limits described on page 3 See paragraph...

Страница 6: ...ch to the deck using five M6 bolts not supplied by Harken correctly chosen for the thickness and type of the boat deck Consult the yard that built the boat in case of doubt WARNING To install the winc...

Страница 7: ...faces Make sure that the holes and drainage channels in the base of the winch are not obstructed so that water does not collect Maintenance table Winches must be visually inspected at the beginning an...

Страница 8: ...s shown in the paragraph on winch installation and then do the following 6 Completely unscrew the three screws n 16 8 Slide out the central shaft n 7 10 Slide off gear n 3 7 Remove the stripper arm su...

Страница 9: ...ars bearings pins and pawls for any signs of wear or corrosion Carefully check the teeth of gears and ring gears to make sure there are no traces of wear Replace worn or damaged components Carry out m...

Страница 10: ...ion and Maintenance Manual Exploded view with maintenance products 1Apply Harken grease on assy socket screw 2Apply Harken grease on drum gear G G A A Harken Grease G Harken Pawl Oil O Axial Threadloc...

Страница 11: ...ssemble the pawls correctly position the spring in its housing as shown at left Hold the spring closed and slide the pawl into its housing Once in position check that the pawls can be easily opened an...

Страница 12: ...inch is printed on a plate on the drum support of the winch Harken limited worldwide warranty Ordering spare parts Headquarters Harken Inc 1251 East Wisconsin Avenue Pewaukee Wisconsin 53072 3755 USA...

Страница 13: ...13 Performa Winch 20 STP Installation and Maintenance Manual Exploded view 1 2 13 19 14 12 15 16 17 18...

Страница 14: ...14 Performa Winch 20 STP Installation and Maintenance Manual Exploded view 2 2 2 1 4 5 11 4 5 7 3 6 10 9 8 4 5...

Страница 15: ...8 Gear Z18 Bushing 9x 11x7 4 4 S000080003 Pawl 8 5 4 S000380001 Pawl Spring 8 6 1 S413700004 Pin 7 1 S413630002 Shaft Winch 20 8 Winch Serial Number Sticker 9 1 S268890080 Washer 10 1 M0604003 Screw M...

Отзывы: