background image

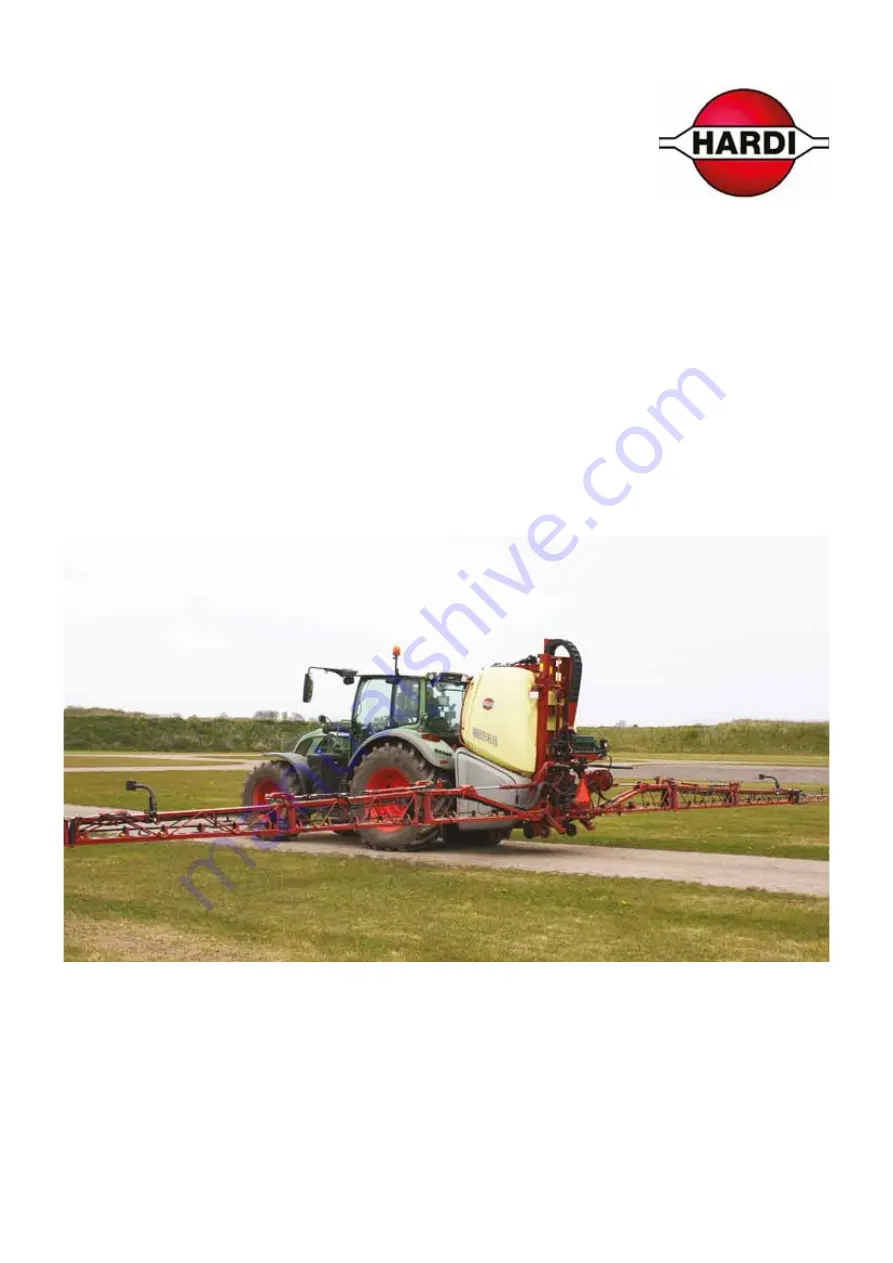
MEGA
VPZ

Original

Instruction book

67050600-110, version 1.10
GB - 03.2018

www.hardi-international.com

Содержание MEGA VPZ MASTER

Страница 1: ...MEGA VPZ Original Instruction book 67050600 110 version 1 10 GB 03 2018 www hardi international com...

Страница 2: ...ne machine C as defined in the directive 2006 42 EC article 2 Connecting the sprayer to the tractor makes the operator responsible for safety and health when using that combination of machines Before...

Страница 3: ...rding the Machinery Directive CE marking 2009 127 EC and later amendments regarding machinery for pesticide application 2014 30 EU regarding electromagnetic compatibility EMC Electronic components on...

Страница 4: ...1 EU Declaration 4...

Страница 5: ...sons 22 Safety Measures in Normal Operation 23 Protection Equipment 23 Residual Energy 24 Possible Dangers 24 Service and Maintenance Work 25 Statutory Inspection 25 Preventive Measures 25 Design Chan...

Страница 6: ...er for Pesticide Information 64 Tank Level Indicator 65 External Cleaning Device 66 Night Spraying Light 66 AutoSlant 67 Ladder 67 4 Sprayer Setup General Info 69 Unloading the Sprayer from the Truck...

Страница 7: ...ion 91 Filling Washing Location Requirements 92 Filling of Water 92 Filling Through Tank Lid 93 External Filling Device 93 Filling of Rinsing Tank 94 Filling of Clean Water Tank 95 External Filling De...

Страница 8: ...130 250 Hours Service Hydraulic Circuit 131 250 Hours Service Hoses and Tubes 131 Occasional Maintenance 132 General Info 132 Lifting and Removing the Pump 132 Pump Valves and Diaphragms Renewal 133...

Страница 9: ...161 General Info 161 Overall Dimensions 161 Weight 162 Pump Specifications 163 Pump Model 364 10 0 163 Pump Model 464 10 0 163 Pump Capacity 163 Other Specifications 164 Tractor Requirements 164 Filt...

Страница 10: ...Table of Contents 10...

Страница 11: ...it please contact the manufacturer or your HARDI dealer A worker is hereinafter called an operator An operator is a person who installs operates configures adjusts maintains cleans repairs transports...

Страница 12: ...s been installed correctly and is operating properly 2 In order to ensure that health and safety conditions are maintained and that deterioration liable to result in dangerous situations can be detect...

Страница 13: ...nasmuch as they affect work equipment situated in their immediate work area or site even if they do not use such equipment directly 3 The information and the written instructions shall be comprehensib...

Страница 14: ...uthorized persons The results of inspection testing shall be recorded and kept Health Issues Ergonomics and occupational health aspects shall be taken fully into account by the owner Obligationsof the...

Страница 15: ...causes Improper use of the sprayer Improper installation commissioning operation and maintenance of the sprayer Operation of the sprayer with defective safety equipment or improperly attached or non...

Страница 16: ...by the manufacturer of the plant protection product to be used such as This Instruction Book must always be kept together with the sprayer must always be easily accessible for the operator Chemical re...

Страница 17: ...us physical injury if the instruction is not followed This symbol means WARNING Be alert as your safety can be involved The WARNING symbol indicates a medium risk for immediate death or serious injury...

Страница 18: ...about chemical preparation before handling the machine Observe instructions and safety rules when operating Service Carefully read the Instruction Book before handling the machine Observe instructions...

Страница 19: ...alling off Do not ride on platform or ladder Risk of sprayer tipping over Be aware when disconnecting the sprayer Grapping area Manual handling of the boom etc Not for drinking This water must never b...

Страница 20: ...tarted up all the safety and protection equipment must be properly attached and fully functional Check all safety and protection equipment regularly Repair or replace the equipment as needed Faulty Sa...

Страница 21: ...icable workplace safety Follow these regulations especially when driving on public roads and routes Comply with the appropriate statutory road traffic regulations These vary from country to country an...

Страница 22: ...ng shall be considered as a specialist Due to their specialist training and their knowledge of the appropriate regulations they can evaluate the work with which they have been appointed to and detect...

Страница 23: ...al Operation Protection Equipment Only operate the sprayer if all the safety and protection equipment is fully functional Check the sprayer at least once a day for visible damage and check the functio...

Страница 24: ...happening due to residual energy Below are some examples on where the sprayer s residual energies may be present Mechanical Energy springs under tension weights exposed to gravity Hydraulic Energy tr...

Страница 25: ...hydraulic levers in neutral position to relieve oil pressure turn off the tractor and remove the ignition key dismount the hydraulic hoses connected from the tractor to the sprayer Electric system tur...

Страница 26: ...e specified by the approval It is strictly forbidden to Drill holes in the steel frame or in the running gear Increasethe size of existing holes in the steel frameor inthe runninggear Weld support par...

Страница 27: ...osal Environmental Protection Carefully handle and dispose of any materials used in particular When carrying out work on oiled or lubricated sprayer parts When cleaning using solvents Always follow lo...

Страница 28: ...th the operator or if the operator is trying to operate the sprayer from other places than the tractor s driver seat this can result in negligent or incorrect handling of the vehicle Risk of the opera...

Страница 29: ...ople to the environment and to the sprayer Danger to people through non secured working areas Danger to people through mechanical and chemical influences Failure of important sprayer functions Failure...

Страница 30: ...clearly Drive in such a waythat you always have fullcontrol over the tractor with the attachedsprayer In doing so take your personal abilitiesinto account as wellas the road traffic visibility weathe...

Страница 31: ...e vehicles and helpers may only move between the vehicles when both are at a standstill If using the tractor s three pointlinkage including lift arms lower links securethe operatinglever of the tracto...

Страница 32: ...ly filled tank It is forbidden to stand in or near the working area of the sprayer climb the sprayer stand or sit on the sprayer stand in the turning and swivel range of the sprayer There are crushing...

Страница 33: ...complete the following check points for the tractor and sprayer 1 Spray boom is folded and resting in transport brackets with the intended locks engaged 2 Engage transport locks on the steering cylin...

Страница 34: ...well balanced and stable position Any sprayers and front rear weights connected to the tractor influence the driving behaviour and the steering and braking power of the tractor The front tractor axle...

Страница 35: ...Turn off depressurize the hydraulic system Turn off the tractor engine Engage the parking brake Remove the ignition key Havethehydraulichose linescheckedatleastonceduringacalender year by anexpertto e...

Страница 36: ...components Only use the prescribed fuses If the fuses used are too highly rated the electrical system will be destroyed Risk of fire Thesprayermaybe equippedwith electroniccomponents whosefunctions ar...

Страница 37: ...urer When turning corners observe the permitted bending and displacement of the PTO shaft Before switching on the universal joint shaft check that the selected universaljoint shaft speed rpm of the tr...

Страница 38: ...as the area used for boom folding Please note the area immediately behind the sprayer which is also defined as working area The size of the working area depends on the boom type and boom width The op...

Страница 39: ...nly fill the sprayer using a free flow of water from the mains water supply or from an external water tank Environmental Precautions It is essential to reduce the environmental impact of plant protect...

Страница 40: ...prevent unintentional movements of the sprayer Switch off the PTO Switch off the tractor and remove the ignition key to prevent unintentional starting Activate the parking brake to prevent rolling Pu...

Страница 41: ...nd retighten them as necessary If electrical welding is used on the tractor and on the attached sprayer disconnect the cable to the tractor s generator and battery before carrying out electrical weldi...

Страница 42: ...2 Safety Notes 42...

Страница 43: ...Left side locker containing various functions when operating the sprayer 5 Spray boom for distributing the spray liquid on the crops 6 Ladder for inspecting the top of the sprayer 7 Liquid valves pres...

Страница 44: ...for directing water to the spray guns 15 CycloneFilter for cleaning out impurities in the spray liquid going to the boom nozzles 16 Storage for personal protective equipment etc 17 EasyClean filter fo...

Страница 45: ...ting the spray fluid to here 20 Hose reel with spray gun for cleaning the sprayer on the outside 21 In line filters alternative filters each connected to a separate boom section 22 Spray nozzles for c...

Страница 46: ...y 2 or 3 25 Dampers air filled rubber cushions for absorbing movements from the sprayer 26 Transmission shaft PTO for driving the pump on the sprayer 27 Pump for directing water and spray liquid aroun...

Страница 47: ...ndicating the current spray pressure 30 Clogging indicator for indicating the current state of the EasyClean filter 31 Level indicator for indicating the water level in the rinsing tank 32 Level indic...

Страница 48: ...ing another language the ID plate text might be different The standard types of ID plates belonging to sprayers sold to the equivalent markets are shown below Herthadalvej 10 4840 N rre Alslev Denmark...

Страница 49: ...E g lift sprayer trailer sprayer mist blower field sprayer self propelled sprayer etc In homologation and type approval context the Type refers to the particular form and shape of a chassis i e the ch...

Страница 50: ...UV radiation and chemicals The main tank has a purposeful design with no sharp corners for easy cleaning The filling hole is placed so it can be accessed from the platform This ensures an easy access...

Страница 51: ...ctivated by turning the handle towards the desired function ATTENTION Only the functions used should be open always close remaining valves ATTENTION If a valve is too tight to operate or to loose liqu...

Страница 52: ...to a position near the tip of the arrow Only a small amount of liquid is allowed to pass the valve resulting in a lesser extent of agitation This is recommended when using chemicals with a low density...

Страница 53: ...efilling of the main tank The sensors are also back up for each other ensuring that the system can continue regulation even if one or more sensor signals fails The applied 5 sensors measure 1 Driving...

Страница 54: ...ways run your sprayer with cleaned filters to ensure proper functions and to protect the interior of the pump and valves EasyClean Filter This filter collects impurities when liquid is being sucked ou...

Страница 55: ...when spraying With return flow to prevent filter from clogging during spraying This position is used when rinsing the boom if the main tank is empty C This position is marked with 3 dots Flushing pos...

Страница 56: ...ly 25 litres By operating the three levers A on the left side of the TurboFiller C you can do the following Stir up the added chemicals with water from the sprayer Transfer the mix to the main tank Cl...

Страница 57: ...acity approximately 200 or 243 litres depending on the main tank size Clean Water Tank A clean water tank is integrated in the left side of the sprayer It is accessed for filling after opening the sid...

Страница 58: ...sing Nozzles 20 RinseTank 21 RinseTank Filling Coupler 23 TurboFiller 24 Ejector for TurboFiller 26 Tank Hose for TurboFiller 27 Filling Coupler 30 Filler Hose to Tank Inlet 33 Spray Gun for External...

Страница 59: ...sure Control Valve 37 Pressure Gauge 38 Dilution Valve On Off Section Valve 39 Dilution Valve S67 Pressure Valve 40 Dilution Valve S93 Suction Valve 41 Dilution Valve for Rinsing 42 One Way Valve 43 F...

Страница 60: ...h section B Liquid for BoomPrime is led through a valve D just before the flowmeter F This valve operates in opposite phase When priming the direction of liquid flow will be reversed The liquid will b...

Страница 61: ...a spray job e g because of rain or before the tank has to be refilled at the farm The dilution kit has two functions which are selected on the controller in the tractor Tank dilution Water from the R...

Страница 62: ...aulics The open centre hydraulics block is necessary if the tractor uses open centre hydraulics and or load sensing The hydraulic block is installed just to the left of the upper link in the 3 point l...

Страница 63: ...is trapeze suspended and hydraulically operated Booms are available in 20 21 24 27 and 28 meters working width The booms is provided with spring loaded breakaway in each side The terminology is as fo...

Страница 64: ...ster for Pesticide Information This canister is for storing information about the present pesticide product in the tank such as labels instructions and safety data sheet SDS from the pesticide supplie...

Страница 65: ...for volumes up to 10 of the nominal tank volume 7 5 for volumes between 10 and 20 of the nominal tank volume 5 for volumes above 20 of the nominal tank volume RinseTank The position of the lever B on...

Страница 66: ...ollow these rules Wear personal protective equipment on your body feet hands and head Particles and chemical residues can hit you during the cleaning Any helpers must also wear protective equipment Ke...

Страница 67: ...he boom relative to the terrain To spray efficiently on hilly terrain it is important to adjust the boom to be parallel to the terrain Ladder An integrated ladder is available for climbing up to inspe...

Страница 68: ...3 Description 68...

Страница 69: ...can lead to damages There are wheels mounted below the sprayer for facilitating the moving of the sprayer on the ground Before Putting the Sprayer Into Operation Although the sprayer has been supplie...

Страница 70: ...more on tractor requirements see Tractor Requirements on page 201 Applicable Tractors Fill out this form showing the combinations of tractor and sprayer Sprayer Model Year Identification number The sp...

Страница 71: ...bility of a tractor are in particular Permissible total weight Permissible approved axle loads Load capacity of the tyres fitted Approved front weights must be sufficient You can find this data on the...

Страница 72: ...s instruction book or documentation or data for front weights or perform a measurement A1 m Distance from the centre of the front axle to the centre of the lower link connection See tractor s instruc...

Страница 73: ...couple the sprayer to the tractor if one of the actual calculated values is greater than the permissible value or if there is no front ballast if required mounted on the tractor DANGER When driving on...

Страница 74: ...r Also NEVER cross over a rotating PTO shaft to reach the other side of the sprayer 7 Prevent protection guards from rotating by attaching the chains allowing sufficient slack for turns 8 Make sure th...

Страница 75: ...the handbrake 1 The tractor and sprayer is connected using the 3 point linkage on the tractor Remember to use cotter pins or similar to secure all three connection points 2 Connect hydraulic hoses to...

Страница 76: ...our fingers to locate a leakage in any part of the hydraulic system Due to high pressure hydraulic oil may penetrate the skin Requirements for Tractor The hydraulic system requires One double acting o...

Страница 77: ...flow by activating a hydraulic lever in the tractor If the reaction time for the hydraulic function is relatively short continue your work with this restrictor installed If the reaction time seems too...

Страница 78: ...of the sprayer if the operator finds it necessary Factory setting The valve is screwed completely in and 1 2 turn back out ATTENTION The throttle valve only needs slight adjustments to change the spe...

Страница 79: ...the chapter Technical Specifications in this Instruction Book ATTENTION Turn OFF all work lights when driving on public roads Spray box connector 1 pin plug The unit requires Wire 2 5 mm2 Fuse 10 amps...

Страница 80: ...ggered so that if correctly orientated all boxes will line up ATTENTION See also the controllers instruction book for further details of fitting the controller equipment Speed Transducer for Tractor N...

Страница 81: ...condition of O rings and lubricate if necessary or replace them if damaged before reassembly DANGER Never open the Cyclone filter unless the suction valve is turned to the unused position and the pre...

Страница 82: ...nozzles 4 Turn the BoomPrime adjustment screw A to increase the BoomPrime pressure to 3 bar or until the nozzles start to drip 5 If nozzles leak then lower the BoomPrime pressure by 1 bar on the adju...

Страница 83: ...om setting unless the boom is fully supported in a safe way 2 Loosen the locking bolt A 3 Remove the cross pin split pin B 4 Place B in new setting position 1 2 5 Fasten the locking bolt A again Carry...

Страница 84: ...i Yaw Mechanism The boom is equipped with cone shaped rubber dampers for damping the yaw movements when driving in the field Adjust the damper positions if needed by turning the nut for each damper Us...

Страница 85: ...ribed in this instruction book a new risk assessment and a workplace assessment must be completed for this use This obligation lies with the owner and operator according to EU directive 2009 104 EC se...

Страница 86: ...ng of main tank from external tank Black Blue 97810100 Filling of main tank Black Green 97810300 Spraying Pressurized nozzles Black Green 97810400 Cleaning of main tank inside Black Green 97810500 Pre...

Страница 87: ...verhead power lines Unintended boom movements may cause contact with overhead power lines causing a risk of fatal accidents ATTENTION A label HARDI item no 978448 follows the sprayer This label must b...

Страница 88: ...he boom is locked against moving sideways when driving and locked against folding unfolding The boom should be resting on the rubber pads N during transport DANGER The transport locks must both be fun...

Страница 89: ...ze by pushing for approx 5 seconds The symbol is now shown on the display How To Fold the Boom 1 Press the buttons D or E to set a neutral slant angle no slant 2 Lock the trapeze by pushing for approx...

Страница 90: ...in spray pressure This is default selection when the controller is powered ON and it should remain here during normal spraying Manual spray pressure regulation During normal spraying these regulations...

Страница 91: ...r to the Spray Technique book for instructions on the use of filters nozzles etc and their combination in use with specific spraying applications Quick Reference Operation In the following diagram the...

Страница 92: ...25 metres from non public water supplies for drinking purposes and from treatment sumps and cesspools of drainage systems and 3 50 metres from surface water watercourses lakes and coastal waters and f...

Страница 93: ...force at any time External Filling Device The External Filling Device if installed is operated as follows 1 Remove the cap A and connect a suction hose to the suction manifold 2 Turn pressure valve to...

Страница 94: ...Keep an eye on the level indicator in order not to overfill the tank 4 Stop filling and refit the cap Volume approximately 200 or 243 litres ATTENTION Only fill rinsing tank with clean water To avoid...

Страница 95: ...suctionvalve to External Filling Device 4 Engage the pump and set PTO revolutions at max 540 rpm 5 The tank is now filled with water Keep an eye on the liquid level indicator 6 Turn handle on suction...

Страница 96: ...emical resistance WARNING Protective clothing equipment should be used when preparing the spray liquid during the spray job and when cleaning the sprayer Follow the chemical manufacturer s instruction...

Страница 97: ...the left side of the sprayer Pull out the TurboFiller towards you until it locks into position Remove the lid and place it on the bracket On the next page is a short description on how to operate the...

Страница 98: ...of Chemical Containers The upper lever is used for two purposes 1 When the TurboFiller lid is open For rinsing empty containers Place the container over the rotating flushing nozzle in the middle of...

Страница 99: ...h the red handle outwards to the right to unlock the fixed position At the same time push the TurboFiller back into the storage position Place the spray gun A on the handle for the lid Close the grey...

Страница 100: ...main tank TheTurboFiller suction valve must be open for at least 20 seconds after the chemical is no longer visible in the hopper in order to empty the transfer hoses completely into the main tank DA...

Страница 101: ...valve towards Agitation ATTENTION If foaming is a problem turn down the agitation 10 When the spray liquid is well agitated turn handle of the pressure valve towards spraying position The agitation c...

Страница 102: ...own The TurboFiller suction valve must be open for at least 20 seconds after the chemical is no longer visible in the hopper in order to completely empty the transfer hoses into the main tank DANGER I...

Страница 103: ...ation valve towards agitation 10 When the spray liquid is well agitated turn handle of the pressure valve towards spraying position The agitation continues during spraying of the crop ATTENTION If foa...

Страница 104: ...0 seconds 6 Open the lid to inspect if theTurboFiller is empty If not close the lid again and press theTurboFiller suction valve until the TurboFiller is empty 7 After the last flushing the TurboFille...

Страница 105: ...t into the field through the boom 4 Turn off the PTO to stop the dilution of the boom piping 5 Flick the dilution switch back to spraying B to be ready for resuming spraying later 6 Turn main On Off t...

Страница 106: ...he spray pressure to what will be used when spraying 4 The boom will then be fully primed within 1 2 minutes If the nozzles start to drip when closing one or more boom sections during a spray job proc...

Страница 107: ...s ATTENTION Pressure values below 1 5 bar or above 5 0 bar are considered to be out of range for the nozzles NOTE Find the density for your liquid fertilizer on the packaging or on the material safety...

Страница 108: ...e of 5 bar for the nozzle cannot be reached when spraying the maximum volume rate l ha on the crop This is due to the nozzle design According to the standard for environmental requirements for sprayer...

Страница 109: ...s ditches wells springs etc The washings from the cleaning area must not enter sewers Alternatively the washings can be retained in an appropriate receptacle diluted and distributed over a larger cult...

Страница 110: ...drops close the regulation valve by pressing the button on the SetBox until yellow LED lights on the valve this can take up to 10 seconds Without DF4 system When the boom is completely empty press th...

Страница 111: ...out of nozzles When the pressure drops close the regulation valve by pressing the button on the SetBox until yellow LED lights on the valve this can take up to 10 seconds Press auto to have the system...

Страница 112: ...letely filled Add appropriate detergent and or deactivating agent Special detergents for sprayer cleaning is recommended as some also lubricate ball valves etc 4 Start the pump and operate all control...

Страница 113: ...the TurboFiller suction valve again Ensure that the External fast filling connection and the line are not contaminated with chemicals 5 Turn the suction valve towards and the pressure valve towards an...

Страница 114: ...Turn off the pump again ATTENTION If the sprayer is cleaned with a high pressure washer lubrication of the entire machine is recommended Use of Cleaning Agent It is recommended to use an appropriate c...

Страница 115: ...afety valve 9 Open the TurboFiller transfer valve and the deflector valve Allow the liquid to circulate for 3 minutes 10 Close the lid and activate the container rinsing valve to clean the hopper insi...

Страница 116: ...ring upwards in the V shaped slit 3 To release pull the string downward and the valve will close automatically If draining residues e g liquid fertilizer into a reservoir a snap coupler with hose can...

Страница 117: ...the spray gun nearby for cleaning the EasyClean filter and CycloneFilter 5 After cleaning close the cleaning valve position A Close the side lockers 6 Roll the hose on the reel again ATTENTION Externa...

Страница 118: ...5 Operation 118...

Страница 119: ...le Lubricants What to Lubricate Lubricant Type Factory Use Suitable Alternatives BALL BEARINGS and PUMP Lithium based grease Consistency NLGI grade 2 Viscosity 40 C 460 cSt SHELL Gadus S3 V550L 1 Hard...

Страница 120: ...ct amount of grease is applied to each lubrication point The correct amount of grease applied will prolong the lifetime of the sprayer Calibration example 1 Insert the correct grease cartridge in your...

Страница 121: ...6 Maintenance 121 Lubrication Plan Boom Centre Close up of Glide Shoes to be Lubricated...

Страница 122: ...6 Maintenance 122 Lubrication Plan Boom Wings Both boom wings left and right are to be lubricated equally 10...

Страница 123: ...als Standard PTO for tractor and sprayer Greasing the Pump The pump is greased as follows Factory greased 300 g grease into each lubrication point A Normal operation Greasing every 50 hours with 30 gr...

Страница 124: ...nd hoses The inspection and testing is carried out by an authorized person who is not the owner nor the operator of the sprayer With a positive result a certificate or test sticker will then show that...

Страница 125: ...bolts are being worn quickly and thus will not fulfil their design purpose bolted joints will come loose accidents caused by assembled parts coming apart due to bolts or nuts failing or falling off da...

Страница 126: ...this is often being twisted around in different directions to make it fit between other components on the sprayer Remember to finish off by applying the correct torque NOTE The sealing system for hos...

Страница 127: ...if necessary clean the housing for larger impurities To reassemble 1 Grease the O ring on the filter lid 2 Press the filter onto the filter guide lid Make sure that it has caught the guide Locks A ar...

Страница 128: ...filter into position 4 Place the filter filter lid into the housing and screw the lid until it hits the stop WARNING Always wear protective clothing and gloves before servicing the filter DANGER The p...

Страница 129: ...ated in the nozzle holder Check the filter condition and clean the filter 10 Hours Service Spraying Circuit Fill with clean water and operate all functions Check for leaks using a higher spray pressur...

Страница 130: ...o avoid excessive wear it is important to use a recommended lubricant See the section Recommended Lubricants for more information ATTENTION The pump MUST be stopped during greasing 50 Hours Service Tr...

Страница 131: ...r if needed 250 Hours Service Hoses and Tubes Check all hoses and tubes for possible damage and proper attachment Replace damaged hoses or tubes In general a hose or tube should always be replaced if...

Страница 132: ...als beforehand The operator must select appropriate intervals for the occasional maintenance If in doubt contact your local HARDI dealer Lifting and Removing the Pump When lifting and removing the pum...

Страница 133: ...w gaskets 4 when changing or checking the valves Diaphragms 5 Loosen the diaphragm bolt 5 6 Remove the diaphragm washer 6 7 The diaphragm 7 may then be changed 8 Check that the drain hole 8 at the bot...

Страница 134: ...he pump model the overhaul kit can be ordered by your local dealer Model 364 HARDI item no 75585900 Model 464 HARDI item no 75586000 Speed Transducer for Pump The speed transducer measuring rounds per...

Страница 135: ...y DANGER Do not enter the inside of the tank the parts can be changed from the outside of the tank WARNING Use eye face protection mask when dismantling the tank drain valve 1 Make sure that the tank...

Страница 136: ...rly provoke opening of the safety valve This prevents clogging and ensures proper function of the safety valve Opening of the valve is done by turning the pressure SmartValve to an unused function whe...

Страница 137: ...and oil O ring B Change the O ring B if worn before reassembly Reassembly 1 Check that the barbed lock ring C is fitted to the feed pipe with barb pointing away from pipe opening 2 Fit the oiled O ri...

Страница 138: ...Check condition and position of O ring or gasket Replace it if damaged or cracked 3 Clean and lubricate the O ring or gasket Lubricate all the way around using a non mineral lubricant 4 Reassemble the...

Страница 139: ...nt type of gasket in use F How To Remove Lock Ring If the lock ring needs to be replaced this can be done by mounting a connector A in reverse direction Push the connector over the lock ring Place the...

Страница 140: ...O rings Foreign objects In Case of Leaks 1 Disassemble the pipe fitting 2 Check condition and position of O ring Replace it if damaged or cracked 3 Clean and lubricate the O ring Lubricate all the way...

Страница 141: ...tenance Note that the O ring when seated is supposed to be a little out of shape to fit tightly around the hole in the nozzle pipe How To Reassemble Nozzle Holder 1 Place the O ring inside the lower p...

Страница 142: ...fit the cover and tighten the screws ATTENTION If halogen bulbs are used never touch the bulb with your fingers Natural moisture in the skin will cause the bulb to burn out when the light is switched...

Страница 143: ...llowed under the boom while the adjustment is carried out Adjustment of hydraulic cylinders is to be carried out without pressure in the system ATTENTION For information on boom terminology see Boom a...

Страница 144: ...during folding the chains must be tight If this is not the case even when the hydraulic cylinder is fully retracted the chains must be tightened Note On this picture the boom is unfolded Horizontal A...

Страница 145: ...cal Alignment of Inner and Outer Sections ATTENTION This alignment must be done before attempting to do the Over Centre Boom Lock Adjustment on page 149 Furthermore always follow up this alignment wit...

Страница 146: ...tric bolts simultaneously and in same direction 5 Tighten the nuts A and C again after alignment 6 Fold the boom to see if it hits and rests correctly in the transport brackets 7 If necessary to adjus...

Страница 147: ...The force is adjusted by the length of the turnbuckle C below the lock bracket B Adjust the turnbuckle C in steps of approximately a quarter turn until the lock force is correct 5 Mount the cylinder a...

Страница 148: ...k like this The piston rod is a little too long when fully extracted 11 Fit cylinder arm A to the lock bracket again B 12 After adjustment the lock mechanism should be in locked position when the cyli...

Страница 149: ...r and further backwards when unfolded due to wear Adjustment One boom wing at a time is adjusted 1 Park the tractor and sprayer Activate the handbrake 2 Unfold the spray completely and turn off the tr...

Страница 150: ...ims C should be mounted in between 2 If the glide shoe B or the shims C are worn they should be replaced 3 Loosen the bolts and nuts to separate the parts Replace parts as needed and tighten the bolts...

Страница 151: ...overtighten or squeeze the rubber bushings B Only tighten until there is no more play Chassis Damping Two air filled rubber dampers are installed to absorb movements from the sprayer when driving on t...

Страница 152: ...uter sections 2 4 Boom centre Cylinder for slant motion Venting Procedure Follow these steps to complete the venting Both venting screws or valves A and B are closed to begin with 1 Cylinder piston is...

Страница 153: ...ank In the mixture include any remaining water in hidden places in the liquid system Depending on your winter temperatures use the recommended mixture ratio in the table below Turn on the pump and ope...

Страница 154: ...ables and hoses 5 Hydraulic hoses are connected correctly to tractor see flow directions marked on the hoses and they are without damages 6 Electric cables to the tractor are intact and connected corr...

Страница 155: ...auge but it decreases pressure at the nozzles Impurities sucked in by the pump may prevent the valves from closing correctly thus reducing the pump flow A bad reassembly of the pump elements especiall...

Страница 156: ...on is on Nozzles are worn Check nozzle output Replace nozzles if the deviation in output exceeds 10 Sucking air towards end of tank load Lower pump speed rpm Pressure increasing Pressure filters begin...

Страница 157: ...lves Air is being sucked into system Check for leaks pinholes in suction hoses tightness gaskets O rings of all fittings on the suction side Lack of flow capacity Internal wear on conrod and conrod ri...

Страница 158: ...open an electric junction box check the fuse change it if needed and reassemble the junction box Any other changes or modifications of the circuit boards must be carried out only by qualified HARDI pe...

Страница 159: ...15 A Active yaw damping valves Y1 Y4 Paralift lock valve V3 Right inner wing valve V7 Junction box for DilutionKit HC 5500 DAH DF4 26030100 F1 F2 F3 F4 F5 F6 3 A 3 A 3 A 3 A 3 A 15 A Dilution valve D...

Страница 160: ...ve clothing and gloves before opening the filter Emergency Operation Liquid System In case of power failure it is possible to operate all functions of the operating unit manually Controller HC 6500 an...

Страница 161: ...ve might differ slightly from your actual sprayer Tank 1800 litres Tank 2200 litres Boom width A Total length mm B Total width mm C Total height mm 20 m 2420 2340 2920 21 m 2420 2340 2920 24 m 2440 23...

Страница 162: ...itres Main tank 1500 litres Main tank 1800 litres Main tank 2200 litres 20 m 1677 kg 3316 kg 1704 kg 3607 kg 1746 kg 4038 kg 1776 kg 4434 kg 21 m 1689 kg 3328 kg 1716 kg 3619 kg 1758 kg 4050 kg 1788 k...

Страница 163: ...ank with tap water 2 Remove the hose A from the pressure side of the pump which is the smaller of the two pump connections 3 Connect your flowmeter and hose here and prepare for leading the water away...

Страница 164: ...lt the tractor dealer if in doubt Voltage The sprayer is designed for the following voltage only The blade fuses usually allow up to 50 A for a few seconds before blowing Min Max operating torque kW S...

Страница 165: ...6 Filter name position Mesh Size of openings in the filter Color EasyClean Cyclone In Line Tank strainer Nozzle 18 1 00 mm White Yes 30 0 58 mm Green Yes 50 0 30 mm Blue Yes Yes Yes 80 0 18 mm Red Yes...

Страница 166: ...below The non dilutable volume varies depending on the boom width and installed options in the fluid system Airborne Noise Emission Airborne noise emission from operating the sprayer relates to the t...

Страница 167: ...gislation regarding disposal Materials Used Disposal of Cleaning Water Protect the environment When cleaning the sprayer inside and outside dispose of chemical residues in the liquid system and water...

Страница 168: ...ts The wiring is in accordance with ISO 1724 Position Designation Wire colour 1 Left direction indicator Yellow 2 Free max 55 W Blue 3 Ground White 4 Right direction indicator Green 5 Right rear posit...

Страница 169: ...P N 2606 2500 L S p a re W ir e 5 4 G M a x 5 5 W P in 1 1 2 V A E C D B F G H I J K L M N O A Position light left B Rear light left C Position light right D Rear light right E Connector for traffic l...

Страница 170: ...3 V2 V1 V4 R UP L K 1 5 0 7 V7 V5 Slant Lock OPEN Right wing 3 IN Right wing 2 IN Right wing 1 V13 V14 Right lt Le lt UP UP OPEN 1 8 80 bar 80 bar B A B A Lock IN A B A B 1 2 r a b 0 6 r a b 0 7 Le wi...

Страница 171: ...S R UP L K Hydraulic block for slant Item no 72266100 1 5 0 7 V7 V5 Slant 1 8 Lock OPEN IN Le wing 3 IN Le wing 2 IN Le wing 1 IN Right break away IN Right wing 3 IN Right wing 2 IN Right wing 1 IN V1...

Страница 172: ...8 Technical Specifications 172...

Страница 173: ...ging Indicator 54 Connector Power and data 79 Control Unit 87 90 Brackets 80 Conversion factors 162 CycloneFilter 54 55 81 128 D Diagram EVC Liquid system 58 Diagram EVC Liquid system with optional ex...

Страница 174: ...26 Safety 74 Training 22 Overall Dimensions 161 Over Centre Boom Lock 147 P ParaLift 62 Parking the Sprayer 105 Periodic Inspection 124 Permissible Total Weight 71 Tractor Weight 73 Values 73 Personal...

Страница 175: ...lve 51 Suction Filter 54 Suitability of the Tractor 71 T Tank 50 61 105 Tank Level Indicator 65 Technical Residue 114 166 Tightening Hydraulic Hoses 126 Tightening Torque 124 Tractor Speed Transducer...

Страница 176: ...Index 176...

Страница 177: ...he menu on the left 3 Select Spare parts catalogue and find your spare part 4 Online ordering is also possible 5 Contact your HARDI dealer for further information on spare parts User Evaluation Dear R...

Страница 178: ...HARDI INTERNATIONAL A S Herthadalvej 10 DK 4840 N rre Alslev DENMARK...

Отзывы: