Scissor lift
Happ10
Version 4.0
©HAPP Australia Pty Ltd
Page 19
Chapter 5 Adjustment
5.1Start
l
Make sure all pins and bolts to insure proper mounting are correct
l
Make sure the electrical system feeding voltage is equal to that
specified in the nameplate on the motor
l
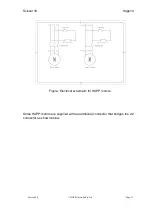
Make sure the electric connections are in compliance with the
electrical diagram.
l
Make sure there is no leakage in fittings or hydraulic line
l
Make sure the working area is free from people and objects
l
Grease sliding seats of blocks placed under platforms and on bases
l
Pour oil in the tank (about 5 liters or more )
5.2Bleeding
l
Raise the lift slowly by pressing the UP button until cylinders bottom
out and the lift stops. DO NOT continue pressing the button after the
lift reaches full height. Damage to the motor can occur if continued.
l
Cylinders may jump upon initial start up which is normal due to
trapped air inside the hydraulic lines. If the lift cannot be raised upon
initial start up due to trapped air inside the pump: loosen the
maximum pressure valve, in-‐push the UP button and retighten the
valve after trapped air has escaped, then raise the lift at full height.
l
Lower the lift completely.
l
Raise and lower the lift completely at least 3 times to equalize the oil
pressure in each cylinder.
5.3Checks no load
Carry out two or three complete cycles of lowering and lifting and check:
•
the safety devices for proper operation ( latch clears locking teeth for
lower with lever depressed and engages with lever in default
position)
•
proper oil level in the tank -‐ on load
•
no leakage and blow-‐by in hydraulic line and pneumatic line
•
cylinders for proper operation
•
the lift is capable of reaching its maximum height

