Scissor lift
Happ10
Version 4.0
©HAPP Australia Pty Ltd
Page 11
DANGERS
DO NOT install or use this lift on any asphalt surface or any surface other than concrete.
DO NOT install or use this lift on expansion seams or on cracked or defective concrete.
DO NOT install or use this lift on a second / elevated floor without first consulting building
architect.
4.3 Installation steps
To install a HAPP 10 the following steps are followed.
•
Remove items from packaging
•
Attach pump assembly to trolley
•
Hydraulic system connection
•
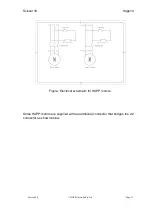
Electrical system connection
•
Safety system connection
•
Test operation
Remove items from packaging
Typically the system ships with three packages
•
Pump assembly
•
Hoist
•
Trolley
Unpack the items and confirm parts are there for attachment which include:
•
Bolts / nuts for attaching pump assembly (typically attached to trolley)
•
Handle for safety latch operation (typically attached to cable)
•
Hydraulic fitting for connecting pump assembly
Attach pump assembly to trolley
Using the bolts and nuts supplied attach the pump assembly to the trolley
Hydraulic system connection
Unravel the hydraulic line and layout to trolley
l
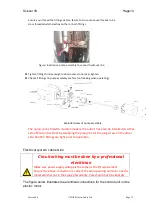
Connect hydraulic hoses.
The hydraulic fitting for connection to the pump assembly can be located in
the parts supplied with the hoist. Remove the dummy fitting supplied with the
pump assembly and fit the fitting supplied and then fit the hydraulic hose to
the fitting.


