Start-up
Page EN-22
Installing the appliance
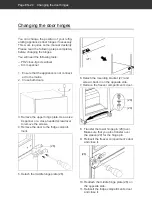
Before installation, check that the door
hinges are on the correct side. Change
the position of the door hinges if necessary
(see „Changing the door hinges“ on page
EN-24).
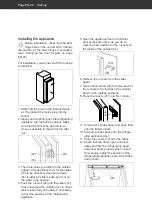
For installation, you will need a PH2 cross-tip
screwdriver.
1. Switch off the fuse for the intended sock-
et. Then insert the mains plug into the
socket.
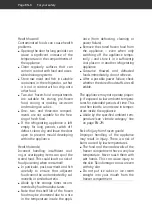
2. Slowly and carefully push the refrigerating
appliance into the built-in cabinet. Make
sure that the side to be opened is as
close as possible to the wall of the cabi-
net.
(24)
(18)
(20)
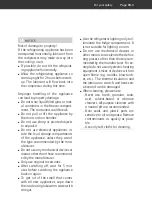
3. There are holes pre-drilled in the outside
edges of the appliance door for the slides
(18) to be attached. Use short screws
(24) to attach 2 sliders each per door on
the sides to be opened.
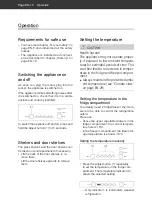
4. Push the runners (20) into the slides (18).
Close and open the cabinet door to check
that it closes fully and easily. If necessary,
correct the position of the refrigerating
appliance.
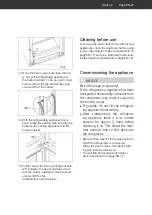
5. Open the appliance door and cabinet
door at the same time. As you do so,
mark the best position for the runners on
the inside of the cabinet door.
(24)
(20)
6. Remove the runners from the slides
again.
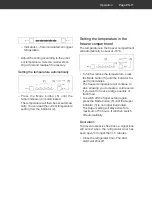
7. Use 2 short screws (24) to fasten each of
the runners to the insides of the cabinet
doors in the marked positions.
8. Press the covers (21) onto the runners.
9. Unscrew the slides again and push them
onto the fitted runners.
10. Screw the slides back onto the refriger-
ating appliance door.
11. Press the covers (19) onto the slides.
12. Check that the doors open and close
easily and that the refrigerating appli-
ance door seals properly when closed.
If necessary, adjust the position of the
refrigerating appliance and of the slides
and runners.
(24)

